VisionX, a short look at Validators
It is time to have a short look at Validators, what they are, how they work and how they can be used.
Okay, what are they?
A Validator is a component which is available to our customers who have purchased VisionX, it allows to quickly and easily add field validation to a form or any screen with records.
Validators in VisionX
Validators are readily available in VisionX as components which can be added to the screen.
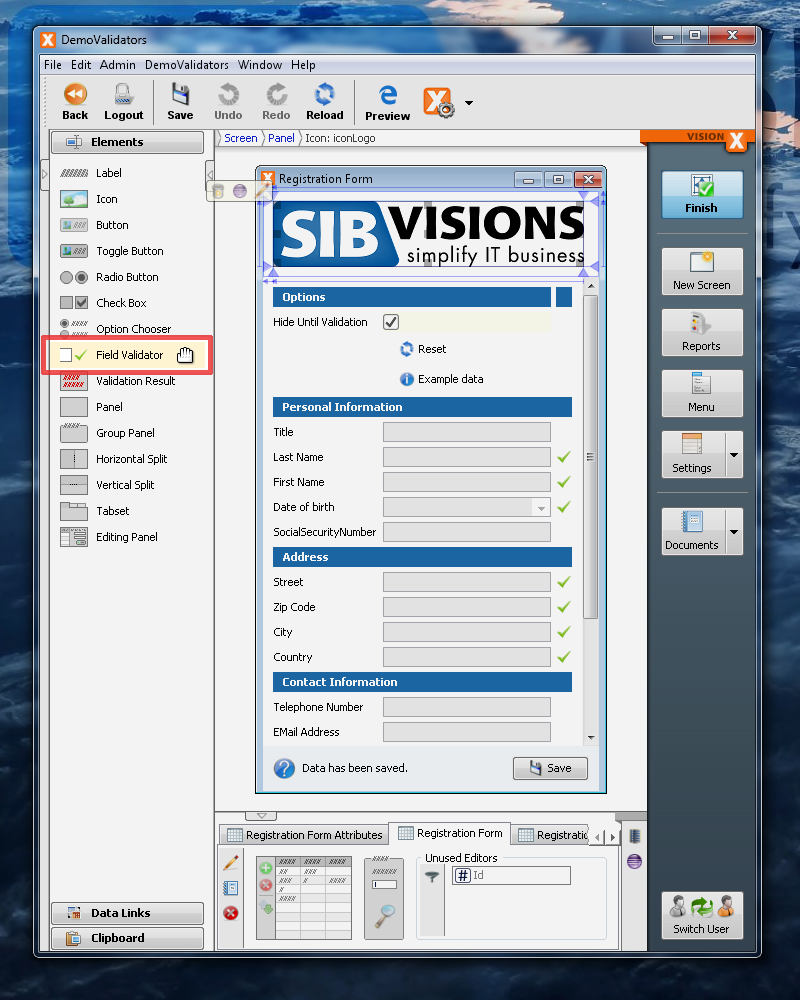
It can be added to the screen by simply dragging it like any other component, but must be configured afterwards to know which field required validation.
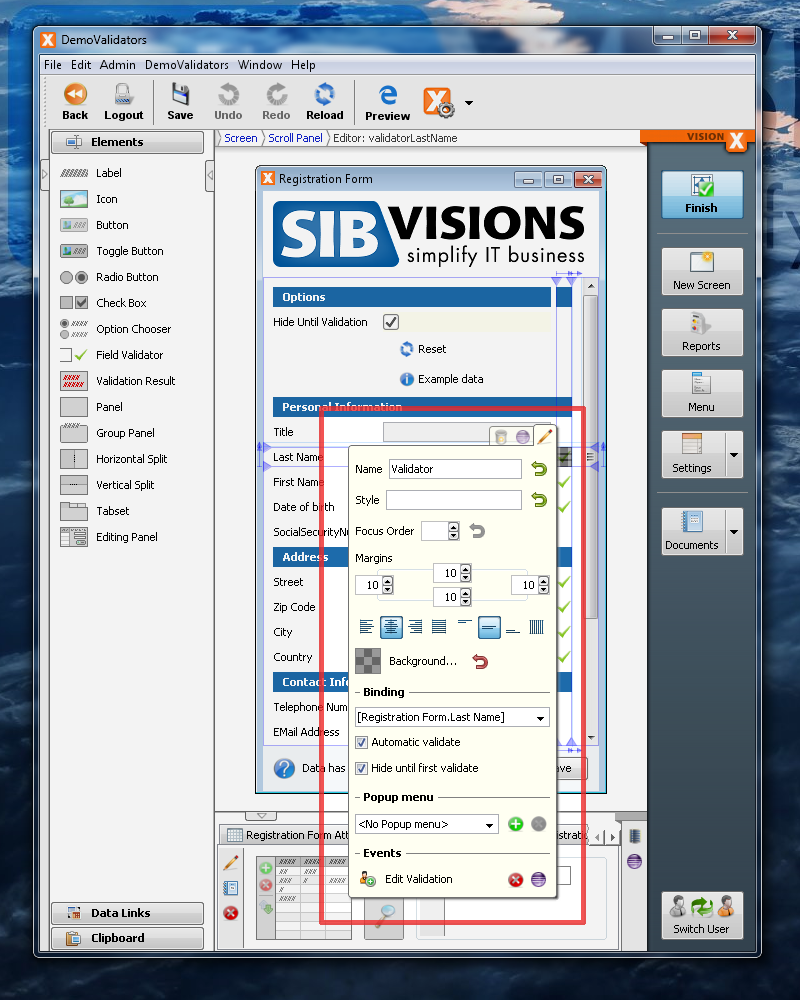
There are three important properties to the Validator:
- Binding: The field to which the Validator should be bound to. This works analog to selecting to a field for an Editor.
- Automatic validate: If the validation process should be automatically performed on value changes.
If this is checked, the Validator will listen for value changes on the specified field and will automatically run the validation action on every change. If not checked, the validation process must be run manually by calling Validator.validate() as needed. - Hide until first validate: If the Validator should stay hidden until at least one validation was performed.
If this is checked, the Validator will not be visible until at least its validation has been called once, afterwards it will always be visible.
Validating values
To actually validate something, we have to attach an action to the Validator which will perform the validation. This can be readily done through the VisionX action designer, which provides everything needed to create such an action and we will not go into detail on how to do this.
We will, however, have a short look at the code of a simple action.
-
public void doValidateNonEmpty(Validator pValidator) throws Throwable
-
{
-
if (Logical.equals(rdbData.getValue("COLUMN"), ""))
-
{
-
throw new Exception("A value for the COLUMN must be entered.");
-
}
-
}
It is a very simple action, the current value of the DataBook is checked and if it is empty, an Exception is. This is the most simple validation action one can create.
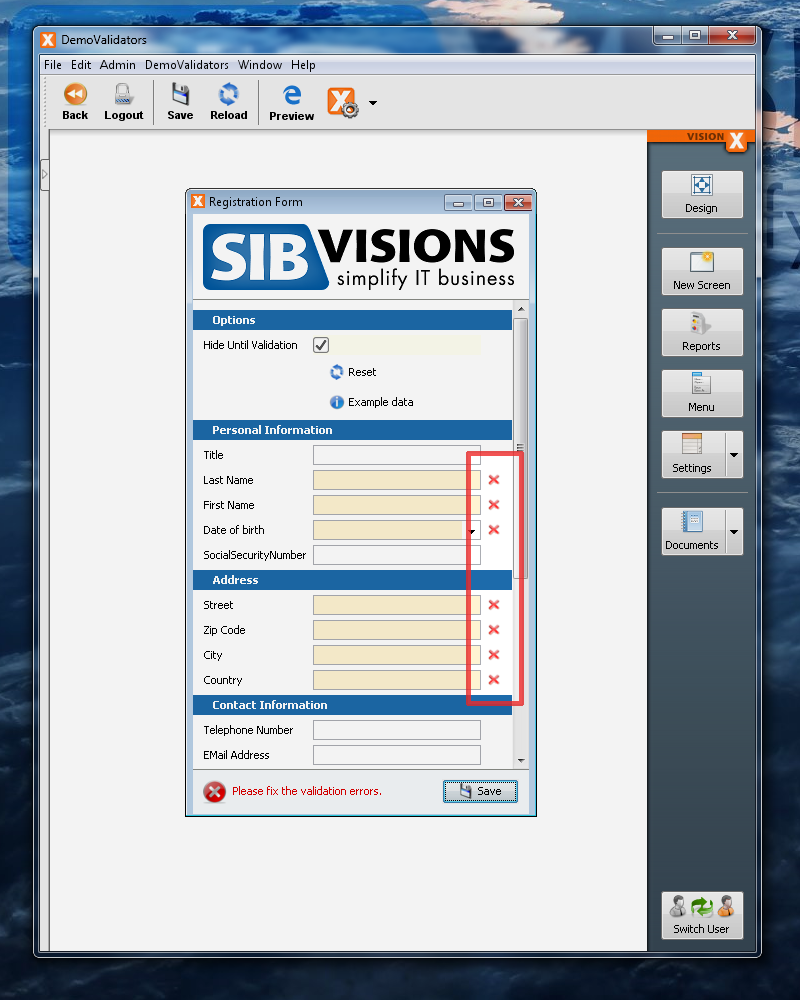
Validators in action
Once we have everything setup, we can put the Validators to good use. When the validation is performed, may it be automatically or manually, the validation actions will be invoked and if all of them return without throwing an Exception, the Validator will display a green check mark. However, if the actions should throw an Exception, the Validator will display a red "X".
Manual validation
Manually invoking the validation process as needed is quite simple by calling Validator.isValid(), which will return either true or false.
-
public void doSaveButtonPressed(UIActionEvent pEvent) throws Throwable
-
{
-
if (validator.isValid())
-
{
-
rdbData.saveSelectedRow();
-
}
-
else
-
{
-
labelError.setVisible(true);
-
}
-
}
Above you see a sample action which manually performs the validation process and either saves the data or sets an error label to visible.
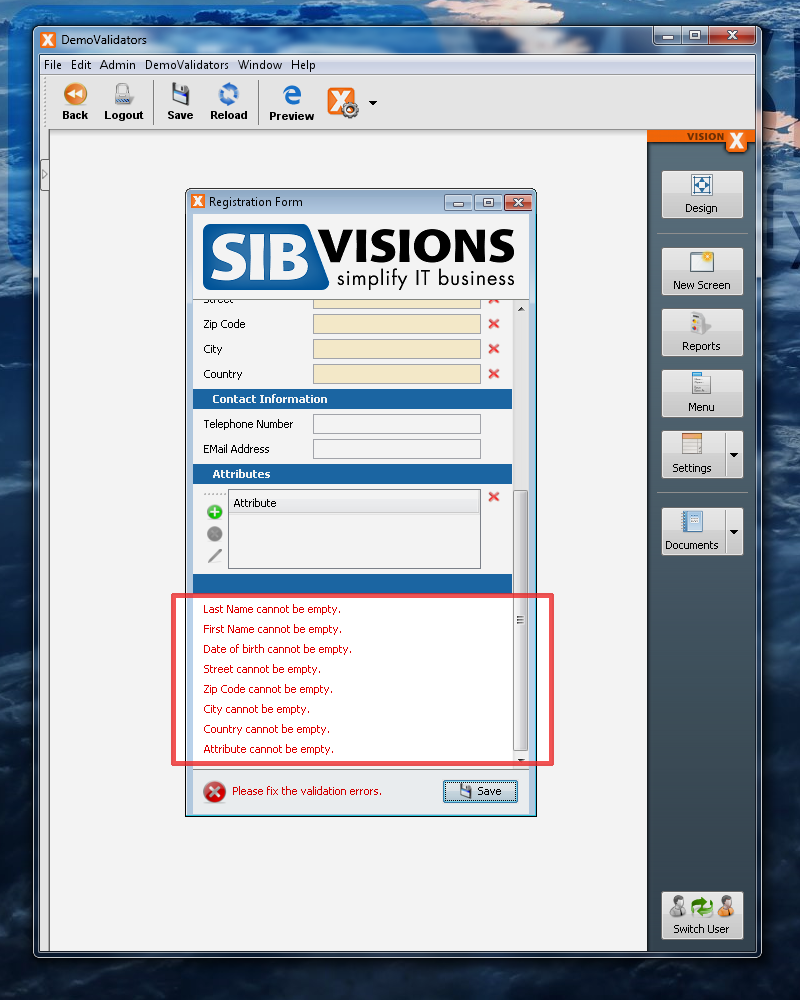
The ValidationResult
One can quickly end up with many Validators in a single screen, which might make it difficult for the user to directly see why a field is not correctly validated. So it suggest itself that there should be a short summary close to the save button to make sure that the user is readily provided with the information why the action could not be performed. For this scenario there is the ValidationResult, which is another component which can be added to the screen from the toolbox.
It will automatically find all Validators in the screen and will perform their validation as needed. Afterwards it will gather all error messages and display them in a list.
The ValidationResult can be used similar to the Validator in an action.
-
public void doSaveButtonPressed(UIActionEvent pEvent) throws Throwable
-
{
-
if (validationResult.isValid())
-
{
-
rdbData.saveSelectedRow();
-
}
-
else
-
{
-
labelError.setVisible(true);
-
}
-
}
Additionally, there is the clearMessage() method which allows to clear the list of errors.
Conclusion
The Validator and ValidationResult provide quick and easy means to add data validation to forms and screens with records and can be added and configured completely through the VisionX designer. Additionally, it provides a rich API which allows it to be easily used when writing the code manually or extending it with additional functionality.
![]() Development, Information | rzenz | 10/09/2017 |
Development, Information | rzenz | 10/09/2017 | ![]() Comments (0)
Comments (0)
 RSS-Feed