This website uses cookies for visitor traffic analysis. By using the website, you agree with storing the cookies on your computer.More information

NFC/RFID for Beagleboard xm with Java

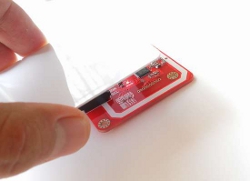
NFC reader   Based on my experience with JavaFX, Beagleboard xm, RxTx and GSM devices, I started my new research project: A simple and cheap time tracking solution.

There are hundreds of tools and hardware solutions available for time tracking, but hardware solutions are expensive and tools without hardware are not practically.

The ideal solution would use a Raspberry Pi and a RFID reader together with a simple JavaFX application. Total costs are about EUR 50,- for the hardware and software should be free :) If you need a case for your hardware and a lcd display, it would be more expensive but EUR 150,- should be the limit for a brilliant system.

I ordered my Raspberry Pi some weeks ago but it is still not available and hopefully it will arrive before Xmas? My fallback board is the Beagleboard xm.

The big question was the RFID reader/writer. Wich devices were supported, and were there any Java APIs for the communication? After a short google search I found a lot of recommendations for RFID breakout board, but it was not too cheap and I don't have an Arduino board and don't want one. I found some other boards but I decided to use PN532 NFC RFID module kit. It is still expensive but seems to be fair.

Why this RFID board?

Firstly, because of a mistake. I saw a screenshot of an example application and the frame icon was a Java icon... So I thought the application was written with Java and there must be a Java API. Not really!
The whole kit was available as developer version with a lot of accessoires like two cards, one dongle, additional cables, ....

After reading the documentation and provided information it was clear that the board was perfect for Arduino boards and the software was written in C/C++, but it was still not too expensive.

But no risk, no fun - ordered.

The delivery time was ok and after unpacking I thought it would be easy to test the included RFID cards - Plug and Play? The truth: No way.

First problem

Included cables were built for Arduino board. I kew that the connection could be a problem and ordered an USB TTL module together with the RFID baord.

The USB module has a connector with 4 pins (GND, VCC, RX, TX) and the RFID board has 4 pins (GND, VDD, RX/SDA, TX/SDL). It was not a big problem to connect the right pins after it was clear that the included standard cable will not work.

Solved.

Second problem

The RFID reader supports 3 different modes (HSU, I2C, SPI). The default mode was I2C because of the Arduino support. But in order to support my Beagleboard, HSU was needed. The board has no jumpers and you must solder a little bit to, but with the right tools it's easy.

Solved.

Third problem

No Arduino board, no chance to test the RFID board? Not really.
There is a great open source project with the name libnfc. It has read/write and diagnostic tools and runs on Linux and should run on Windows too. I compiled libnfc on my Ubuntu VM and had the problem that the nfc-list tool reported a timeout after connecting - but the RFID board was found.
Hm...

It was easy to compile libnfc on Ubuntu - after installing some dependencies - so I thought it should be easy to compile it on my Beagleboard xm? It was a bad idea and I spent some extra hours... but it worked.

How? I can't remember every single step, but try following:

Dependencies:

opkg install cc
opkg install gcc-dev
opkg install task-native-sdk
opkg install libusb-1.0-0 libusb-1.0-dev
opkg install libusb-0.1-4 libusb-0.1-dev
opkg install udev-dev
opkg install autoconf

You need following source packages:

pcsc-lite.1.7.0
libnfc-1.5.1

(Newer versions or different version combinations did not work because libraries were not available for my distribution. But this versions are good enough for tests.)

Start with pcsclite:

./bootstrap
./configure --disable-libhal
make install

Copy /usr/local/include/PCSC directory to /usr/include and /usr/local/lib/pkgconfig/libpcsclite.pc to /usr/lib/pkconfig/

Next, compile libnfc:

./configure --with-drivers=pn532_uart,pn53x_usb --enable-serial-autoprobe --enable-debug
make install

If you get the exception similar to ln: symbol not found -lusb, create a symbolic link:

cd /lib
ln -s libusb-0.1.so.4.4.4 libusb.so

Test, in your libnfc directory:

cd utils
./nfc-list
cd ../examples
# hold a card over the RFID board
./nfc-poll

My output:

# ./nfc-list
Connected to NFC device: PN532 (/dev/ttyUSB0) - PN532 v1.6 (0x07)

# ./nfc-poll
NFC device will poll during 30000 ms (20 pollings of 300 ms for 5 modulations)
ISO/IEC 14443A (106 kbps) target:
    ATQA (SENS_RES): 00  04
       UID (NFCID1): 1b  21  4b  e0
      SAK (SEL_RES): 08

Now you know that your hardware is supported and works with CPP libraries. But what about Java?

I found NFC Tools but the online demo did not work with my reader. Another solution was Open-NFC.

Both solutions were feature rich but horrible because the first one did not compile and maven could not resolve all dependencies. The other solution was too complex for my use case. Why the hell are most libraries so complex. Nobody can handle big libraries.

My use-case was simple: I need a small Java library that can be bundled with my application and it should work on Linux, Windows and optionally on MacOS. It should connect to my Reader via RS232. I stopped evaluating libraries and decided to create my own "simple" library for my use-case.

The topic (NFC, RFID, smart cards) is really complex but I had a PDF that described how read/write basically should work. And I had a reference implementation in cpp. After some problems and night hacking, the problem was solved and I had my library that simply worked (only 2 source files and ~ 1000 LoC).

My first application only reads content from cards that are over the reader. Here is the output:

SAM = true
LOOP PAUSE
UUID length: 4
UUID: 1b 21 4b e0
Authentication receive: 00 FF 03 FD D5 41 00 EA
Authentication successful
Read block successfully:
00 00 00 00 00 00 00 00 00 00 00 00 00 00 00 00

Read block successfully:
00 00 00 00 00 00 00 00 00 00 00 00 00 00 00 00

Read block successfully:
00 00 00 00 00 00 00 00 00 00 00 00 00 00 00 00

Read block successfully:
00 00 00 00 00 00 FF 07 80 69 FF FF FF FF FF FF

And it supports writing to the card, but don't overwrite the 4th block because it contains security settings. If you overwrite the 4th block with wrong values, the whole sector is unusable.

What'll come next? A JavaFX UI for in/out tracking.
The library itself is free but the source is not yet available because it needs some refactoring and beautifying.

Have fun ;-)

JavaFX development for Beagleboard xm

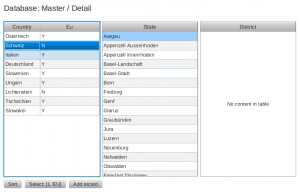
TableView

TableView

  This is my first application for the board.
It's not rocket science but was already developed :)

This screenshot was captured via VNC. The installation of VNC was very easy:

opkg install angstrom-x11vnc-xinit
killall Xorg

Wait until X was restarted and use a VNC Viewer (e.g. TightVNC) to create a connection to port 5900. More details are available here.

The application was developed with JavaFX 2.2.2, but on the beagleboard (with the current preview version) it is version 8.0.0-ea-b55. If you develop custom controls be careful because SkinBase was moved to javafx.scene.control. If you want develop with an 8.x version, you must download a JDK8 EA version. It works for me but some methods are different in 8.x as in 2.x and of course they removed some deprecated "impl_" methods :)

Another problem with my test application is that I have no scrollbars (see screenshot) and scrolling with my mouse does not work. Sort on header and resize columns is not possible.

Don't expect too much from the current JavaFX support for ARM. It's in a very early phase, but if you create your own "controls" you get a powerful toy.

JavaFX + ScenicView + Javeleon = LiveFX

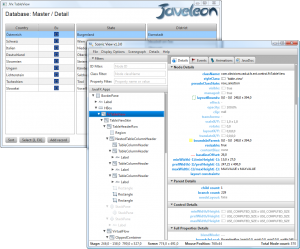
JavaFx + ScenicView

JavaFx + ScenicView

  If you use JavaFX for development, normally you create applications with a GUI - so far so good. How often do you restart your application to check if a simple code change works? Many times?

If you develop a control, wouldn't it be great to see your code changes immediately?

We use Javeleon for application development together with JVx because it saves a lot of development time and creates live feeling. We thought that Javeleon could also be useful for JavaFX application or control development because application restarts always waste development time.

The integration of Javeleon in your JavaFX application is not difficult, simply add two VM arguments

-Xbootclasspath/p:"D:\temp\JaveleonBoot\default"
-javaagent:D:\libs\javeleon\javeleon.jar

to your launch/run configuration (use your directories). If you use Javeleon for development, it reduces application restarts to a bare minimum, but you should know the limits.

Javeleon reloads classes directly in your VM, but it does not recreate members of your loaded instances and does not call the constructor of your classes again.

You should use a Javeleon reload listener to trigger reload of resource files (css, xml) and call specific methods after reload e.g. call init again.

Imagine you have a GUI with a button and on click you start the creation of a report or execute some business logic, etc. If you change the source code for your button click action or change a method used in the action, your application always invokes the changed "code".

Sounds tricky? It isn't, but live coding is not well known.

If you are interested, simply try it out!

I'm not sure whether the current downloadable Javeleon 3.0 is up-to-date because I found some smaller problems with ScenicView. The problems were already fixed and hopefully released asap.
My working version number: Javeleon version 3.0.1 dev 2012-11-13 (r699).

If you have problems, simply contact the Javeleon team.

BeagleBoard xm and WLAN

I tried to connect an USB WLAN adapter to my board and thought it should work out-of-the-box like my cordless mouse (WLAN c'mon). But that was not the case. The good news is that it already works. The bad news is that it took hours to figure out how it works.

Maybe my requirements are too specific (I don't think so), but the documentation in the Internet about beagleboard stuff is not really good. I found a lot of old articles and most of them did not work or did not work with my software. It took hours to find information snippets for my requirements.
Are a fixed MAC address and WLAN support really too modern?

Anyway, I try to prepare my hardware before I start with development. I'm not totally happy at the moment because my touch screen does not work with JavaFX applications. It's an ELO touchscreen EL1725 connected via USB. I hope that this ticket solves my problem.

Some background information for my WLAN adapter

I read the manual before I bought an adapter and was suprised that only some specific adapters were supported (maybe the documentation is not up-to-date). I chose Trendnet TEW-648UBM Micro. It was not in the list, but I thought it could work...

After I plugged the adapter to my last free USB port I checked dmesg and saw no errors. The adapter was detected and I thought it should work. Typed

ifup wlan0

and got error messages. Checked dmesg and saw an information about missing firmware.

The adapter needs a firmware but it didn't find it on my SD card :( . I asked one of my best friends, google, and got a lot of results but no answer. So I tried

opkg list|grep realtek

because dmesg showed me that my adapter has a realtek chip. I got results, but no firmware. The next try was:

opkg list|grep firmware

I got too many results :) My next attempt:

opkg list|grep 8192cu

I found my firmware and installed it:

opkg install linux-firmware-rtl8192cu

Now the adapter was integrated but it was not configured. My WLAN is secured with a passphrase.
I tried to configure the wlan0 interface via /etc/network/interfaces and /etc/wpa_supplicant.conf but without success. So I asked google again and found some "useful" articles:

Beaglebone WiFi
connman
Beagleboard WiFi USB dongle

The second article was not bad but did not work. The last one was better but it did not work as described :)
Mabe I did not understand something that was written between the lines.

What I did:

opkg install connman-tests connman-tools

I did nothing with /etc/network/interfaces because the connman has its own configuration! So I created a file with the name /var/lib/connman/wifi.config. To find out the SSID the following command was useful:

/usr/lib/connman/test/test-connman services
/usr/lib/connman/test/get-services

Set [WiFi] Enabled = true in /var/lib/connman/settings.

My wifi.config

[global]
Name = NetworkName
Description = Home WLAN

[service_networkname]
Type = wifi
ssid = 123456789
Passphrase = mypassword

Be sure that your Name is equal to the name in the service section. The ssid was taken from output of

/usr/lib/connman/test/test-connman services

mynetwork {wifi_<macaddr>_<sid>_managed_psk}

My /etc/network/interfaces

# The loopback interface
auto lo
iface lo inet loopback

# Wireless interfaces
#iface wlan0 inet dhcp
#       wireless_mode managed
#       wireless_essid any
#       wpa-driver wext
#       wpa-conf /etc/wpa_supplicant.conf

iface atml0 inet dhcp

# Wired or wireless interfaces
auto eth0
iface eth0 inet dhcp
iface eth1 inet dhcp

After rebooting the board the connection was established automatically. If you have problems, use gnome to check your network settings or try to establish a connection with your network.

Sometimes during startup it was not possible to load the firmware for the adapter, but normally it worked without problems. If you have problems, simply use dmesg and journalctl to find error details.

BeagleBoard xm fixed MAC address

The BeagleBoard xm has no fixed MAC address. During startup, a random MAC address is created and used. This is a problem if you wanna use it in your local LAN with Firewalls. It also is a problem to assign a fixed IP to the board, because the MAC address changes.

I searched and tried a lot of things to set a fixed MAC address. All hints didn't work:

Set an udev rule to assign a fixed MAC address
or configure eth0 with a fixed hwaddress

Well, to get a fixed MAC address I had to patch my image :( but how? I built my Angstrom image from scratch but all sources were downloaded as archives and bitbaker extracts/compiles the sources automatically. I found no documentation for manuall patching. And I didn't know what I should patch.

So I started researching. The network module was smsc95xx but I had no idea which version was used for the kernel. I had to find out the version before I could search a patch...

I knew that the file was stored in a directory with the name drivers/net/usb. All source archives are available in <dir>/setup-scripts/sources/downloads. An archive search should find the right archive but I had to find the build file for the kernel...

After some hours googling I found that <dir>/setup-scripts/sources/meta-ti/recipes-kernel/linux contains kernel buildfiles, but more than one! I figured out that linux-mainline_3.2.bb was the right buildfile. I checked the content and found the link to the source archive (online). After reading the source file I knew that the following patch should work: MAC address patch. Some details about this patch are available here.

I had a patch file and knew the buildfile but how should I apply the patch? It was not too complex because the buildfile already contained a list of patchfiles. I added my patchfile to the list and copied it to the same directory where all other patchfiles were stored.

The next step was the rebuild of my image... Sounds simple but how? It was simple with following commands:

bitbake -c clean virtual/kernel
bitbake virtual/kernel
bitbake systemd-gnome-image

Some hours later, I had a new kernel and recreated my SD card. To set a MAC address, I changed uEnv.txt:

optargs="consoleblank=0 smsc95xx.macaddr=xx:xx:xx:xx:xx:xx"

It works!

JavaFX and my Beagleboard xm

Inspired from the JavaOne Technical Keynote, I ordered a Beagleboard xm and all needed stuff like touch display, micro sd card, power supply and a nice looking case. I was fascinated from the features of the board and the JavaFX preview version for ARM - and it is not really expensive, of course it costs more than the Raspberry Pi (btw the Raspi will be my next project).

I developed different applications with GSM modems, push buttons (buzzers) - connected to RS232 - in the past, with desktop hardware. The applications were written in Java and used rxtx heavily. So I thought that it would be a good start to test my old applications or the RS232 communication with my new board. The next step could be a modern JavaFX UI for my old applications.

That was the idea... but first it was important to build/create the SD card for the board. I had different options because Oracle published a document about the creation of their image and Gerrit Grunwald created his own image based on the documentation. He published his files and it was possible to use his image.

I decided to build my own image because I love to hack with linux, I wanted to understand the build process and I did not want to miss the experience. To be honest, the documentation was so short and simple and I thought it should be very easy :)

Well, I won't post all steps for the creation of my image, instead I'll post my problems with the original guide and the differences. Start with this documentation and go to the chapter Rebuilding Ångström 12.05.

I loaded Ubuntu 12.04.1 LTS Desktop and installed it in a fresh VirtualBox VM (30G disk image is enough, but 40G is better). The installation was not very special, only standard packages. After the installation I did:

apt-get update
apt-get upgrade

I continued with the installation of important tools, as described in the documentation, but don't forget the package gawk and please install ia32-libs-multiarch. The next steps from the documentation worked like a charm... but I had some smaller problems with my proxy. The configuration was not the problem because documentation mentions proxy setup. I'm not sure if the cause of the problem was the old squid version or an old configuration file. In order to use git through my proxy, I had to allow CONNECT to port 9418:

//new
acl git_port port 9418

//new
http_access allow CONNECT git_port
//existing
http_access deny CONNECT !SSL_ports

In my environment the http URL did not work, so I switched to https and git clone worked. During the build I had two problems. The first was a manual cancel of the build process because I pressed the wrong keys. But it was no problem to start the build again because it continued (standard make behaviour) and did not restart the whole build. The other problem was with XML parsing (xmlto/xmlling failed with docbook... fetch). The problem was gone after some experiments... I am not sure what exactly solved the problem because I installed the docbook-utils again and restarted my VM and afterwards the build continued without errors?

The Oracle documentation contains the info that the build process "takes several hours to run". In my case and with my environment, the whole build process took about 24 hours ;-)

After successful creation of the SD card, it was time to power up the board. I did not attach a serial console and was a little bit unsure what happened, because my screen (standard LCD 19" without touch) only showed a beagleboard image, but hurray the first start was faster than described - about 10 minutes (class 10 SD Card, 8G) - and gnome started automatically.

I continued with JDK + examples installation and verified that everything worked - and it did!

One problem was that gnome was not repainted after I stopped a JavaFX application, but maybe I should not use gnome together with JavaFX (I read this anywhere, but can't remember).

The documentation describes that you must restart the Beagleboard xm because it is not possible to close the OGLES2Water demo... C'mon it's linux. If you have no better ideas, simply kill the OGLES2Water process and gnome and restart gnome. That's it.

If you are working on a windows machine, I recommend winscp for file transfers, to the board, because it is a GUI for scp. I love using vi and know ALL shortcuts (believe me ;-) ) and it is a really great tool but sometimes it is easier to use "modern" tools like midnight commander. So I installed mc:

opkg update
opkg install mc

I think it's easier and you are faster with mc compared to the console.

After everything worked - it was time to test the serial input with some source code.

The beagleboard has a RS232 interface and I thought I could use it without problems - bad idea.
I started with the installation of rxtx:

opkg install rxtx
opkg install librxtx-java

(Add /usr/share/java/RXTXcomm.jar to your classpath and /var/lib/jni in your java.library.path)

After the installation, I used my existing serial interface java implementation and started my tests and had following problems:

  • rxtx did not find serial interfaces
  • the device name was /dev/ttyO2 and not /dev/ttyS0
  • dmesg|grep tty showed that /deb/ttyO2 was already in use

Fixed first problems with an additional system property:

-Dgnu.io.rxtx.SerialPorts=/dev/ttyO0:/dev/ttyO1:/dev/ttyO2:/dev/ttyO3

and set console="" in my uEnv.txt to solve the last problem. I didn't need a serial console!

The next problem was that my buzzer test application did not work because the RS232 received "no signals". I tried to find out why and found the "problem". The standard RS232 header on Beagleboard xm only supports RX, TX, GND (send and receive data) and all other pins are ignored or not connected. Read the documentation (BEAGLE-xM_SRM_REV_C_1_0.pdf, page 102) for the details.

So, I connected an USB to serial adapter and removed the manual serial port configuration for my application because /dev/ttyUSB0 was detected automatically. After a restart of my application, everything worked as expected.

Now I'm ready for a JavaFX application :)

JavaFX + Beagleboard in Action (NightHacking)

See JavaFX on a Beagleboard in Action:

NightHacking/ tour

A nice application.

Joomla/RSForms post request to Java Servlet

Maybe this information is useful for other Joomla/RSForms users or for developers who want send a post request from php to anywhere :)

I had the following configuration in my dev environment:

Joomla together with RSForms (free version)

I love to use this combination because it is easy and just works. With RSForms I created some forms like User registration. This tool allows you to send emails to the registered user and it stores the registration automatically in the database. It's really useful.

In my case, the user registration was not real-time because I got an email and had to create a user account manually. This is web 0.1.

Well, I decided to push the whole process to web 2012. My plan was to create a simple Java servlet that creates my user accounts. This servlet should be called from the RSForms component, with a simple POST request. I don't like SOAP overhead, so it was no option for me. Of course, my servlet is a service :)

BTW, I wouldn't change the RSForms component because it should work as it was. The component has a nice feature that allows you to configure custom scripts for loading and processing.

I started with the configuration and added following process script:

$url = 'https://tomcatvm/services/User';
 
$ch = curl_init();
curl_setopt($ch, CURLOPT_URL, $url);
curl_setopt($ch, CURLOPT_RETURNTRANSFER, 1);
curl_setopt($ch, CURLOPT_POST, 1);
curl_setopt($ch, CURLOPT_CONNECTTIMEOUT, 5);
//curl_setopt($ch, CURLOPT_SSL_VERIFYHOST, 0);
//curl_setopt($ch, CURLOPT_SSL_VERIFYPEER, 0);

$data = array();
$data[] = 'language=en';

foreach ($_POST['form'] as $post => $value)
{
    if (is_array($value))
    {
        foreach ($value as $post2 => $value2)
        {
            $data[] = $post.'[]='.urlencode($value2);
        }
    }
    else
    {
        $data[] = $post.'='.urlencode($value);
    }
}

curl_setopt($ch, CURLOPT_POSTFIELDS, implode('&', $data));
 
$data = curl_exec($ch);

if (curl_errno($ch))
{
    JUtility::sendMail($form->emailfrom,$form->emailfromname,
    'support@sibvisions.com','Service error',
    'Service call failed! ('.curl_error($ch).')',$form->emailmode,null,null,null);
}

curl_close($ch);

The code is written in php, but it is not rocket science. It simply sends a post request to the configured URL. The important thing is that all form parameters were used as parameters for the request, because the service needs the entered values!

That's all for Joomla/RSForms. During development I thought that the process script will be executed only once per form but that was not true. It was executed after loading and everytime when the user submits the form. If the forms had validation errors, the process script was executed more than once (with and without valid inputs).

I changed the php script a little bit and moved the process execution after the validation. It depends on your RSForms version, but in my case the original script (/plugins/content/mosforme.php) looks like:

...
eval($form->script_process);

if(!empty($processform)){
...

and the new script:

if(!empty($processform)){
...
    if(!empty($_SESSION['formmsg'])){
    ...
    // store it in the db
    ...
    eval($form->script_process);
    ....
}

But it is also possible to use the original script without modification.

The other side was the servlet... It's to simple to show you the whole source, only a snippet:

@Override
public void doPost(HttpServletRequest pRequest, HttpServletResponse pResponse) throws ServletException
{
    String sParamFirstName;
    String sParamLastName;
    String sParamEmail;

    try
    {
        sParamFirstName = getParameter(pRequest, "firstname");
        sParamLastName  = getParameter(pRequest, "lastname");
        sParamEmail     = getParameter(pRequest, "email");
        sParamLanguage  = getParameter(pRequest, "language");
    ...