Four years SIB Visions, a look back and ahead
My fourth year at SIB Visions has ended, once more it is time to take a deep breath, sit down and have a look at everything that has happened so far.
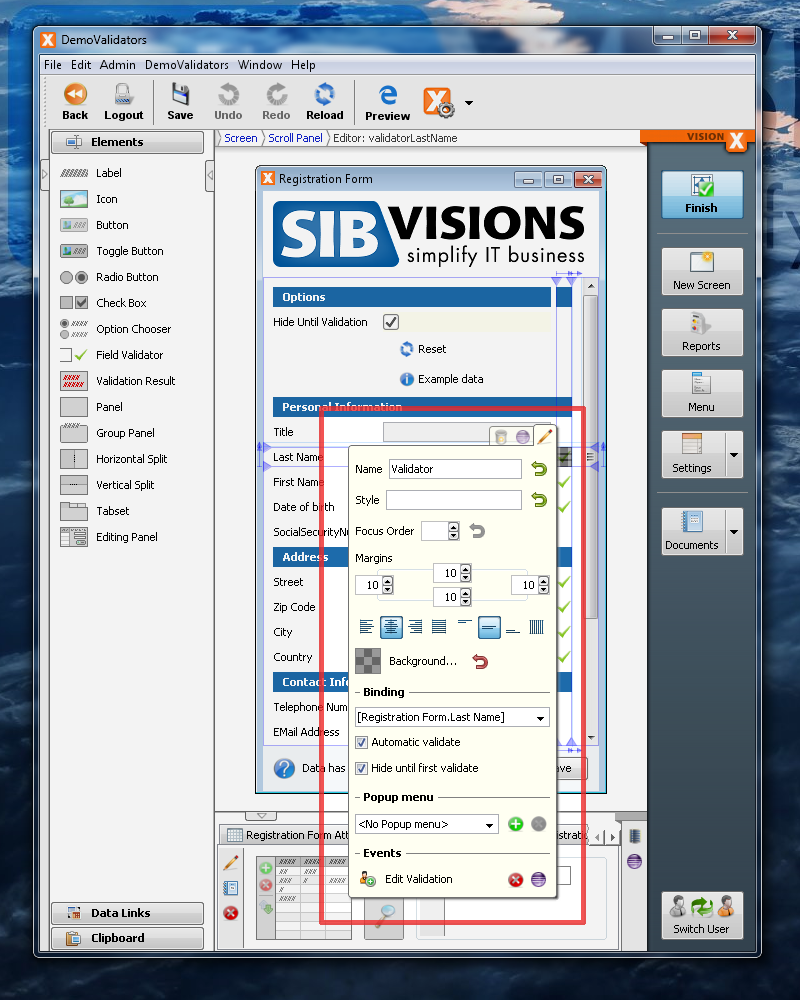
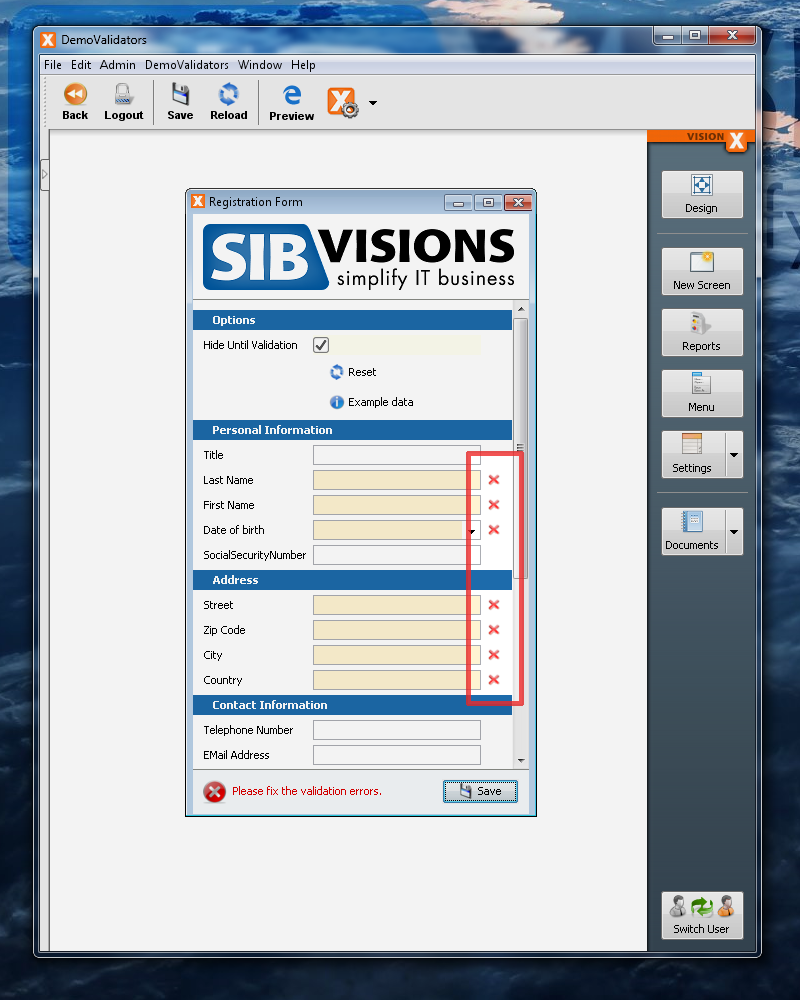
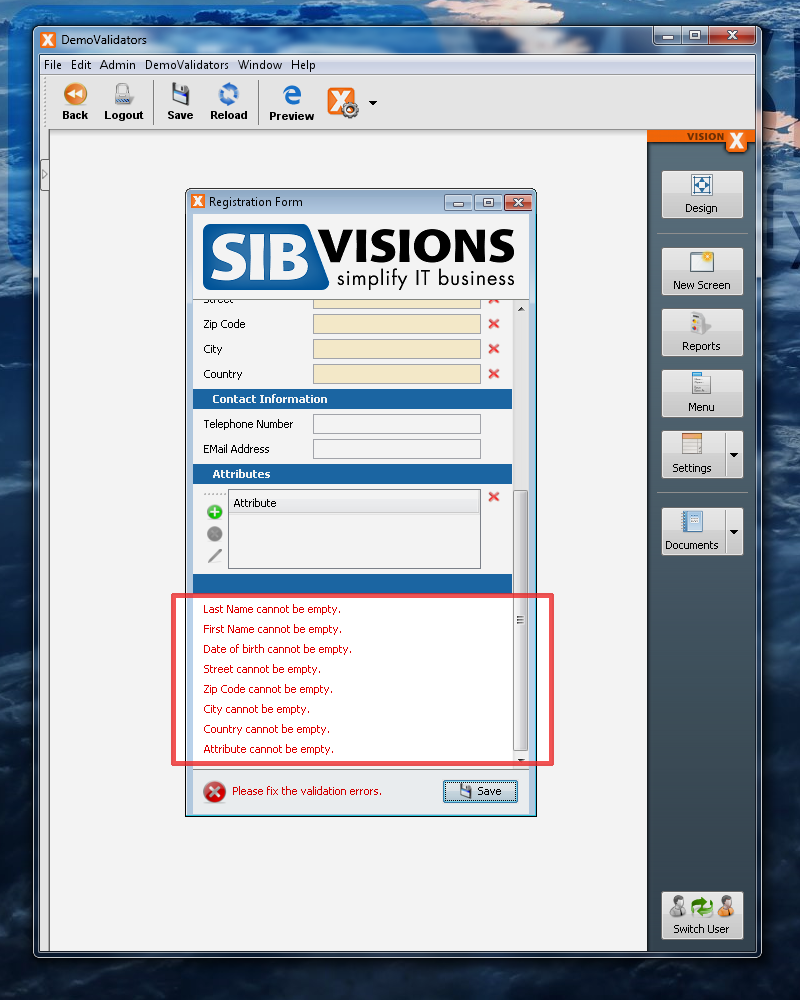
Demos
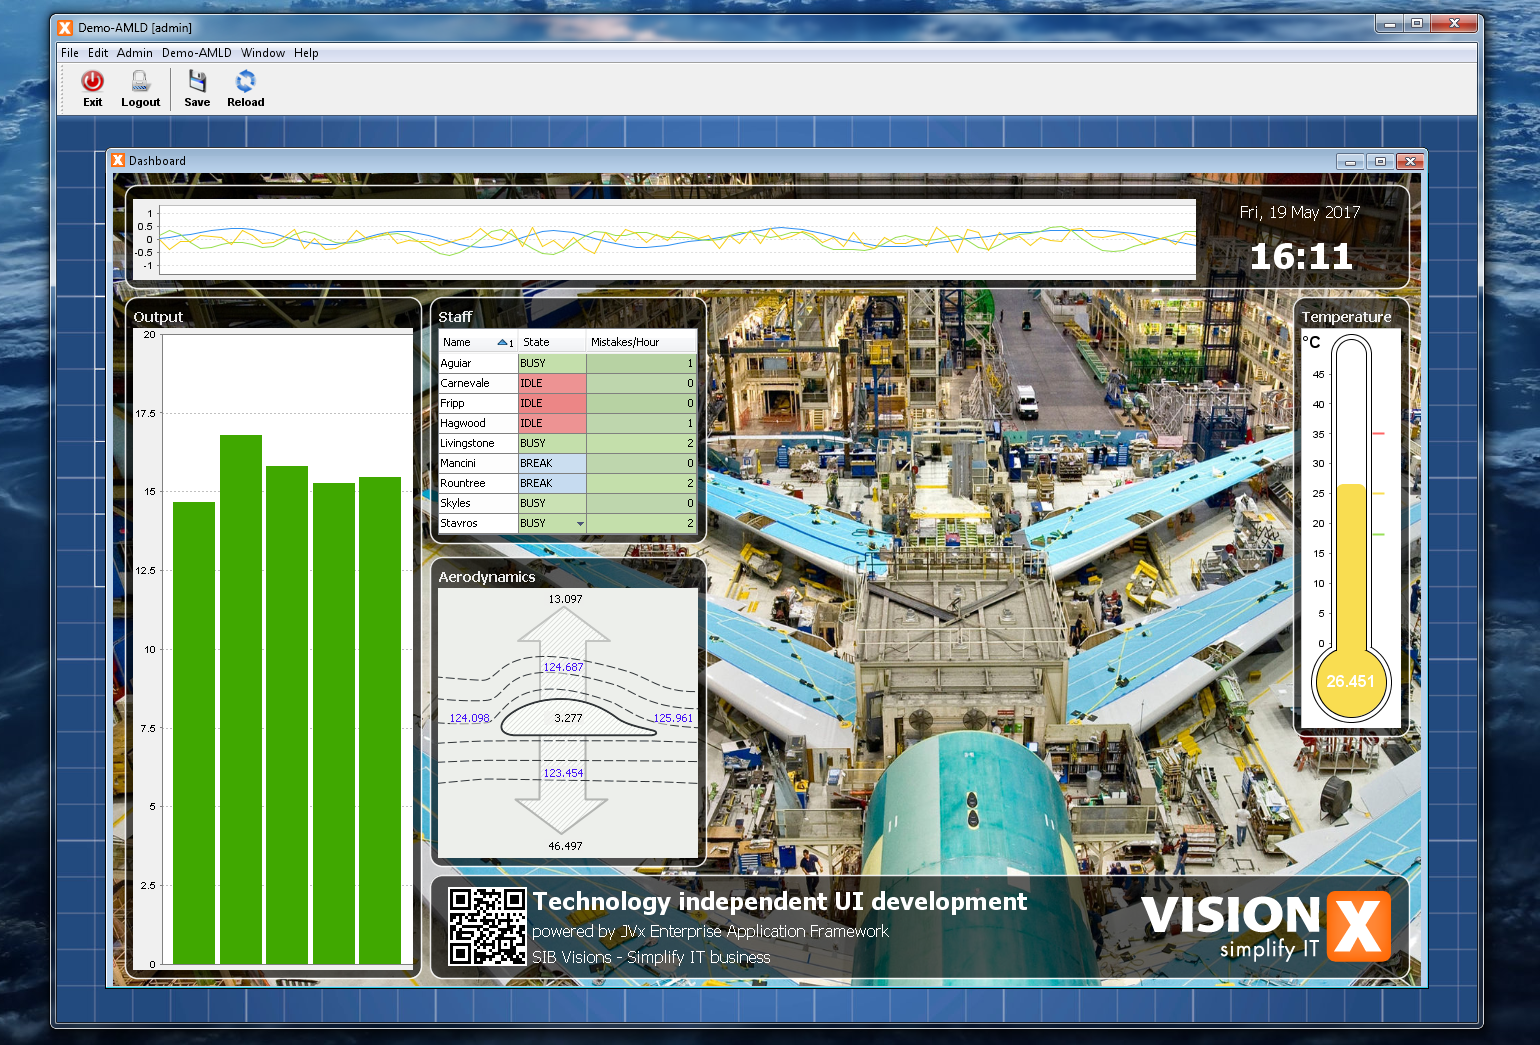
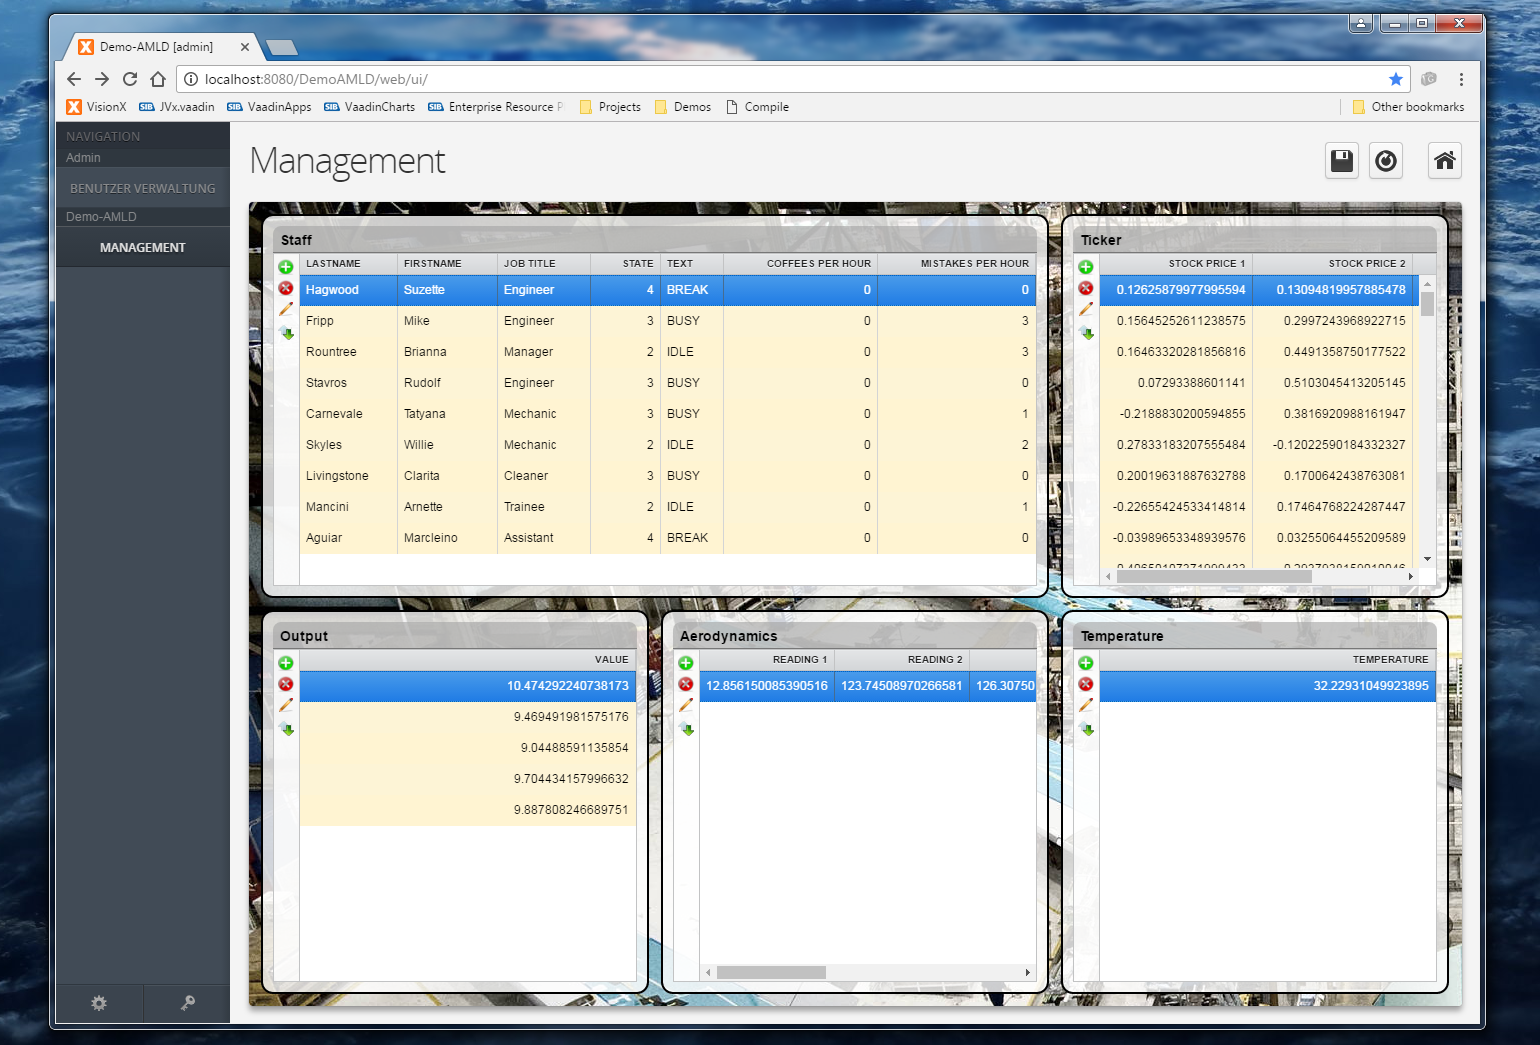
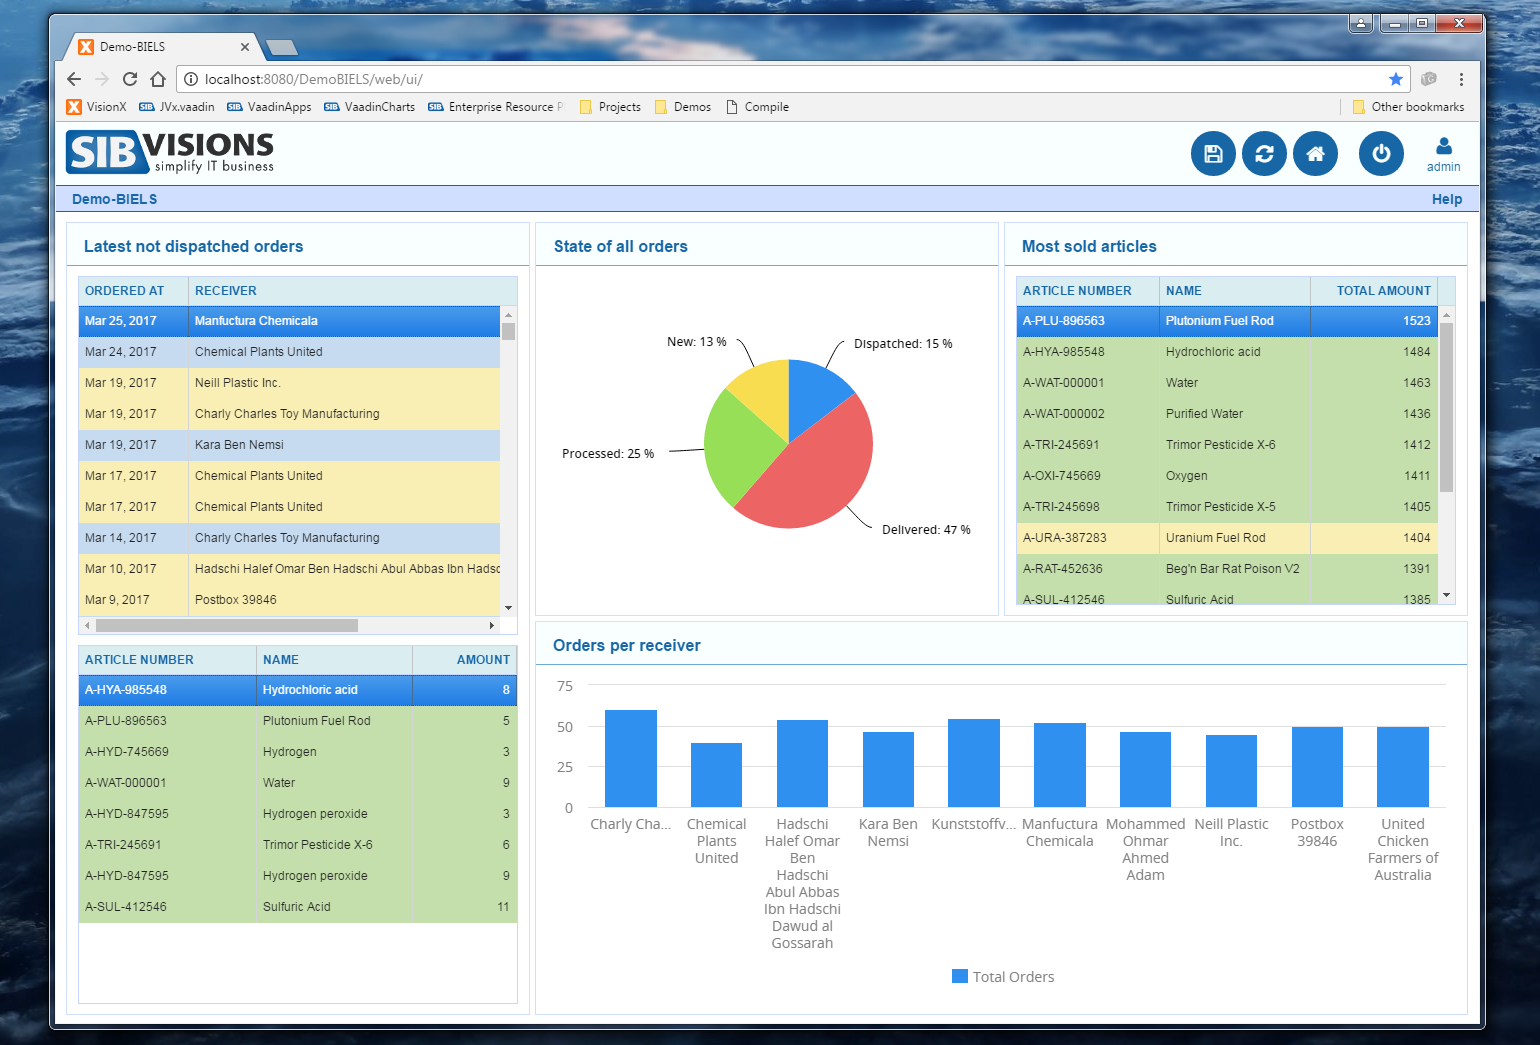
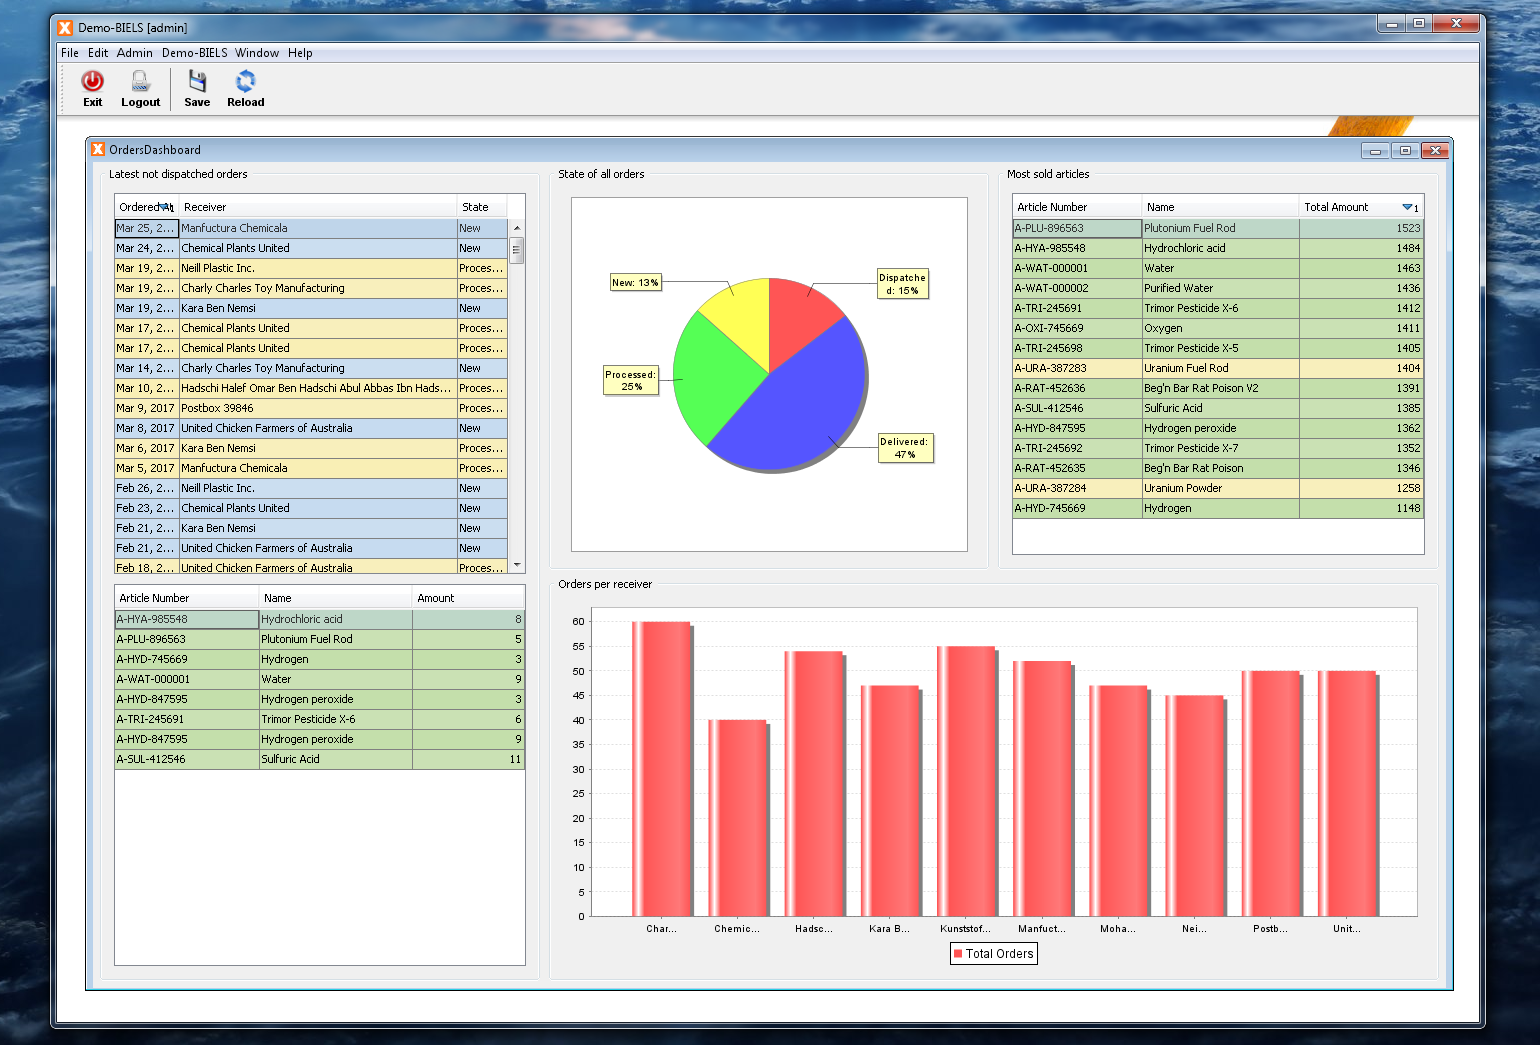
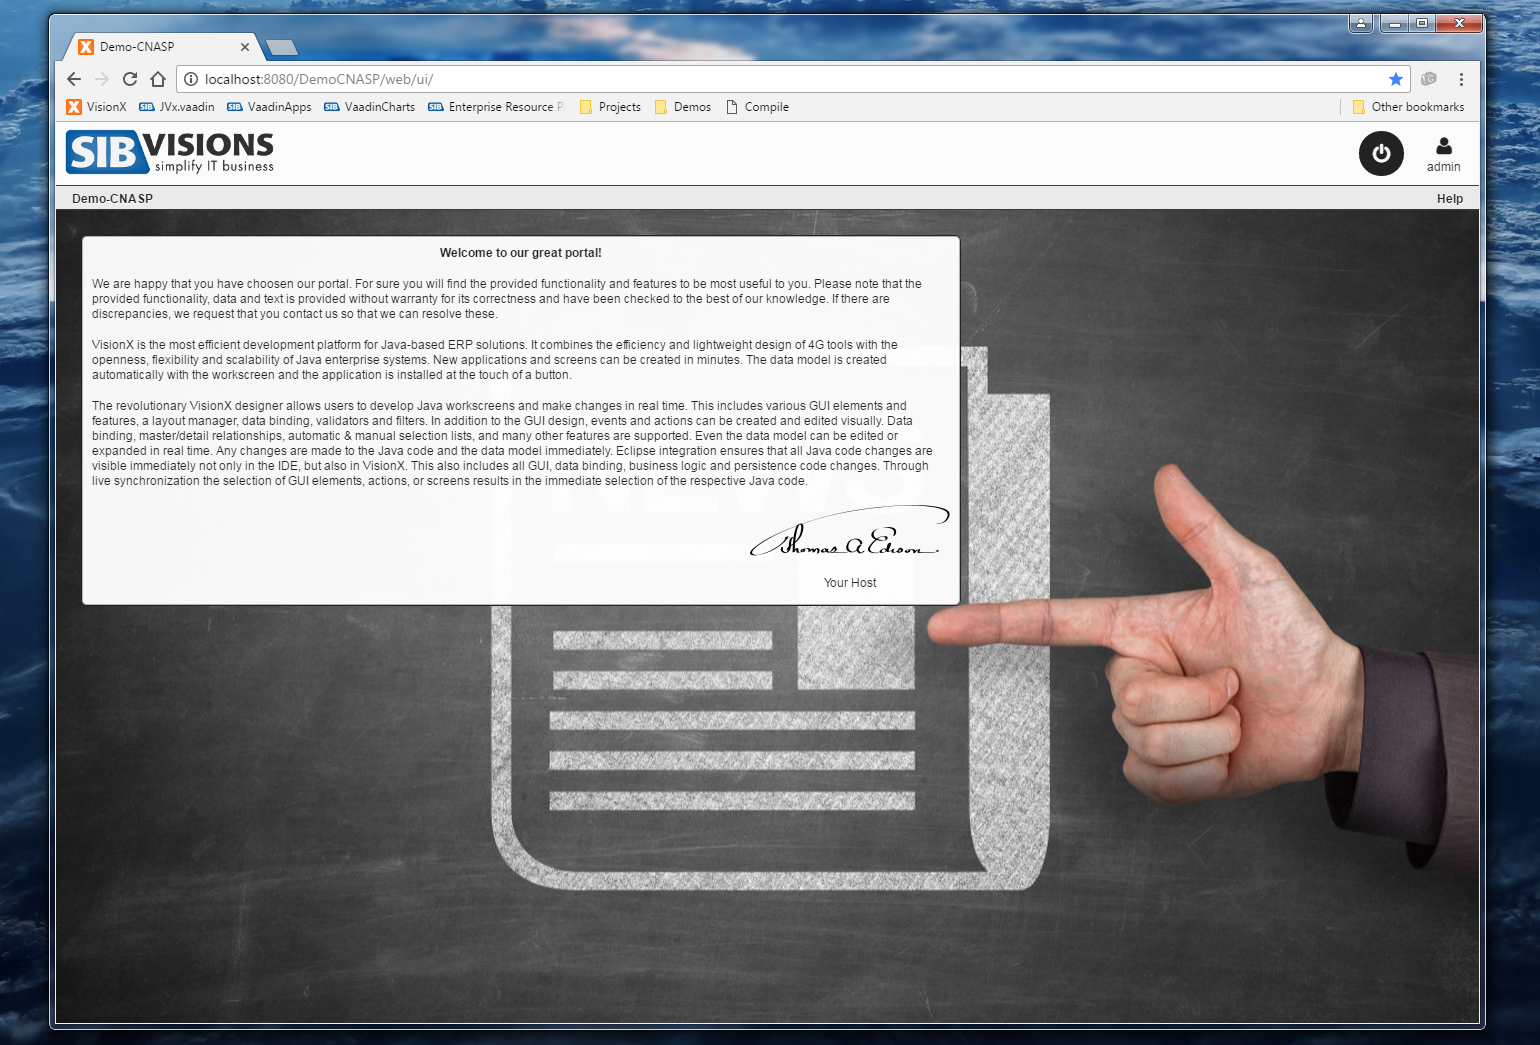
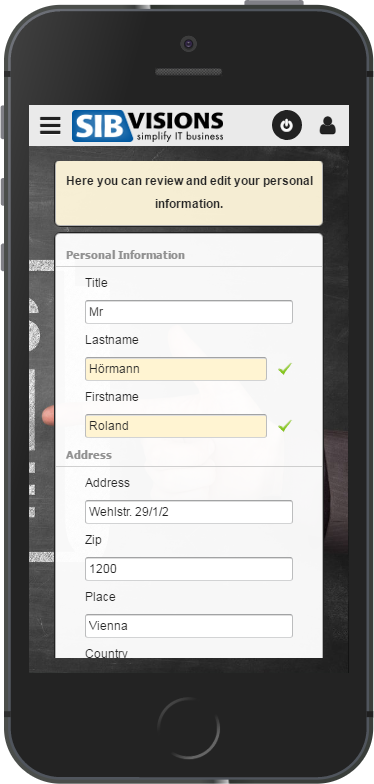
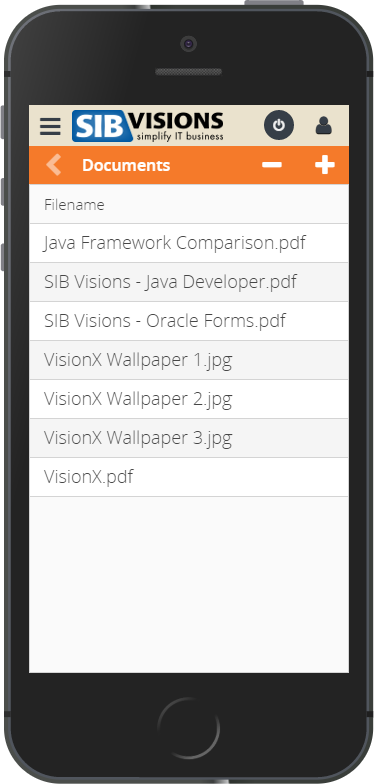
As mentioned in my last years post, there are several new demo applications available in the VisionX application store. These range from member portals to ERP applications and demonstrate not only the capabilities of JVx but also those of VisionX.
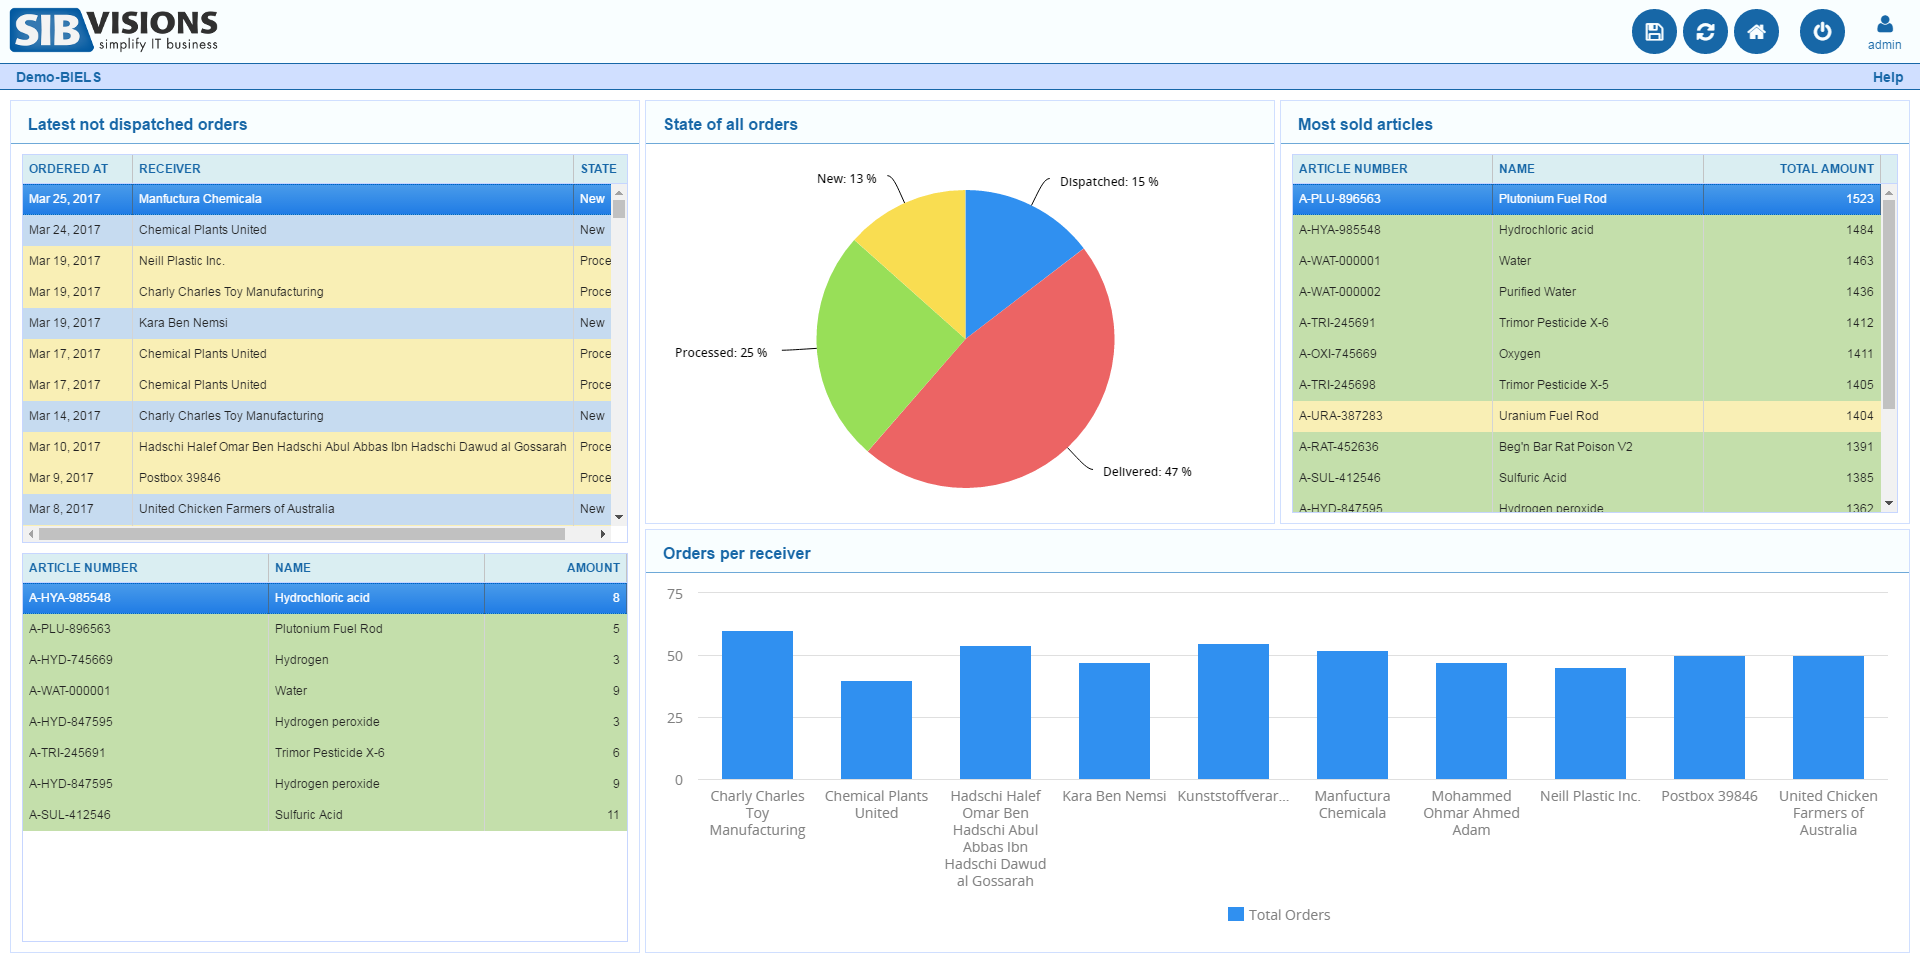
The blog posting already outlines quite well what the demo applications encompass, so there is no need here to reiterate that. However, working in these was quite interesting because it is such a vast spectrum of applications, they have quite different requirements and as I've said before (at some point), one should always use the product one does create.
JVx Reference series
The JVx Reference series, a collection of blog posts which is supposed to give an overview over the most important aspects of the JVx Application Framework, has also grown considerably:
- Application Basics, an overview over how a JVx application works.
- DataBooks, a simple introduction to DataBooks.
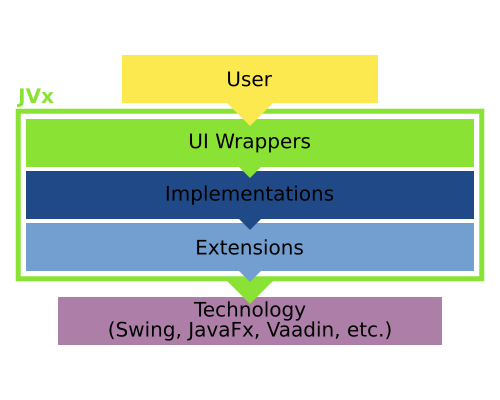
- Resource and UIResource, an explanation of the GUI abstraction concepts.
- Launchers and Applications, an overview over the two concepts of Launchers and Applications in JVx.
- The FormLayout, a tutorial showing how to use the FormLayout.
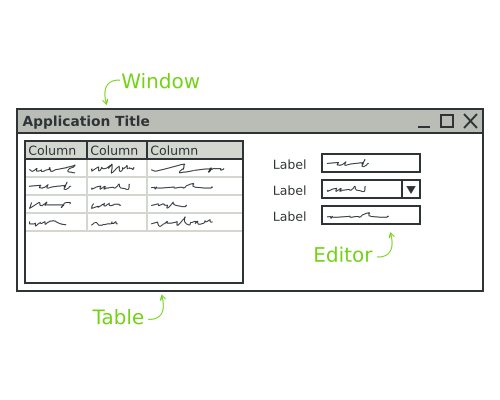
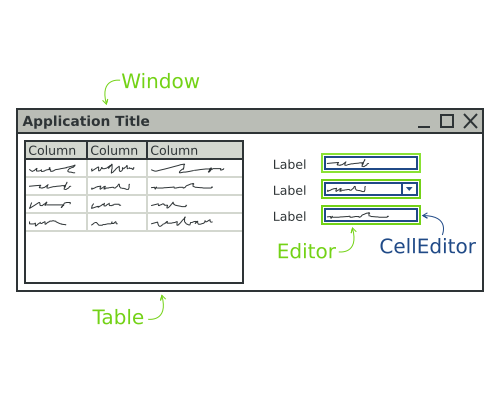
- CellEditors, an explanation on what CellEditors are.
The series now covers all of the most important topics of the JVx framework. The new articles are outlining the remaining core concepts of JVx and give a good overview over these. If you feel like something is still missing and should be added to this list, feel free to drop us a message so that we can include it. We're also considering pressing these into an easier to digest format, to make the entrance of newcomers to JVx as easy as possible.
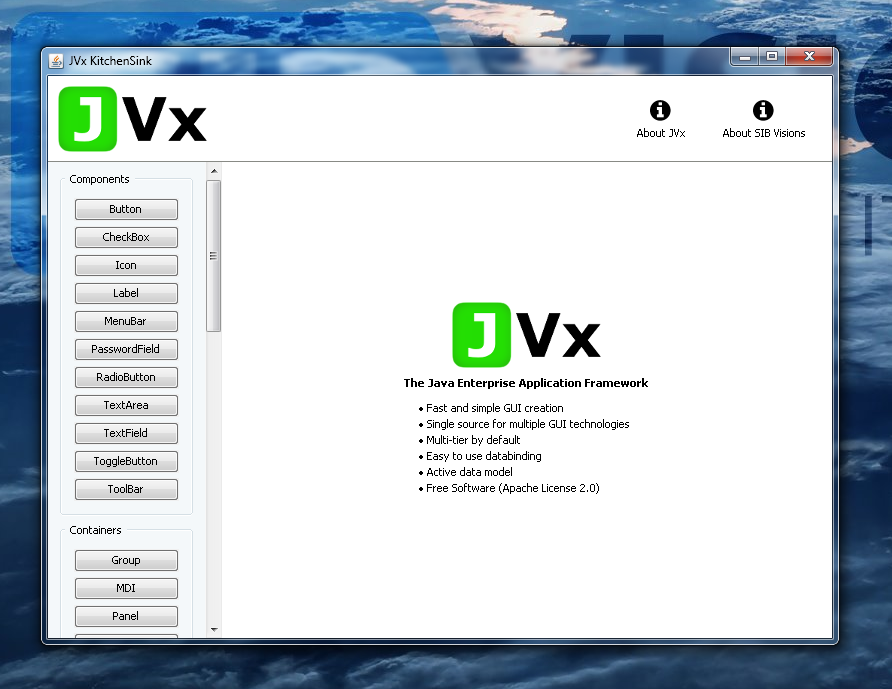
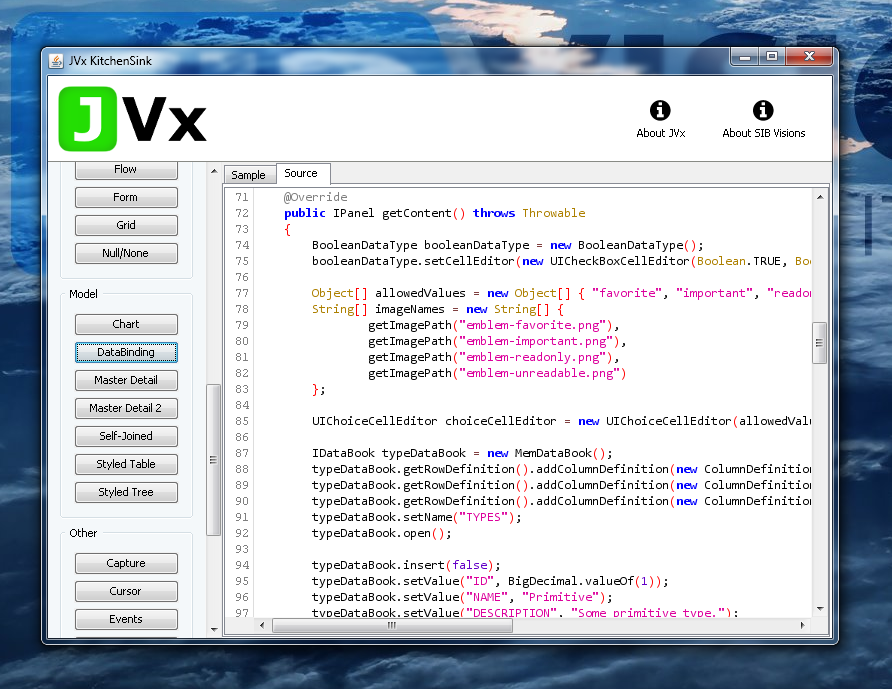
Kitchensink
After having it around for so many years, I've finally managed to properly introduce the JVx Kitchensink last year. It is a simple demo application which is supposed to give a good overview over all the components and controls of JVx.
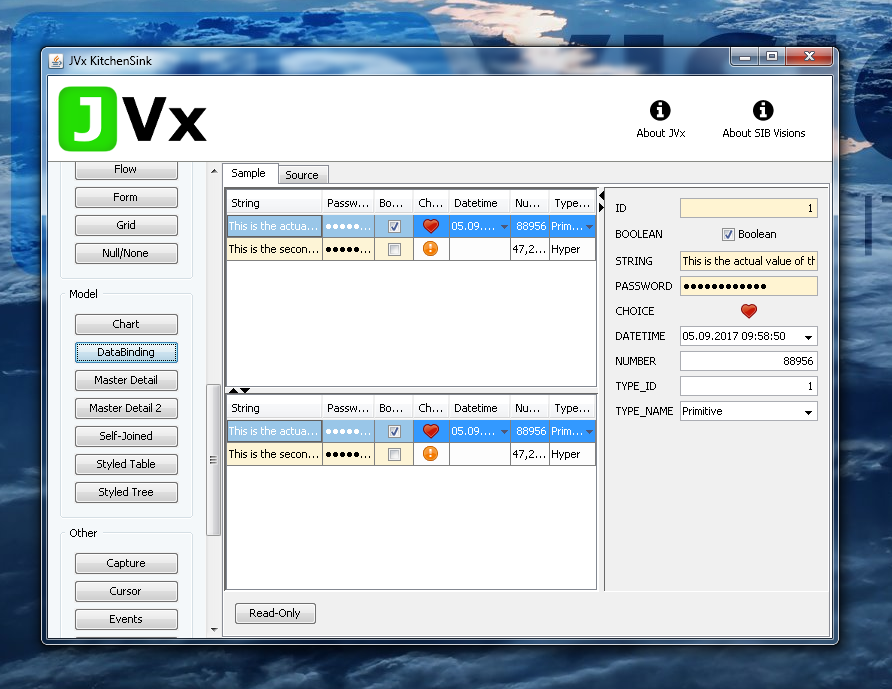
It is also my go-to application when it comes to debugging problems with JVx or testing the same functionality in different implementations. With this introduction it also received a much needed upgrade in aesthetics and functionality, for example it is now easy to see the source of each sample.
JVx and Lua
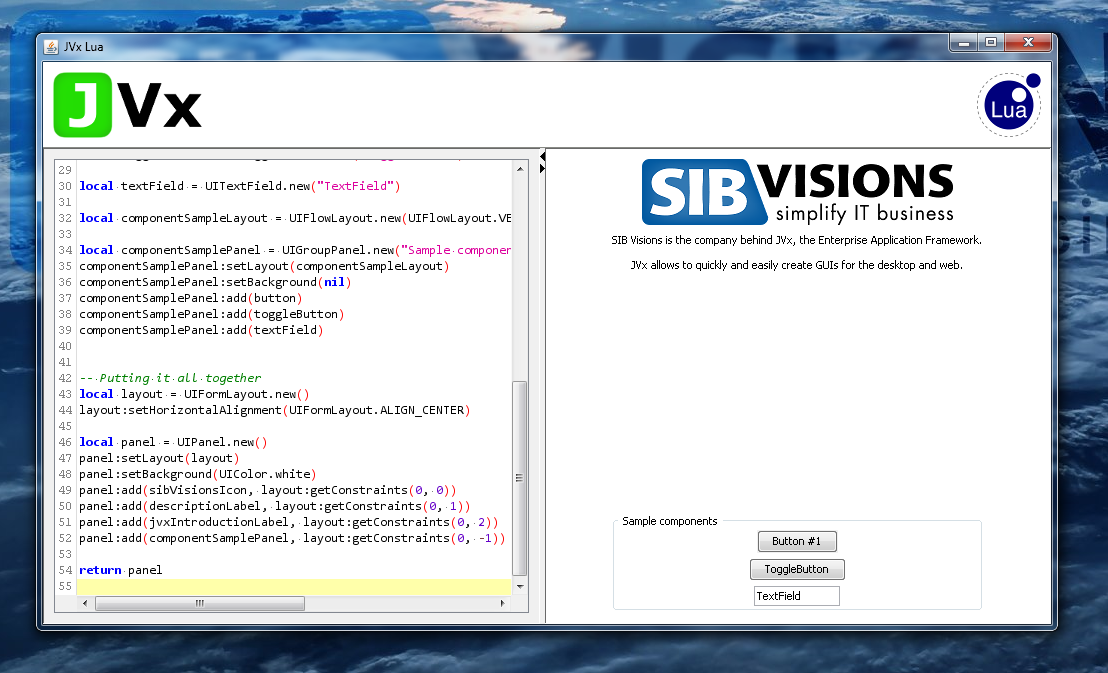
I'm quite a fan of LuaJ, a Lua JITC for Java. It allows you to quickly and easily deploy a complete Lua integration and adding scripting support to your application. I've worked with LuaJ on a private project of mine and have been very fascinated with how easy it is to create a scripting interface with it, so of course I could not withstand the temptation to create a proof-of-concept JVx bindings library with it.
These bindings give you access to the complete GUI layer of JVx, directly from Lua scripts. There is also a demo application for these bindings available.
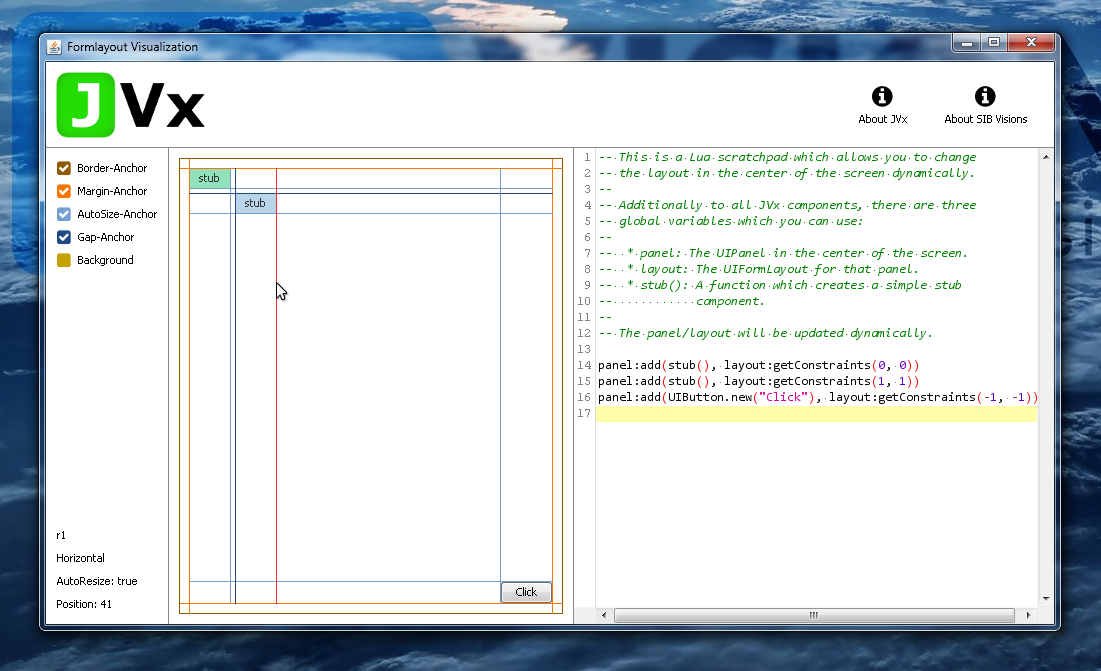
Additionally, these bindings are used in the JVx FormLayout Visualization application, which makes it easy to inspect certain configurations of the FormLayout and see how it behaves with each change.
Vaadin 8
In the late summer of 2017 we've started working on migrating from Vaadin 7 to Vaadin 8. That was not a small task, but was eased by the availability of the Vaadin 7 compatibility layer, which allowed us to gradually and deliberately upgrade parts and single components to the new version. All in all, the migration went rather smooth even though it was quite time consuming. On a similar note, we took the opportunity and enabled the new client-side layouts by default. These new layouts provide a much more sophisticated layouting mechanism and allow the applications to utilize layouts as it was previously only possible in desktop applications.
I already wrote briefly about these new layouts in my last years posting, and I will do so again. The main motivation behind these new layouts is to be able to use sophisticated layouts on the client side which are driven dynamically by the size of each component. There is no such support in Vaadin by default, so we had to create our own layouts for this. The main idea behind these layouts is to have the layouting mechanism completely on the client side and that it only operates with hints (constraints) given by the server side, if they are required at all. What is happening on the client side is that each component which is added to the panel is measured and then absolutely positioned inside the panel according to the layout. So technically it works exactly the same as the layouts in the Swing or JavaFX implementation, with the sole difference that the a layer of indirection is between the component management and the layout itself (namely the client/server connection).
While further work was done on these layouts, the need to actually being able to measure the time spent in each panels layout method was also required. Unfortunately, there wasn't a ready made solution at hand so I dug around the Vaadin internals and found that it has a profiler built-in. Nice, or so I thought, as it turned out, getting it to spit out the needed information was a little bit more work than anticipated, however, in the end I was able to gather quite valuable information from it.
The remaining time was filled with making sure that Vaadin 8 worked the same way as Vaadin 7 did, and replacing all the deprecated Vaadin 7 components wherever possible.
Documentation pipeline
As part of our efforts to unify our documentation and provide a better documentation experience (for us, our users and our customers) we've built a custom documentation pipeline. This pipeline allows us to feed it Markdown documents and spits out HTML, PDF and DokuWiki files. The main component which enables us to do that is Pandoc, the swiss-army knife when it comes to converting documents, and wkhtmltopdf, which allows to convert HTML documents into PDFs.
The requirements for this pipeline were simple enough:
- Documentation must be easy to write.
- Documentation must have a unified look, always.
- Conversion into multiple formats are required (HTML, PDF and DokuWiki).
That lead us to the decision to use Markdown with Pandoc. Markdown is easy to write and easy to read and does not dictate any sort of styling for the finished document (though it is possible with embedded HTML). Pandoc can convert the Markdown documents to HTML and DokuWiki and additionally allows us to manipulate these documents on the fly by using Lua filters. With these filters one is capable of manipulating the internal document representation and add or remove additional parts or modify already existing ones. In short, there is not much the Lua filters cannot do.
Conversion to PDF was a quite different matter, the logical choice was to convert the HTML to PDF, as this was already quite well laid out. wkhtmltopdf is a tool which uses the Qt Webkit engine to render a HTML document into a PDF, there are quite a few gotchas on the way, but overall it does that very well. Additionally, with the modern CSS variants, one can write rules for different devices, which make it easy to change the style of a document as soon as it is send to a printer.
Last but not least, we needed a way to easily start this pipeline on different machines. We've opted to use Apache Ant as launcher environment for the pipeline for a few simple reasons:
- We are already familiar with it.
- It allows to write complex logic using the ant-contrib tasks.
- As it is a Java solution, we can write the script once and run it everywhere. So we don't need to duplicate logic over multiple files for different systems.
So the only thing that needed to be system dependent were the launcher scripts. We've put all the necessary logic into the Apache Ant build file (which is mostly copying files and executing different programs like Pandoc) which in turn is invoked through the systems specific launchers.
I'm not sure in what detail I can go here, but the most work here was obviously to create the HTML template and figuring out which options make the most sense to use. I can give you two pieces of advice, though. First, when working with Pandoc and Lua filters, the native (or JSON) output format of Pandoc is your best friend when it comes to debugging the document structure. Second, when trying to create print material with wkhtmltopdf, disable the automatic scaling of content, it will save you a lot of headache.
We're still looking into how we can make this pipeline available to the general public, whether it will be as a product or as (partial) FLOSS has not been decided by now.
EPlug
With the start of the new year we've found the time to squeeze some much needed bug fixes into EPlug and publish the 1.2.7 bug fix release. It brings various bug fixes, improved performance and a better DataBookView to the table.
Diving into database specific behavior
There were some problems surrounding our PostgreSQL JDBC implementation. As it turned out, when an exception occurs during a transaction, PostgreSQL is awaiting a user interaction on how to proceed. I've outlined everything related to it in another blog post, and as it turned out, PostgreSQL wasn't even the odd one during my tests.
The look ahead
That was a quite slow year, actually. The Vaadin 8 migration took a lot of time, but a few interesting projects sneaked in none the less. I'm currently working on another quite interesting project which I hope will be finished within the next time. Stay tuned for it.
Thanks to everyone at SIB Visions, it's been an awesome year and I'm looking forward to another one with all of you!
![]() Information | rzenz | 07/05/2018 |
Information | rzenz | 07/05/2018 | ![]() Comments (0)
Comments (0)


 RSS-Feed