This website uses cookies for visitor traffic analysis. By using the website, you agree with storing the cookies on your computer.More information

Category: Fun

Alexa, shutter control

It's time for some words about my "shutter control" side project.

My house has electrical roller shutters with remote control units for every window. It was/is possible to close and open the shutters with these remote control units without any problems. But it wasn't possible to open/close them automatically because I don't own a central control unit. I'm not sure if such a central control unit is available for my "old" receiver modules?
Anyway, I'm a researcher and builder. So I built a central control unit based on a Raspberry Pi. I wrote about it in the past:

In the meantime, the project got a lux sensor to close the shutter if it's dark outside and it recognizes public holidays for later opening. It's not a good idea to open shutters on public holidays at 6 am :) The whole project is working very stable and it's so useful!

A few months ago, I heard about Google Home and Amazon Echo because both systems offer Voice control. I thought that voice control would be an awesome feature for my shutter control because sometimes it happens that my smartphone or remote control units are not at hand. And voice control is faster than using a smartphone or remote control. The only problem was that Google Home and Amazon Echo weren't available in Austria, not for German language and I didn't find any information about their APIs and whether if it's possible to develop addons. ... Sometimes you have to wait...

Things have changed in the meantime and both devices have APIs but only Amazon Echo is available for German language. I read some test reviews about both devices and Amazon is the pioneer. It supports more 3rd party devices than Home and looks proven. I had no preferences for Echo or Home, but Echo was available. The decision was simple :)

I made some simple tests with Echo because I tried to find out if it's really useful to have such a thing at home. And for sure, it is. It works really great and saves time :) It's great as replacement for standard radios or to stream your favourite music. It's also nice to listen to daily news or the weather forecast. A nice feature is the alarm clock!

But enough, it's a nice and useful device which simply works. The idea was voice control of my roller shutters.

Amazon Echo allows developers to create AddOns. Such AddOns are called Skills. It's not trivial but also not complex to create a custom Skill. The getting started is well documented and more documentation is available online. A developer forum exists and is active enough. It's really no problem to start but some pieces of the puzzle are unclear. I didn't find a detailed technical overview or didn't search long enough. It also was unclear where the Skills will be executed. I thought a skill is like an app and runs directly on the device... This was not the case.

Amazon Echo is a simple client and sends all requests to the amazon cloud. It handles responses but the brain is in the cloud. This means that all your services must be in the cloud. It's not a problem to host your own services in your own infrastrcuture but all your services have to be available via Internet. It's not possible to access a server in your Intranet directly. It's not possible to tweak with custom router configurations or custom dns records. Your services have to be available as cloud services. I found many solutions with service proxies or request forwarding but I didn't like this solutions because my home network is private.

But this was the only limitation and not really a problem because we have technologies like MQTT. I didn't use MQTT in the past but read a lot about it. The problem was that I didn't have a use-case for it. This was changed with Echo.

I played around with Mosquitto some hours and after TLS with and without user certificates were working, I was ready for connecting my shutter client. I don't write about my Mosquitto configuration here because there are so many good blog entries available in the wild.
It might be interesting that I use Eclipse paho as Java client library.

Ooh... and this utility class was really helpful. It made it possible to communicate secure to my Mosquitto broker. The class didn't support authentication without user certificate and it didn't read from InputStreams, but it was a good starting point. It also didn't work in with my Jetty application server. Here's a snippet of my code:

public static SSLSocketFactory getSocketFactory(Object pCACrt, Object pCrt,
                                Object pKey, String pPassword)
{
    try
    {
        // Load Certificate Authority (CA) certificate
        PEMParser reader = new PEMParser(createReader(pCACrt));
        X509CertificateHolder caCertHolder = (X509CertificateHolder)reader.readObject();
        reader.close();

        JcaX509CertificateConverter conv = new JcaX509CertificateConverter();
       
        X509Certificate caCert = conv.getCertificate((X509CertificateHolder)caCertHolder);
       
        // CA certificate is used to authenticate server
        KeyStore caKeyStore = KeyStore.getInstance(KeyStore.getDefaultType());
        caKeyStore.load(null, null);
        caKeyStore.setCertificateEntry("ca-certificate", caCert);

        TrustManagerFactory trustManagerFactory = TrustManagerFactory.getInstance(
                                TrustManagerFactory.getDefaultAlgorithm());
        trustManagerFactory.init(caKeyStore);
       
        // Create SSL socket factory
        SSLContext context = SSLContext.getInstance("TLSv1.2");

        if (exists(pCrt))
        {
            // Load client certificate
            reader = new PEMParser(createReader(pCrt));
            X509CertificateHolder certHolder = (X509CertificateHolder)reader.readObject();
            reader.close();

            X509Certificate cert = conv.getCertificate(certHolder);

            // Load client private key
            reader = new PEMParser(createReader(pKey));
            Object keyObject = reader.readObject();
            reader.close();

            PEMDecryptorProvider provider = new JcePEMDecryptorProviderBuilder().
                                build(pPassword.toCharArray());
            JcaPEMKeyConverter keyConverter = new JcaPEMKeyConverter().setProvider("BC");

            KeyPair key;

            if (keyObject instanceof PEMEncryptedKeyPair)
            {
                key = keyConverter.getKeyPair(((PEMEncryptedKeyPair)keyObject).
                                decryptKeyPair(provider));
            }
            else
            {
                key = keyConverter.getKeyPair((PEMKeyPair)keyObject);
            }

            // Client key and certificates are sent to server so it can authenticate
            // the client
            KeyStore clientKeyStore = KeyStore.getInstance(KeyStore.getDefaultType());
            clientKeyStore.load(null, null);
            clientKeyStore.setCertificateEntry("certificate", cert);
            clientKeyStore.setKeyEntry("private-key", key.getPrivate(),
                                pPassword.toCharArray(), new Certificate[] { cert });

            KeyManagerFactory keyManagerFactory = KeyManagerFactory.getInstance(
                                KeyManagerFactory.getDefaultAlgorithm());
            keyManagerFactory.init(clientKeyStore, pPassword.toCharArray());
           
            context.init(keyManagerFactory.getKeyManagers(),
                                trustManagerFactory.getTrustManagers(), null);
        }
        else
        {
            context.init(null, trustManagerFactory.getTrustManagers(), null);
        }

        return context.getSocketFactory();
    }
    catch (Exception e)
    {
        throw new RuntimeException(e);
    }
}

So, the communication via MQTT was configured and ready to use. The next step was the creation of a Skill. Echo supports using external services via https. The Skills-API comes with a special Servlet, the SpeechletServlet. You have to extend this servlet for every service. This creates boilerplate code because the servlet does nothing special. It usually configures the Speechlet. A Speechlet is more or less the main class for your service. So I decided to create a generic Servlet:

public class GenericServlet extends SpeechletServlet
{
    public void init(ServletConfig pConfig) throws ServletException
    {
        String sSpeechlet = pConfig.getInitParameter("speechlet");
       
        try
        {
            Class<?> clazz = Class.forName(sSpeechlet);
           
            Object obj = clazz.newInstance();
           
            if (obj instanceof Speechlet)
            {
                setSpeechlet((Speechlet)obj);
            }
            else
            {
                setSpeechlet((SpeechletV2)obj);
            }
        }
        catch (Exception e)
        {
            throw new ServletException("Can't init speechlet, e");
        }
       
        super.init(pConfig);
    }

}   // GenericServlet

Simple configuration in web.xml and no additional servlets needed:

<servlet>
    <servlet-name>ShutterService</servlet-name>
    <servlet-class>com.sibvisions.alexa.services.GenericServlet</servlet-class>

  <init-param>
    <param-name>speechlet</param-name>
    <param-value>com.sibvisions.alexa.services.shutter.ShutterSpeechlet</param-value>
  </init-param>
</servlet>

The Skill itself doesn't need source code. Amazon offers a web UI for the configuration and a simple test tool. The creation was straight forward and I simply followed an example from the Skills-API package. One tricky step was the certificate configuration, but Amazon supports self-signed certificates and wildcard certificates without problems. So, the Skill creation was done very fast because everything was done online without coding.

The custom service creation wasn't very difficult because the API is really simple and doesn't need more than implementing 4 interface methods:

@Override
public void onSessionStarted(SessionStartedRequest pRequest, Session pSession) throws SpeechletException
{
}

@Override
public void onSessionEnded(SessionEndedRequest pRequest, Session pSession) throws SpeechletException
{
}

@Override
public SpeechletResponse onIntent(IntentRequest pRequest, Session pSession) throws SpeechletException
{
    Intent intent = pRequest.getIntent();
   
    String intentName = (intent != null) ? intent.getName() : null;

    TranslationMap tmap = getTranslation(pRequest);
   
    if ("DownIntent".equals(intentName)
        || "UpIntent".equals(intentName)
        || "HaltIntent".equals(intentName))
    {
        String sText;

        try
        {
            if ("DownIntent".equals(intentName))
            {
                client.down();
               
                sText = "The shutters are moving down!";
            }
            else if ("UpIntent".equals(intentName))
            {
                client.up();
               
                sText = "The shutters are moving up!";
            }
            else
            {
                client.halt();
               
                sText = "The shutters are stopping!";
            }
        }
        catch (Exception e)
        {
            sText = "Shutter control not possible!";
        }
       
        sText = tmap.translate(sText);
       
        // Create the Simple card content.
        SimpleCard card = new SimpleCard();
        card.setTitle(tmap.translate("Shutter control"));
        card.setContent(sText);

        // Create the plain text output.
        PlainTextOutputSpeech speech = new PlainTextOutputSpeech();
        speech.setText(sText);

        return SpeechletResponse.newTellResponse(speech, card);
    }
    else
    {
        throw new SpeechletException(tmap.translate("Invalid intent!"));
    }
}

@Override
public SpeechletResponse onLaunch(LaunchRequest pRequest, Session pSession) throws SpeechletException
{
    TranslationMap tmap = getTranslation(pRequest);
   
    String sText = tmap.translate("Here we go!");
   
    // Create the Simple card content.
    SimpleCard card = new SimpleCard();
    card.setTitle(tmap.translate("Shutter control"));
    card.setContent(sText);

    // Create the plain text output.
    PlainTextOutputSpeech speech = new PlainTextOutputSpeech();
    speech.setText(sText);

    PlainTextOutputSpeech repromptSpeech = new PlainTextOutputSpeech();
    repromptSpeech.setText(tmap.translate("Tell me the direction!"));
   
    Reprompt reprompt = new Reprompt();
    reprompt.setOutputSpeech(repromptSpeech);

    return SpeechletResponse.newAskResponse(speech, reprompt, card);
}

It's also possible to use Amazons infrastructure for your services, but I have my own application server.

After some days, my roller shutters were controlled by Amazon Echo aka Alexa with voice commands. It was really cool and simple!

Here's a demonstration of the result (it's in German):

Alexa in action

I can only recommend this device!

Using Oracle JET with VisionX/JVx

The shiny new technology from Oracle is JET (Javascript Extension Toolkit). It's a really interesting thing because it bundles relevant technologies like jQuery, jQuery UI, Knockout, Require, Hammer, ...

You don't need know-how for every used technology, only JET is enough. This is a nice and new approach in the JS world. A possible problem with such an approach could be the update of single libraries, but this isn't your problem because Oracle has to maintain the right versions and bugfixes in JET. So it's not our problem :)

I'm not a big fan of Javascript libraries/technologies but from time to time I like to play around with such things and proof the interaction with JVx. Some time ago my new friend was AngularJS.

This time, I tried to work with Oracle JET.

The use-case was trivial: I'd like to visualize a list of contacts as simple table. The contacts are available as REST service. The REST service needs basic authentication.

Foreword: JET has much documentation and some useful examples, but it's inconsistent because the documentation shows different solutions for the same problem and you don't know which is best or recommended. And the examples are sometimes too complex. The start with existing examples is simple but if you start coding, it's not so simple. But this is a documentation problem and has nothing to do with the product itself. I prefer source code to find out how things work and this procedure worked without problems for JET.

Foreword 2: I couldn't find a description for Basic authentication. Not in the forum, not in the documentation and not in different blog posts. But I found many questions regarding Basic authentication. I found a solution for the problem but if someone has a better solution, please add a comment. My solution is more or less not API compliant - but works with JET version 1.1.2 and hopefully with newer versions as well.

Conditions

I've used our VisionX tool and the Contacts demo application for this example because VisionX has an embedded tomcat and REST access is pre-configured. It's not tricky to use any other simple JVx application but it requires more work because you need an application server and a deployed application.

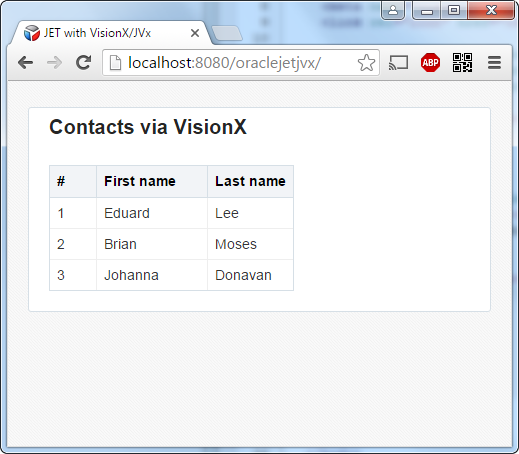
The Trial version of VisionX is a good start. Before I show you the source code, I'll show you the result:

Contacts table

Contacts table

You're right, this isn't rocket science. But it's not hard to add more columns and some css.

What about the source code?

We have one html page, index.html:

<!DOCTYPE html>

<html>
  <head>
    <title>JET with VisionX/JVx</title>
   
    <meta charset="UTF-8">
    <meta name="viewport" content="width=device-width, initial-scale=1">
    <link rel="icon" href="css/images/favicon.ico" type="image/x-icon" />

    <link rel="stylesheet" href="css/libs/oj/v1.1.2/alta/oj-alta-min.css" type="text/css"/>
    <link rel="stylesheet" href="css/demo-alta-patterns-min.css"/>
    <link rel="stylesheet" href="css/override.css" type="text/css"/>

    <script data-main="js/main" src="js/libs/require/require.js"></script>
  </head>
 
  <body>
    <br/>
    <div id="mainContent" class="oj-md-12 oj-col page-padding">
      <div class="demo-page-content-area page-padding">  
        <h1>Contacts via VisionX</h1>
        <br/>
        <table id="table"
          data-bind="ojComponent: {component: 'ojTable',
                                   data: dataSource,
                                   columns: [{headerText: '#',
                                              field: 'ID', sortable: 'enabled'},
                                             {headerText: 'First name',
                                              field: 'FIRSTNAME', sortable: 'enabled'},
                                             {headerText: 'Last name',
                                              field: 'LASTNAME'}]}">

        </table>
      </div>
    </div>    
  </body>
</html>

We need two javascript files, main.js:

requirejs.config({
    paths: {
        'knockout': 'libs/knockout/knockout-3.3.0',
        'jquery': 'libs/jquery/jquery-2.1.3.min',
        'jqueryui-amd': 'libs/jquery/jqueryui-amd-1.11.4.min',
        'promise': 'libs/es6-promise/promise-1.0.0.min',
        'hammerjs': 'libs/hammer/hammer-2.0.4.min',
        'ojdnd': 'libs/dnd-polyfill/dnd-polyfill-1.0.0.min',
        'ojs': 'libs/oj/v1.1.2/min',
        'ojL10n': 'libs/oj/v1.1.2/ojL10n',
        'ojtranslations': 'libs/oj/v1.1.2/resources',
        'signals': 'libs/js-signals/signals.min',
        'text': 'libs/require/text'
    },
    shim: {
        'jquery': {
            exports: ['jQuery', '$']
        },
        'crossroads': {
            deps: ['signals'],
            exports: 'crossroads'
        }
    },
    config: {
        ojL10n: {
            merge: {
                //'ojtranslations/nls/ojtranslations': 'resources/nls/menu'
            }
        }
    }
});

require(['ojs/ojcore',
         'knockout',
         'jquery',
         'app',
         'ojs/ojknockout',
         'ojs/ojknockout-model',
         'ojs/ojdialog',
         'ojs/ojinputtext',
         'ojs/ojinputnumber',
         'ojs/ojbutton',
         'ojs/ojtable',
         'ojs/ojdatacollection-common'],
        function(oj, ko, $, app)
        {
            var vm = new app.contactsVM();
         
            $(document).ready(function()
            {
                ko.applyBindings(vm, document.getElementById('mainContent'));

                //Show the content div after the REST call is completed.
                $('#mainContent').show();
            });
        });

and app.js

define(['ojs/ojcore', 'knockout', 'ojs/ojmodel'],
       function(oj, ko)
       {
           function viewModel()
           {
                var self = this;
                self.serviceURL =
                   'http://localhost/services/rest/vxdemo/ContactsWorkScreen/data/contacts';
                self.dataSource = ko.observable();
                self.ContactsCollection = ko.observable();
               
                self.myBasicAuth = function() {};
                self.myBasicAuth.prototype.getHeader = function ()
                {
                    var headers = {};
                    headers['Authorization'] = 'Basic ' + btoa("admin:admin");
                   
                    return headers;
                };
               
                parseContact = function(response)
                {
                    return {ID: response['ID'],
                            FIRSTNAME: response['FIRSTNAME'],
                            LASTNAME:response['LASTNAME']};
                };

                var Contact = oj.Model.extend(
                {
                    urlRoot: self.serviceURL,
                    parse: parseContact,
                    idAttribute: 'ID'
                });
   
                var myContact = new Contact();
               
                var ContactsCollection = oj.Collection.extend(
                {
                    url: self.serviceURL,
                    model: myContact,
                    oauth: new self.myBasicAuth(),
                    comparator: "ID"
                });
               
                self.ContactsCollection(new ContactsCollection());
               
                //simple Request test
                //self.ContactsCollection().fetch({headers: {"Authorization": 'Basic ' + btoa("admin:admin")}});
               
                self.dataSource(new oj.CollectionTableDataSource(self.ContactsCollection()));      
           }

           return {'contactsVM': viewModel};
        }
    );

Above files are not enough to run the example because you need a full JET application. You can download a JET application from the official site (-> Getting started with Oracle JET -> Downloading Oracle JET). The QuickStart template works well. Unzip the application into the directory: <VisionX_folder>/rad/apps/visionx/WebContent/ojet (ojet must be created manually). Simply copy the example files in the ojet, ojet/js folder.
Open the browser and navigate to: http://localhost/ojet/

My source code is small and simple but I don't know if it could be optimized. The official CRUD example application has more features and doesn't connect to a real REST service.
It wasn't funny to use/read the example because it's much for such a simple use-case. I found a similar but inofficial example. This was nice but didn't solve the Basic authentication problem!

Long story, short:

I found no option for Basic authentication and no documentation, but found that OAuth is supported. Not the same as Basic authentication but something I could search in the source code. The Model file was the right place to search (-> oauth).

And my simple solution for Basic authentication was:

self.myBasicAuth = function() {};
self.myBasicAuth.prototype.getHeader = function ()
{
  var headers = {};
  headers['Authorization'] = 'Basic ' + btoa("admin:admin");
                   
  return headers;
};

Username and password are hardcoded, but it's easy to replace the code with a better solution.

The "authenticator" will be set as oauth property:

var ContactsCollection = oj.Collection.extend(
{
    url: self.serviceURL,
    model: myContact,
    oauth: new self.myBasicAuth(),
    comparator: "ID"
});

The problem with this API is that it's not guaranteed that the getHeader method will be used in future releases. And it's also not perfect to use oauth for Basic authentication, but whatever.

Our example runs with VisionX' embedded tomcat. If you want to test with your own application server, you should enable CORS for VisionX to use the REST services from an external server:

To enable CORS, change the web.xml in <VisionX_folder>/conf/ and add

<init-param>
  <param-name>cors.origin</param-name>
  <param-value>http://localhost:8080</param-value>
</init-param>

to RestletServlet definition.

Example Download

Use OBridge together with JVx

OBridge is a nice Java FOSS project. The description according to the website:

OBridge generates standard Java source code for calling PL/SQL stored procedures and functions.

It's focus is on Oracle but this wasn't a limitation for us to test it with JVx.

Most of you know that JVx has generic support for procedure/function calls which is DB independent. The implementation is not really type-safe but it's simple.
If type-safety is preferred, you could use OBridge for your application.

I write about this library, because it's super small and simple. We love small and simple things :)

Assume, we have following PL/Sql procedure:

CREATE OR REPLACE PROCEDURE execProcedure(pNumber IN OUT NUMBER,
                                          pInText IN VARCHAR2,
                                          pOutText OUT VARCHAR2) IS
  nr NUMBER := pNumber;
BEGIN
  pOutText := 'Out: '|| pOutText ||' In: '|| pInText;

  pNumber := pNumber + pNumber;
END execProcedure;

and function:

CREATE OR REPLACE FUNCTION execFunction(pNumber IN OUT NUMBER,
                                        pInText IN VARCHAR2,
                                        pOutText OUT VARCHAR2) RETURN VARCHAR2 IS
  res VARCHAR2(200);
  nr NUMBER := pNumber;
BEGIN
  pOutText := 'Out: '|| pOutText ||' In: '|| pInText;

  pNumber := pNumber + pNumber;

  RETURN 'IN-Param Nr: '|| nr;
END execFunction;


With JVx, the procedure and function call will look like following JUnit test:

@Test
public void testCall() throws Exception
{
    DBAccess dba = DBAccess.getDBAccess("jdbc:oracle:thin:@localhost:xe", "test", "test");
    dba.open();
   
    /**
     * Procedure call.
     */

    OutParam ouTextParam = new OutParam(InOutParam.SQLTYPE_VARCHAR);
    dba.executeProcedure("execProcedure", BigDecimal.valueOf(25),
                         "Hello JVx' procedure", ouTextParam);

    Assert.assertEquals("Out:  In: Hello JVx' procedure", ouTextParam.getValue());

    /**
     * Function call.
     */

   
    ouTextParam = new OutParam(InOutParam.SQLTYPE_VARCHAR);
    Object oResult = dba.executeFunction("execFunction", Types.VARCHAR,
                                         BigDecimal.valueOf(25),
                                         "Hello JVx' function", ouTextParam);
   
    Assert.assertEquals("IN-Param Nr: 25", oResult);
    Assert.assertEquals("Out:  In: Hello JVx' function", ouTextParam.getValue());
}


and the same with OBridge:

@Test
public void testCall() throws Exception
{
    DBAccess dba = DBAccess.getDBAccess("jdbc:oracle:thin:@localhost:1521:xe", "test", "test");
    dba.open();
   
    /**
     * Procedure call.
     */

    Execprocedure proc = ProceduresAndFunctions.execprocedure(BigDecimal.valueOf(35),
                                           "Hello OBridge procedure", dba.getConnection());
   
    Assert.assertEquals("Out:  In: Hello OBridge procedure", proc.getPouttext());

    /**
     * Function call.
     */

   
    Execfunction func = ProceduresAndFunctions.execfunction(BigDecimal.valueOf(35),
                                            "Hello OBridge function", dba.getConnection());
   
    Assert.assertEquals("IN-Param Nr: 35", func.getFunctionReturn());
    Assert.assertEquals("Out:  In: Hello OBridge function", func.getPouttext());
}


The OBridge code saves two LoC for the call, but it needs some additional classes and packages in your application. If you change your procedure or function definition in the database, you have to recreate the Java files.
This is not needed with pure JVx, but it's your choice.

The code generation is not tricky, simply follow the official documentation. Our steps:

  • Create the file config.xml in the working directory of your project
    <?xml version="1.0" encoding="UTF-8"?>

    <configuration>
        <jdbcUrl>jdbc:oracle:thin:test/test@localhost:1521:xe</jdbcUrl>
        <sourceRoot>./src/</sourceRoot>
        <rootPackageName>com.sibvisions.apps.obridge.db</rootPackageName>
        <packages>
            <entityObjects>objects</entityObjects>
            <converterObjects>converters</converterObjects>
            <procedureContextObjects>context</procedureContextObjects>
            <packageObjects>packages</packageObjects>
        </packages>
    </configuration>

  • Run the main class: org.obridge.OBridge with argument: -c config.xml
    (or use -c fullqualified_path_to_config.xml)
 

If you love our generic built-in solution, you don't need OBridge but if you prefer type-safety it's definitely an option.

RaspberryPi + 1-wire + i2c + camera and kernel pain

Our last research project was real fun: Build a Webcam with temp and light sensor to do some home/office automation.

We took a RaspberryPi model B, temp sensor (DS18B20) and light sensor (TSL45315).

The temp sensor had a 1-wire interface and the Internet had many tutorials to connect the sensor to a RasPi. It should be a trivial job, if you read the tutorials and it should be ready in max. 10 minutes. Should!

The theory wasn't the reality and the tutorials didn't cover our environment, because we had a new Raspbian ISO with kernel 3.16 and 3.18 some hours later.

We tried to connect the sensor as described (with and without pullup resistor, with parasite power and without) but it wasn't detected. It was horrible because the driver was loaded without problems and logged a simple success message.
We didn't find information about the problem because we didn't see an error. It simply did nothing and the filesystem didn't contain the relevant files and directories. Our /sys/bus/w1/devices directory was clean and empty. After some hours error searching, without any ideas we tried an older Raspbian image with kernel 3.6 and our sensor worked out-of-the-box without modifications. We saw additional log information from the 1-wire module which we didn't have with our 3.18 kernel. So we knew that something has changed in the kernel or kernel config...

But we weren't happy because the whole thing should work with an up-to-date setup. After we knew that the kernel caused our problems, we tried to find a solution and found: http://www.raspberrypi.org/forums/viewtopic.php?t=97216&p=676793 (first posting on 2nd page). There was a hint about the device tree. With this information, we found: https://github.com/raspberrypi/documentation/blob/master/configuration/device-tree.md

We disabled the device-tree by adding device_tree= to our config.txt and everything worked after a reboot, with our 3.18 kernel. So far so good.

It also worked with device_tree_overlay=overlays/w1-gpio-overlay.dtb. This option was our preferred one because it didn't disable the device_tree.

After our temp sensor worked without problems we connected the Raspicam and made some tests. Everything worked without problems. The last piece of our project was the light sensor. It was a littly bit tricky to use the sensor with our Pi because the source code example wasn't available for Java/Pi4J, but here it is:

I2CBus bus = I2CFactory.getInstance(I2CBus.BUS_1);

I2CDevice device = bus.getDevice(0x29);

device.write((byte)(0x80 | 0x0A));

byte[] byData = new byte[1];
device.read(byData, 0, 1);

System.out.println(byData[0]);

System.out.println("Power on...");

device.write((byte)(0x80 | 0x00));
device.write((byte)0x03);

System.out.println("Config...");

device.write((byte)(0x80 | 0x01));
device.write((byte)0x00);   //M=1, T=400ms
//device.write((byte)0x01);   //M=2, T=200ms
//device.write((byte)0x02);   //M=4, T=100ms

byData = new byte[2];

while (true)
{
    device.write((byte)(0x80 | 0x04));
   
    device.read(byData, 0, 2);
   
    int l = byData[0] & 0xFF;
    int h = byData[1] & 0xFF;
   
    int lux = (h << 8) | (l << 0);
   
    lux *= 1;   //M1
    //lux *= 2;   //M2
    //lux *= 4;   //M4
   
    System.out.println(lux);
   
    Thread.sleep(1000);
}

We compared the output with an Arduino board and the values were "the same".

It wasn't possible to use the light sensor without required modules. We simply added device_tree_param=i2c1=on to our config.txt and I2C worked. You should install

sudo apt-get install i2c-tools

to verify connected sensors, via:

i2cdetect -y 1

After we thought that everything will work, we put all pieces together: temp sensor, cam, light sensor.
During development, we didn't use all parts together - only the relevant sensor, to rule out errors.

Everything worked fine after starting the Pi, but the cam stopped capturing after some minutes... frustrating.
So again we tried to find an error without detailed information and without logs. We thought it might be a module loading problem and found some hints: https://github.com/raspberrypi/linux/issues/435. But nothing worked for us. The only working solution was: disable the device tree :(

The whole system is up and running for some days and there we no problems.

We currently don't know what's the problem with the device tree or what we should configure to avoid problems, but if you have similar problems, this posting could help. If you have a working solution with the device tree... leave a comment :)

Vaadin UI with SmartTV

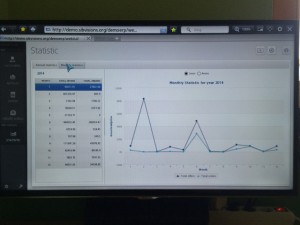
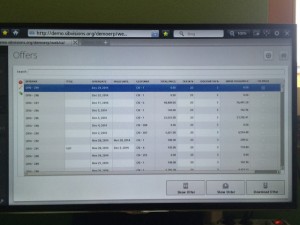
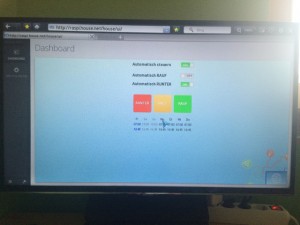
It's not rocket science and we didn't write code, but it's nice to see our UIs on SmartTVs :)

Here are some impressions:

SmartTV - Statistic

SmartTV - Statistic

SmartTV - Data

SmartTV - Data

SmartTV - Window Shutter

SmartTV - Window Shutter

Window shutter UI - WiiU

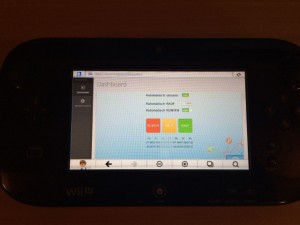
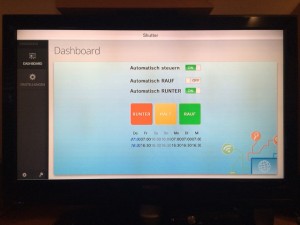
Because I got some emails, here's the window shutter UI how it looks on my Wii U. Sure, the space is not perfectly used, but the UI wasn't optimized for Wii U. Also the agent name of the browser wasn't checked to optimize controls.

But it's ok and control just works :)

The pictures (phone cam):

Wii-U controller

Wii-U controller

Wii-U (TV)

Wii-U (TV)