Let's experiment, reducing code in screens and lifecycle objects.
Let's do a small experiment, and see if we can reduce the code required in screens and lifecycle objects to a minimum.
But be advised, this blog post is meant as a food for thoughts and less as a practical manual on doing things. So we will explore different possibilities which might not be practical.
Starting point
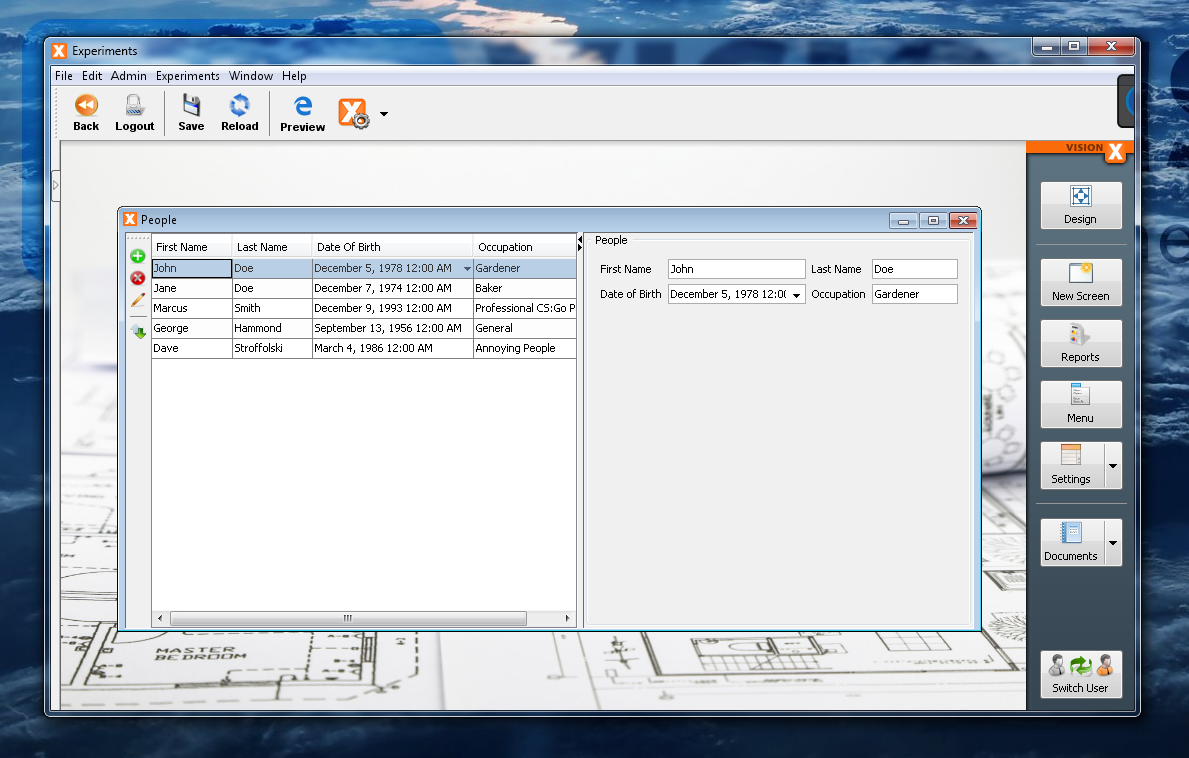
We will start with a small screen which has been automatically generated by VisionX, but has (manually) been stripped of all comments, documentation, imports and has some formatting modifications to make it easier readable in this post.
-
public class PeopleWorkScreen extends DataSourceWorkScreen
-
{
-
private UIEditor editPeopleFirstName = new UIEditor();
-
private UIEditor editPeopleLastName = new UIEditor();
-
private UIEditor editPeopleDateOfBirth = new UIEditor();
-
private UIEditor editPeopleOccupation = new UIEditor();
-
private UILabel labelFirstName = new UILabel();
-
private UILabel labelLastName = new UILabel();
-
private UILabel labelDateofBirth = new UILabel();
-
private UILabel labelOccupation = new UILabel();
-
private UIFormLayout formLayout1 = new UIFormLayout();
-
private UIGroupPanel groupPanelPeople = new UIGroupPanel();
-
private NavigationTable tablePeople = new NavigationTable();
-
private UIPanel splitPanelMainFirst = new UIPanel();
-
private UIPanel splitPanelMainSecond = new UIPanel();
-
private UISplitPanel splitPanelMain = new UISplitPanel();
-
private UIBorderLayout borderLayout1 = new UIBorderLayout();
-
private UIBorderLayout borderLayout2 = new UIBorderLayout();
-
private UIBorderLayout borderLayout3 = new UIBorderLayout();
-
private RemoteDataBook rdbPeople = new RemoteDataBook();
-
-
public PeopleWorkScreen(
-
IWorkScreenApplication pApplication,
-
AbstractConnection pConnection,
-
Map pParameter) throws Throwable
-
{
-
super(pApplication, pConnection, pParameter);
-
-
initializeModel();
-
initializeUI();
-
}
-
-
private void initializeModel() throws Throwable
-
{
-
rdbPeople.setName("people");
-
rdbPeople.setDataSource(getDataSource());
-
rdbPeople.open();
-
}
-
-
private void initializeUI() throws Throwable
-
{
-
tablePeople.setMaximumSize(new UIDimension(450, 350));
-
tablePeople.setDataBook(rdbPeople);
-
tablePeople.setAutoResize(false);
-
-
labelFirstName.setText("First Name");
-
-
labelLastName.setText("Last Name");
-
-
labelDateofBirth.setText("Date of Birth");
-
-
labelOccupation.setText("Occupation");
-
-
editPeopleFirstName.setDataRow(rdbPeople);
-
editPeopleFirstName.setColumnName("FIRST_NAME");
-
-
editPeopleLastName.setDataRow(rdbPeople);
-
editPeopleLastName.setColumnName("LAST_NAME");
-
-
editPeopleDateOfBirth.setDataRow(rdbPeople);
-
editPeopleDateOfBirth.setColumnName("DATE_OF_BIRTH");
-
-
editPeopleOccupation.setDataRow(rdbPeople);
-
editPeopleOccupation.setColumnName("OCCUPATION");
-
-
splitPanelMainFirst.setLayout(borderLayout2);
-
splitPanelMainFirst.add(tablePeople, UIBorderLayout.CENTER);
-
-
groupPanelPeople.setText("People");
-
groupPanelPeople.setLayout(formLayout1);
-
groupPanelPeople.add(labelFirstName, formLayout1.getConstraints(0, 0));
-
groupPanelPeople.add(editPeopleFirstName, formLayout1.getConstraints(1, 0));
-
groupPanelPeople.add(labelLastName, formLayout1.getConstraints(2, 0));
-
groupPanelPeople.add(editPeopleLastName, formLayout1.getConstraints(3, 0));
-
groupPanelPeople.add(labelDateofBirth, formLayout1.getConstraints(0, 1));
-
groupPanelPeople.add(editPeopleDateOfBirth, formLayout1.getConstraints(1, 1));
-
groupPanelPeople.add(labelOccupation, formLayout1.getConstraints(2, 1));
-
groupPanelPeople.add(editPeopleOccupation, formLayout1.getConstraints(3, 1));
-
-
splitPanelMainSecond.setLayout(borderLayout3);
-
splitPanelMainSecond.add(groupPanelPeople, UIBorderLayout.CENTER);
-
-
splitPanelMain.add(splitPanelMainFirst, UISplitPanel.FIRST_COMPONENT);
-
splitPanelMain.add(splitPanelMainSecond, UISplitPanel.SECOND_COMPONENT);
-
-
setLayout(borderLayout1);
-
add(splitPanelMain, UIBorderLayout.CENTER);
-
}
-
}
This is the PeopleWorkScreen class. It really doesn't do much except containing a Split panel, having on the left a table and on the right a few editors. That does look quite manageable, also it does look as one would expect in the GUI.
But it is a very good starting point for our experiments. As an additional note, we will lose VisionX support with all the changes we will make, unfortunately, that can't be circumvented I'm afraid.
Annotations for editors
The first thought one has when it comes to reducing code is to use Annotations to deliver important information. We can do this here, too, to remove some setup from the editors and instead add it to a more central place. So we will create a new Annotation which is holding the required information for the editors, which are the name of the databook and the name of the column.
-
@Retention(RUNTIME)
-
@Target(FIELD)
-
public @interface DataBound
-
{
-
public String dataBookName();
-
public String columnName();
-
}
-
public class PeopleWorkScreen extends DataSourceWorkScreen
-
{
-
@DataBound(dataBookName = "people", columnName = "FIRST_NAME")
-
private UIEditor editPeopleFirstName = new UIEditor();
-
@DataBound(dataBookName = "people", columnName = "LAST_NAME")
-
private UIEditor editPeopleLastName = new UIEditor();
-
@DataBound(dataBookName = "people", columnName = "DATE_OF_BIRTH")
-
private UIEditor editPeopleDateOfBirth = new UIEditor();
-
@DataBound(dataBookName = "people", columnName = "OCCUPATION")
-
private UIEditor editPeopleOccupation = new UIEditor();
-
private UILabel labelFirstName = new UILabel();
-
private UILabel labelLastName = new UILabel();
-
private UILabel labelDateofBirth = new UILabel();
-
private UILabel labelOccupation = new UILabel();
-
private UIFormLayout formLayout1 = new UIFormLayout();
-
private UIGroupPanel groupPanelPeople = new UIGroupPanel();
-
private NavigationTable tablePeople = new NavigationTable();
-
private UIPanel splitPanelMainFirst = new UIPanel();
-
private UIPanel splitPanelMainSecond = new UIPanel();
-
private UISplitPanel splitPanelMain = new UISplitPanel();
-
private UIBorderLayout borderLayout1 = new UIBorderLayout();
-
private UIBorderLayout borderLayout2 = new UIBorderLayout();
-
private UIBorderLayout borderLayout3 = new UIBorderLayout();
-
private RemoteDataBook rdbPeople = new RemoteDataBook();
-
-
public PeopleWorkScreen(
-
IWorkScreenApplication pApplication,
-
AbstractConnection pConnection,
-
Map pParameter) throws Throwable
-
{
-
super(pApplication, pConnection, pParameter);
-
-
initializeModel();
-
initializeUI();
-
}
-
-
private void initializeModel() throws Throwable
-
{
-
rdbPeople.setName("people");
-
rdbPeople.setDataSource(getDataSource());
-
rdbPeople.open();
-
}
-
-
private void initializeUI() throws Throwable
-
{
-
tablePeople.setMaximumSize(new UIDimension(450, 350));
-
tablePeople.setDataBook(rdbPeople);
-
tablePeople.setAutoResize(false);
-
-
labelFirstName.setText("First Name");
-
-
labelLastName.setText("Last Name");
-
-
labelDateofBirth.setText("Date of Birth");
-
-
labelOccupation.setText("Occupation");
-
-
splitPanelMainFirst.setLayout(borderLayout2);
-
splitPanelMainFirst.add(tablePeople, UIBorderLayout.CENTER);
-
-
groupPanelPeople.setText("People");
-
groupPanelPeople.setLayout(formLayout1);
-
groupPanelPeople.add(labelFirstName, formLayout1.getConstraints(0, 0));
-
groupPanelPeople.add(editPeopleFirstName, formLayout1.getConstraints(1, 0));
-
groupPanelPeople.add(labelLastName, formLayout1.getConstraints(2, 0));
-
groupPanelPeople.add(editPeopleLastName, formLayout1.getConstraints(3, 0));
-
groupPanelPeople.add(labelDateofBirth, formLayout1.getConstraints(0, 1));
-
groupPanelPeople.add(editPeopleDateOfBirth, formLayout1.getConstraints(1, 1));
-
groupPanelPeople.add(labelOccupation, formLayout1.getConstraints(2, 1));
-
groupPanelPeople.add(editPeopleOccupation, formLayout1.getConstraints(3, 1));
-
-
splitPanelMainSecond.setLayout(borderLayout3);
-
splitPanelMainSecond.add(groupPanelPeople, UIBorderLayout.CENTER);
-
-
splitPanelMain.add(splitPanelMainFirst, UISplitPanel.FIRST_COMPONENT);
-
splitPanelMain.add(splitPanelMainSecond, UISplitPanel.SECOND_COMPONENT);
-
-
setLayout(borderLayout1);
-
add(splitPanelMain, UIBorderLayout.CENTER);
-
}
-
}
As one can see, we've annotated the fields with our new Annotation and removed the setup lines from the initializeUI() function. Of course, that alone does nothing, we must add the processing of the annotations somewhere. The best place would be in the application when the workscreen is opened.
-
public class AnnotationAwareApplication extends ProjX
-
{
-
public AnnotationAwareApplication(UILauncher pLauncher) throws Throwable
-
{
-
super(pLauncher);
-
}
-
-
@Override
-
public synchronized IWorkScreen openWorkScreen(
-
String pClassName,
-
Modality pModality,
-
AbstractConnection pConnection,
-
Map pParameters,
-
boolean pSingleInstance) throws Throwable
-
{
-
DataSourceWorkScreen workScreen = (DataSourceWorkScreen)super.openWorkScreen(
-
pClassName,
-
pModality,
-
pConnection,
-
pParameters,
-
pSingleInstance);
-
-
for (Field field : workScreen.getClass().getDeclaredFields())
-
{
-
DataBound dataBound = field.getAnnotation(DataBound.class);
-
-
if (dataBound != null && IEditor.class.isAssignableFrom(field.getType()))
-
{
-
IDataBook dataBook = workScreen.getDataSource().
-
getDataBook(dataBound.dataBookName());
-
String columnName = dataBound.columnName();
-
-
field.setAccessible(true);
-
-
IEditor editor = (IEditor)field.get(workScreen);
-
-
editor.setDataRow(dataBook);
-
editor.setColumnName(columnName);
-
}
-
}
-
-
return workScreen;
-
}
-
-
}
Easy enough, it removes some lines from the screen and the logic added inside the application is straightforward.
The upside is that we now have the information of the data binding right there in the field declaration, the downside is that it doesn't save us that much. In theory the gain is only 1 line per editor. We could do better than that.
Automatic editors
Annotations are interesting, but don't fit well here. We could do better when we extend the UIEditor itself and fit it with the necessary logic to be able to find its data binding on its own. That means that it would need to go upward at some point and find its parent workscreen to retrieve the datasource (which holds all the databooks). Walking upwards in the hierarchy is straightforward, the question is when we should do that? The best point in time would be when addNotify() is being called, because at that point the GUI is being created, so we are very, very likely inside the initializeUI() function of the workscreen or at a later point.
-
public class AutomaticEditor extends UIEditor
-
{
-
private String dataBookName = null;
-
private String columnName = null;
-
-
public AutomaticEditor(String pDataBookName, String pColumnName)
-
{
-
super();
-
-
dataBookName = pDataBookName;
-
columnName = pColumnName;
-
}
-
-
@Override
-
public void addNotify()
-
{
-
DataSourceWorkScreen workScreen = getParentWorkScreen();
-
-
try
-
{
-
setDataRow(workScreen.getDataSource().getDataBook(dataBookName));
-
setColumnName(columnName);
-
}
-
catch (ModelException e)
-
{
-
ExceptionHandler.raise(e);
-
}
-
-
super.addNotify();
-
}
-
-
private DataSourceWorkScreen getParentWorkScreen()
-
{
-
IContainer parent = getParent();
-
-
while (parent != null && !(parent instanceof DataSourceWorkScreen))
-
{
-
parent = parent.getParent();
-
}
-
-
return (DataSourceWorkScreen)parent;
-
}
-
}
-
public class PeopleWorkScreen extends DataSourceWorkScreen
-
{
-
private UIEditor editPeopleFirstName=new AutomaticEditor("people","FIRST_NAME");
-
private UIEditor editPeopleLastName = new AutomaticEditor("people", "LAST_NAME");
-
private UIEditor editPeopleDoB = new AutomaticEditor("people", "DATE_OF_BIRTH");
-
private UIEditor editPeopleOccupation=new AutomaticEditor("people","OCCUPATION");
-
private UILabel labelFirstName = new UILabel();
-
private UILabel labelLastName = new UILabel();
-
private UILabel labelDateofBirth = new UILabel();
-
private UILabel labelOccupation = new UILabel();
-
private UIFormLayout formLayout1 = new UIFormLayout();
-
private UIGroupPanel groupPanelPeople = new UIGroupPanel();
-
private NavigationTable tablePeople = new NavigationTable();
-
private UIPanel splitPanelMainFirst = new UIPanel();
-
private UIPanel splitPanelMainSecond = new UIPanel();
-
private UISplitPanel splitPanelMain = new UISplitPanel();
-
private UIBorderLayout borderLayout1 = new UIBorderLayout();
-
private UIBorderLayout borderLayout2 = new UIBorderLayout();
-
private UIBorderLayout borderLayout3 = new UIBorderLayout();
-
private RemoteDataBook rdbPeople = new RemoteDataBook();
-
-
public PeopleWorkScreen(
-
IWorkScreenApplication pApplication,
-
AbstractConnection pConnection,
-
Map pParameter) throws Throwable
-
{
-
super(pApplication, pConnection, pParameter);
-
-
initializeModel();
-
initializeUI();
-
}
-
-
private void initializeModel() throws Throwable
-
{
-
rdbPeople.setName("people");
-
rdbPeople.setDataSource(getDataSource());
-
rdbPeople.open();
-
}
-
-
private void initializeUI() throws Throwable
-
{
-
tablePeople.setMaximumSize(new UIDimension(450, 350));
-
tablePeople.setDataBook(rdbPeople);
-
tablePeople.setAutoResize(false);
-
-
labelFirstName.setText("First Name");
-
-
labelLastName.setText("Last Name");
-
-
labelDateofBirth.setText("Date of Birth");
-
-
labelOccupation.setText("Occupation");
-
-
splitPanelMainFirst.setLayout(borderLayout2);
-
splitPanelMainFirst.add(tablePeople, UIBorderLayout.CENTER);
-
-
groupPanelPeople.setText("People");
-
groupPanelPeople.setLayout(formLayout1);
-
groupPanelPeople.add(labelFirstName, formLayout1.getConstraints(0, 0));
-
groupPanelPeople.add(editPeopleFirstName, formLayout1.getConstraints(1, 0));
-
groupPanelPeople.add(labelLastName, formLayout1.getConstraints(2, 0));
-
groupPanelPeople.add(editPeopleLastName, formLayout1.getConstraints(3, 0));
-
groupPanelPeople.add(labelDateofBirth, formLayout1.getConstraints(0, 1));
-
groupPanelPeople.add(editPeopleDoB, formLayout1.getConstraints(1, 1));
-
groupPanelPeople.add(labelOccupation, formLayout1.getConstraints(2, 1));
-
groupPanelPeople.add(editPeopleOccupation, formLayout1.getConstraints(3, 1));
-
-
splitPanelMainSecond.setLayout(borderLayout3);
-
splitPanelMainSecond.add(groupPanelPeople, UIBorderLayout.CENTER);
-
-
splitPanelMain.add(splitPanelMainFirst, UISplitPanel.FIRST_COMPONENT);
-
splitPanelMain.add(splitPanelMainSecond, UISplitPanel.SECOND_COMPONENT);
-
-
setLayout(borderLayout1);
-
add(splitPanelMain, UIBorderLayout.CENTER);
-
}
-
}
That removes the complete setup of the editor from the code, with the exception of the constructor, and instead the editor itself manages its own setup, neat. So I think we can't lose any more of the editor associated code at this point, the only further possibility would be to associate a "default" databook with the workscreen so that we can scrap the databook name from the constructor. Or, we could scan the fields of the screen and build the editors based on their name, but that is a rather fragile approach.
Inline fields
While we are at it and we will lose VisionX support anyway, we can inline the fields directly into the initializeUI() function to shed more lines.
-
public class PeopleWorkScreen extends DataSourceWorkScreen
-
{
-
private RemoteDataBook rdbPeople = new RemoteDataBook();
-
-
public PeopleWorkScreen(
-
IWorkScreenApplication pApplication,
-
AbstractConnection pConnection,
-
Map pParameter) throws Throwable
-
{
-
super(pApplication, pConnection, pParameter);
-
-
initializeModel();
-
initializeUI();
-
}
-
-
private void initializeModel() throws Throwable
-
{
-
rdbPeople.setName("people");
-
rdbPeople.setDataSource(getDataSource());
-
rdbPeople.open();
-
}
-
-
private void initializeUI() throws Throwable
-
{
-
NavigationTable tablePeople = new NavigationTable();
-
tablePeople.setMaximumSize(new UIDimension(450, 350));
-
tablePeople.setDataBook(rdbPeople);
-
tablePeople.setAutoResize(false);
-
-
UIPanel splitPanelMainFirst = new UIPanel();
-
splitPanelMainFirst.setLayout(new UIBorderLayout());
-
splitPanelMainFirst.add(tablePeople, UIBorderLayout.CENTER);
-
-
UIFormLayout formLayout1 = new UIFormLayout();
-
-
UIGroupPanel groupPanelPeople = new UIGroupPanel();
-
groupPanelPeople.setText("People");
-
groupPanelPeople.setLayout(formLayout1);
-
groupPanelPeople.add(new UILabel("First Name"),
-
formLayout1.getConstraints(0, 0));
-
groupPanelPeople.add(new AutomaticEditor("people", "FIRST_NAME"),
-
formLayout1.getConstraints(1, 0));
-
groupPanelPeople.add(new UILabel("Last Name"),
-
formLayout1.getConstraints(2, 0));
-
groupPanelPeople.add(new AutomaticEditor("people", "LAST_NAME"),
-
formLayout1.getConstraints(3, 0));
-
groupPanelPeople.add(new UILabel("Date of Birth"),
-
formLayout1.getConstraints(0, 1));
-
groupPanelPeople.add(new AutomaticEditor("people", "DATE_OF_BIRTH"),
-
formLayout1.getConstraints(1, 1));
-
groupPanelPeople.add(new UILabel("Occupation"),
-
formLayout1.getConstraints(2, 1));
-
groupPanelPeople.add(new AutomaticEditor("people", "OCCUPATION"),
-
formLayout1.getConstraints(3, 1));
-
-
UIPanel splitPanelMainSecond = new UIPanel();
-
splitPanelMainSecond.setLayout(new UIBorderLayout());
-
splitPanelMainSecond.add(groupPanelPeople, UIBorderLayout.CENTER);
-
-
UISplitPanel splitPanelMain = new UISplitPanel();
-
splitPanelMain.add(splitPanelMainFirst, UISplitPanel.FIRST_COMPONENT);
-
splitPanelMain.add(splitPanelMainSecond, UISplitPanel.SECOND_COMPONENT);
-
-
setLayout(new UIBorderLayout());
-
add(splitPanelMain, UIBorderLayout.CENTER);
-
}
-
}
That makes the code harder to read but in the end it saves a lot of lines.
Automatic databooks
Now the only part of the screen which we can now reduce is the model part. This is a little more complicated, though. First, if we create a databook on the fly it's a little bit more complicated to get it customized, so we have to assume that we can use the databooks "as they are", with all the necessary setup being done on the server side (which is ideal anyway). Second, ideally we could let the connection create the databooks as they are needed, that is a little bit more complicated and for this example we will add that logic to the screen instead. So the PeopleWorkScreen gains the method getDataBook(String) which gets or creates a databook for the given name and returns it.
-
public class PeopleWorkScreen extends DataSourceWorkScreen
-
{
-
public PeopleWorkScreen(
-
IWorkScreenApplication pApplication,
-
AbstractConnection pConnection,
-
Map pParameter) throws Throwable
-
{
-
super(pApplication, pConnection, pParameter);
-
-
initializeUI();
-
}
-
-
private void initializeUI() throws Throwable
-
{
-
NavigationTable tablePeople = new NavigationTable();
-
tablePeople.setMaximumSize(new UIDimension(450, 350));
-
tablePeople.setDataBook(getDataBook("people"));
-
tablePeople.setAutoResize(false);
-
-
UIPanel splitPanelMainFirst = new UIPanel();
-
splitPanelMainFirst.setLayout(new UIBorderLayout());
-
splitPanelMainFirst.add(tablePeople, UIBorderLayout.CENTER);
-
-
UIFormLayout formLayout1 = new UIFormLayout();
-
-
UIGroupPanel groupPanelPeople = new UIGroupPanel();
-
groupPanelPeople.setText("People");
-
groupPanelPeople.setLayout(formLayout1);
-
groupPanelPeople.add(new UILabel("First Name"),
-
formLayout1.getConstraints(0, 0));
-
groupPanelPeople.add(new AutomaticEditor("people", "FIRST_NAME"),
-
formLayout1.getConstraints(1, 0));
-
groupPanelPeople.add(new UILabel("Last Name"),
-
formLayout1.getConstraints(2, 0));
-
groupPanelPeople.add(new AutomaticEditor("people", "LAST_NAME"),
-
formLayout1.getConstraints(3, 0));
-
groupPanelPeople.add(new UILabel("Date of Birth"),
-
formLayout1.getConstraints(0, 1));
-
groupPanelPeople.add(new AutomaticEditor("people", "DATE_OF_BIRTH"),
-
formLayout1.getConstraints(1, 1));
-
groupPanelPeople.add(new UILabel("Occupation"),
-
formLayout1.getConstraints(2, 1));
-
groupPanelPeople.add(new AutomaticEditor("people", "OCCUPATION"),
-
formLayout1.getConstraints(3, 1));
-
-
UIPanel splitPanelMainSecond = new UIPanel();
-
splitPanelMainSecond.setLayout(new UIBorderLayout());
-
splitPanelMainSecond.add(groupPanelPeople, UIBorderLayout.CENTER);
-
-
UISplitPanel splitPanelMain = new UISplitPanel();
-
splitPanelMain.add(splitPanelMainFirst, UISplitPanel.FIRST_COMPONENT);
-
splitPanelMain.add(splitPanelMainSecond, UISplitPanel.SECOND_COMPONENT);
-
-
setLayout(new UIBorderLayout());
-
add(splitPanelMain, UIBorderLayout.CENTER);
-
}
-
-
public IDataBook getDataBook(String pDataBookName) throws ModelException
-
{
-
IDataBook dataBook = getDataSource().getDataBook(pDataBookName);
-
-
if (dataBook == null)
-
{
-
dataBook = new RemoteDataBook();
-
dataBook.setName(pDataBookName);
-
dataBook.setDataSource(getDataSource());
-
dataBook.open();
-
}
-
-
return dataBook;
-
}
-
}
and the changed editor
-
public class AutomaticEditor extends UIEditor
-
{
-
private String dataBookName = null;
-
private String columnName = null;
-
-
public AutomaticEditor(String pDataBookName, String pColumnName)
-
{
-
super();
-
-
dataBookName = pDataBookName;
-
columnName = pColumnName;
-
}
-
-
@Override
-
public void addNotify()
-
{
-
PeopleWorkScreen workScreen = getParentWorkScreen();
-
-
try
-
{
-
setDataRow(workScreen.getDataBook(dataBookName));
-
setColumnName(columnName);
-
}
-
catch (ModelException e)
-
{
-
ExceptionHandler.raise(e);
-
}
-
-
super.addNotify();
-
}
-
-
private PeopleWorkScreen getParentWorkScreen()
-
{
-
IContainer parent = getParent();
-
-
while (parent != null && !(parent instanceof PeopleWorkScreen))
-
{
-
parent = parent.getParent();
-
}
-
-
return (PeopleWorkScreen)parent;
-
}
-
}
This introduces a quite unhealthy coupling between the PeopleWorkScreen and the AutomaticEditor, we can live with that for this example, but in a real application we'd have to correctly structure these objects. For example by introducing a workscreen base class, or by actually extending the datasource to provide this functionality.
If we ingore the method we just introduced in the PeopleWorkScreen, we actually managed to reduce the screen class a great deal and removed code which can be automated. That means that, at least theoretically, the likelihood of errors as we write the code has been lowered and it has become easier to write error free code. We can also now see that the screen class has become quite minimal, there really isn't anything left that we could restructure or remove.
Lifecycle objects
Now let us jump to the server and have a look at the associated lifecycle object.
-
public class People extends Session
-
{
-
public DBStorage getPeople() throws Exception
-
{
-
DBStorage dbsPeople = (DBStorage)get("people");
-
if (dbsPeople == null)
-
{
-
dbsPeople = new DBStorage();
-
dbsPeople.setWritebackTable("PEOPLE");
-
dbsPeople.setDBAccess(getDBAccess());
-
dbsPeople.open();
-
-
put("people", dbsPeople);
-
}
-
return dbsPeople;
-
}
-
}
There isn't much here that we can do, but a few small things might make it easier to write in the future. Again, we will be losing VisionX support if we edit this "too much", but we are far beyond that point anyway.
Reducing error potential
What can happen easily with managing storages is that one does copy and paste code and misses to edit the key, under which the storage is stored, correctly. That can happen quickly especially if there is a complex object hierarchy in place. So what we can do is separating the storing logic from the creation logic.
-
public class People extends Session
-
{
-
public DBStorage getPeople() throws Exception
-
{
-
return getOrCreateStorage("people", (storage) ->
-
{
-
storage.setWritebackTable("PEOPLE");
-
});
-
}
-
-
protected DBStorage getOrCreateStorage(String pName, Consumer pStorageConfigurer)
-
throws Exception
-
{
-
DBStorage storage = (DBStorage)get(pName);
-
if (storage == null)
-
{
-
storage = new DBStorage();
-
storage.setDBAccess(getDBAccess());
-
-
pStorageConfigurer.accept(storage);
-
-
if (!storage.isOpen())
-
{
-
storage.open();
-
}
-
-
put(pName, storage);
-
}
-
-
return storage;
-
}
-
}
This has the upside that it would reduce the error potential greatly, especially with a lot of storages, and it would allow us to add additional safety checks, for example if a storage with that name is already existing and would be overridden. But it has the downside that with each access a new lambda function is created, that might or might not be important for your use case.
If we try to mitigate this side effect we will quickly reach certain limits, for example if we change the process to a registry based approach we will find that we've again introduced the very thing we wanted to remove. The storage configurer must be registered at the registry with a name and the storage must be received with a name, so we'd be back at square one, actually.
A more dynamic approach
To get rid of this duplication of the name we could create a registry with the configurers and use a generic approach to retrieving it. The problem here is that that is not possible at compile time, so what we need would actually be a system that catches non-matched calls for storages in the client/server connection and redirects it to our generic method. That is unfortunately not trivial and I will only outline this approach here now.
-
public class People extends Session
-
{
-
private Map<String, Consumer> registeredStorages = new HashMap();
-
-
public People()
-
{
-
super();
-
-
registerStorage("people", (storage) ->
-
{
-
storage.setWritebackTable("PEOPLE");
-
});
-
}
-
-
protected DBStorage getOrCreateStorage(String pName) throws Exception
-
{
-
DBStorage storage = (DBStorage)get(pName);
-
if (storage == null)
-
{
-
storage = new DBStorage();
-
storage.setDBAccess(getDBAccess());
-
-
registeredStorages.get(pName).accept(storage);
-
-
if (!storage.isOpen())
-
{
-
storage.open();
-
}
-
-
put(pName, storage);
-
}
-
-
return storage;
-
}
-
-
protected void registerStorage(String pName, Consumer pStorageConfigurer)
-
{
-
registeredStorages.put(pName, pStorageConfigurer);
-
}
-
}
Now all that is missing would be that the connection is calling our getOrCreateStorage(String) method with the name of the requested object. Of course there is also a lot of error checking missing here, but that is not relevant for our example.
And again, if we remove the additional code we added, because it should be contained inside a base class, we have managed to reduce the code on the server side significantly. From here going any further becomes complicated, for example, again, one might to work with Annotations but that won't save us anything here anymore.
Conclusion
From time to time it is necessary to let the thoughts drift and think about different things, for example how to reduce the code inside of classes which are automatically generated and managed. Once I had a nice discussion with someone online on how to do things differently in their library. We had a little back and forth on what could be done and in the end we agreed that it should stay the way it was because none of the approaches we came up with had a significant advantage over the current state. In the end they said that, even though nothing came of it, it was an important discussion to have because from time to time one had to engage in such stimulated, technical and theoretical discussions, and I agree completely with that. It is important to be open to new ideas and consider different approaches even when they don't end up taken.
![]() Development | rzenz | 03/01/2018 |
Development | rzenz | 03/01/2018 | ![]() Comments (0)
Comments (0)


 RSS-Feed