This website uses cookies for visitor traffic analysis. By using the website, you agree with storing the cookies on your computer.More information

Posts tagged: JavaFX

RaspberryPi JavaFX + Sound

Media support is not included in the current JDK8 preview. If you want to play audio files, it's maybe a problem if you think that it's not possible :)

Don't use JavaFX for the job. Simply use Java Sound API. We successfully used it for our tests with Beagleboard-xm and RaspberryPi (jdk7, jdk8 javafx preview).

Here's the source code of our, old but still good, implementation:

/*
 * Copyright 2012 SIB Visions GmbH
 *
 * Licensed under the Apache License, Version 2.0 (the "License"); you may not
 * use this file except in compliance with the License. You may obtain a copy of
 * the License at
 *
 * http://www.apache.org/licenses/LICENSE-2.0
 *
 * Unless required by applicable law or agreed to in writing, software
 * distributed under the License is distributed on an "AS IS" BASIS, WITHOUT
 * WARRANTIES OR CONDITIONS OF ANY KIND, either express or implied. See the
 * License for the specific language governing permissions and limitations under
 * the License.
 *
 *
 * History
 *
 * 15.12.2005 - [JR] - creation
 */

package com.sibvisions.apps.util;

import java.io.ByteArrayInputStream;
import java.io.ByteArrayOutputStream;
import java.io.File;
import java.io.FileInputStream;
import java.io.IOException;
import java.io.InputStream;
import java.util.Hashtable;
import java.util.Vector;

import javax.sound.sampled.AudioFormat;
import javax.sound.sampled.AudioInputStream;
import javax.sound.sampled.AudioSystem;
import javax.sound.sampled.DataLine;
import javax.sound.sampled.LineUnavailableException;
import javax.sound.sampled.SourceDataLine;

import com.sibvisions.util.type.FileUtil;

/**
 * The <code>AudioPlayer</code> plays audio files. Currently only wav, au and midi files are supported.
 *
 * @author René Jahn
 */

public final class AudioPlayer
{
    //~~~~~~~~~~~~~~~~~~~~~~~~~~~~~~~~~~~~~~~~~~~~~~~~~~~~~~~~~~~~~~~~
    // Class members
    //~~~~~~~~~~~~~~~~~~~~~~~~~~~~~~~~~~~~~~~~~~~~~~~~~~~~~~~~~~~~~~~~

  /** thread list for background playback. */
  private static Vector<Thread> vThreads = null;
 
  /** list of dataline connections for playback. */
  private static Vector<SourceDataLine> vSdl = new Vector<SourceDataLine>();
 
  /** Cached audio files. Reduces resource usage during repatedly playback. */
  private static Hashtable<String, byte[]> htAudioCache = new Hashtable<String, byte[]>();
 
  /** sync object. */
  private static final Object SYNC = new Object();
 
  //~~~~~~~~~~~~~~~~~~~~~~~~~~~~~~~~~~~~~~~~~~~~~~~~~~~~~~~~~~~~~~~~
  // Initialization
  //~~~~~~~~~~~~~~~~~~~~~~~~~~~~~~~~~~~~~~~~~~~~~~~~~~~~~~~~~~~~~~~~

  /**
   * Invisible constructor because <code>AudioPlayer</code> is a utility
   * class.
   */

  private AudioPlayer()
  {
  }
 
    //~~~~~~~~~~~~~~~~~~~~~~~~~~~~~~~~~~~~~~~~~~~~~~~~~~~~~~~~~~~~~~~~
    // User-defined methods
    //~~~~~~~~~~~~~~~~~~~~~~~~~~~~~~~~~~~~~~~~~~~~~~~~~~~~~~~~~~~~~~~~

  /**
   * Gets the current player thread count.
   *
   * @return the number of player threads
   */

  public static int getPlayerThreads()
  {
    if (vThreads != null)
    {
      return vThreads.size();
    }
    else
    {
      return 0;
    }
  }
 
  /**
   * Playback an audio file.
   *
   * @param pFileName the filename
   * @param pBackground <code>true</code> to start playback as background process. The method call returns
   *                    immediately.
   */

  public static synchronized void play(final String pFileName, boolean pBackground)
  {
    AudioPlayer.play(new String[] {pFileName}, 0, pBackground);
  }

  /**
   * Playback multiple audio files.
   *
   * @param pFileName list of file names
   * @param pDelay delay between playback
   * @param pBackground <code>true</code> to start playback as background process. The method call returns
   *                    immediately.
   */

  public static synchronized void play(final String[] pFileName, final long pDelay, boolean pBackground)
  {
    Thread thPlay;
    Thread th;

   
    if (pBackground)
    {
      thPlay = new Thread()
      {
        public void run()
        {
          if (Thread.currentThread() == this)
          {
            if (pFileName != null)
            {
              for (int i = 0, anz = pFileName.length; i < anz; i++)
              {
                AudioPlayer.play(pFileName[i]);
               
                //Use defined delay between playback, but ignore delay after the last track
                if (pDelay > 0 && i + 1 < anz)
                {
                  try
                  {
                    Thread.sleep(pDelay);
                  }
                  catch (InterruptedException ie)
                  {
                    //nothing to be done
                  }
                }
              }
            }
          }
         
          vThreads.remove(this);
        }
      };
     
      if (vThreads == null)
      {
        vThreads = new Vector<Thread>();
      }
     
      //Clear zombies
      for (int i = 0; i < vThreads.size();)
      {
        th = (Thread)vThreads.get(i);
       
        if (!th.isAlive())
        {
          th.interrupt();
          vThreads.remove(i);
         
          th = null;
        }
        else
        {
          i++;
        }
      }
     
      vThreads.add(thPlay);
     
      thPlay.setPriority(Thread.MAX_PRIORITY);
      thPlay.start();
    }
    else
    {
      if (pFileName != null)
      {
        for (int i = 0, anz = pFileName.length; i < anz; i++)
        {
          AudioPlayer.play(pFileName[i]);
         
          //Use defined delay between playback, but ignore delay after the last track
          if (pDelay > 0 && i + 1 < anz)
          {
            try
            {
              Thread.sleep(pDelay);
            }
            catch (InterruptedException ie)
            {
              //nothing to be done
            }
          }
        }
      }
    }
  }
 
    /**
     * Playback a sound file.
     *
     * @param pFileName the filename
     */

    public static void play(String pFileName)
    {
    AudioInputStream ais = null;
 
    AudioFormat adf;
   
    DataLine.Info dli;
   
    SourceDataLine sdl;
   
    byte[] byData = new byte[128000];

    int iData;
   
   
    try
    {
      byte[] byCache = (byte[])htAudioCache.get(pFileName);
     
      if (byCache != null)
      {
        ais = AudioSystem.getAudioInputStream(new ByteArrayInputStream(byCache));
      }
      else
      {
        File fiDirect = new File(pFileName);
       
        //use byte array because most InputStreams do not support "seek"
        //we avoid Exceptions
        if (fiDirect.exists())
        {
          byCache = FileUtil.getContent(new FileInputStream(fiDirect));
        }
        else
        {
          byCache = FileUtil.getContent(AudioPlayer.class.getResourceAsStream(pFileName));
        }

        if (byCache != null)
        {
          cacheFile(pFileName, byCache);

          ais = AudioSystem.getAudioInputStream(new ByteArrayInputStream(byCache));
        }
        else
        {
          throw new IllegalArgumentException("No content found for : " + pFileName);
        }
      }
     
      byCache = null;
    }
    catch (Exception e)
    {
      e.printStackTrace();
      return;
    }

    adf = ais.getFormat();
    dli = new DataLine.Info(SourceDataLine.class, adf);

    try
    {
      sdl = (SourceDataLine) AudioSystem.getLine(dli);
      sdl.open(adf);
     
      synchronized (SYNC)
      {
        vSdl.add(sdl);
      }
    }
    catch (Exception e)
    {
      e.printStackTrace();
      return;
    }

    sdl.start();

    try
    {
      while ((iData = ais.read(byData, 0, byData.length)) != -1)
      {
        sdl.write(byData, 0, iData);
      }
    }
    catch (IOException ioe)
    {
      ioe.printStackTrace();
    }

    sdl.drain();

    synchronized (SYNC)
    {
      sdl.flush();
      sdl.stop();
     
      sdl.close();
     
      vSdl.remove(sdl);
    }

    try
    {
      ais.close();
      ais = null;
    }
    catch (IOException ioe)
    {
      //nothing to be done
    }
   
    sdl = null;
    adf = null;
    }
 
    /**
     * Stop playback of all audio files.
     */

    public static void stopSound()
    {
      synchronized (SYNC)
      {
        if (vSdl != null)
        {
        //stop all playbacks
        for (SourceDataLine sdl : vSdl)
        {
          try
          {
            sdl.flush();
            sdl.stop();
         
            //Don't call this because it crashes the VM and results in a core dump
            //sdl.close();
          }
          catch (Exception e)
          {
            //nothing to be done
          }
        }
       
        vSdl.clear();
        }
      }
    }
   
    /**
     * Caches audio data for later use. If the file is already cached the cache won't
     * be overwritten.
     *
     * @param pFileName the filename
     * @param pData audio data
     */

    public static void cacheFile(String pFileName, byte[] pData)
    {
      cacheFile(pFileName, pData, false);
    }

    /**
     * Caches audio data for later use.
     *
     * @param pFileName the filename
     * @param pData audio data
     * @param bIgnoreCache <code>true</code> to overwrite already cached data, <code>false</code>
     *                     doesn't overwrite cached data
     */

    public static void cacheFile(String pFileName, byte[] pData, boolean bIgnoreCache)
    {
      if (!bIgnoreCache && htAudioCache.containsKey(pFileName))
      {
        return;
      }
     
      if (pFileName != null && pData != null)
      {
        htAudioCache.put(pFileName, pData);
      }
    }
   
    /**
     * Caches an audio file for later use. The file content will be read automatically.
     * If the file is already cached the cache won't be overwritten.
     *
     * @param pFileName the filename
     */

    public static void cacheFile(String pFileName)
    {
      cacheFile(pFileName, false);
    }

    /**
     * Caches an audio file for later use. The file content will be read automatically.
     *
     * @param sFileName Dateiname
     * @param bIgnoreCache true um bereits gecachte Daten zu überschreiben
     */

    public static void cacheFile(String sFileName, boolean bIgnoreCache)
    {
      //don't overwrite cache, if not specified
      if (!bIgnoreCache && htAudioCache.containsKey(sFileName))
      {
        return;
      }
     
      InputStream is = AudioPlayer.class.getResourceAsStream(sFileName);
     
      ByteArrayOutputStream bos = new ByteArrayOutputStream();

    byte[] byData = new byte[128000];
     
      int iData;
     
     
      try
      {
      while ((iData = is.read(byData, 0, byData.length)) != -1)
      {
        bos.write(byData, 0, iData);
      }
   
      htAudioCache.put(sFileName, bos.toByteArray());
     
      bos.close();
      is.close();
      }
      catch (IOException ioe)
      {
        //nothing to be done
      }
    }
   
} //AudioPlayer

Example wav file.

Power control with RaspberryPi, JVx and Vert.x

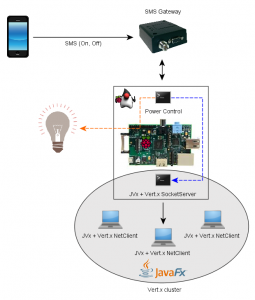
My idea was to create a programmable timer for some lamps at home. I wanted to control the timer via mobile phone (not only smartphone). I decided to use simple SMS'.

The timer app was not really a challenge and the SMS interface was also very straight forward, so I added a little bit network communication and complexity. The result:

Power control

Power control

My Hardware:

  • Raspberry Pi Model B
  • Cinterion TC65i
  • Standard table lamp
  • Solid State Relay (found here)
  • Laptop as cluster client
  • Mobile Phone :)

My software:

My first question was - Which application server should I use for my Pi? I thought that JBoss or Tomcat would be overhead and I would save resources. I decided for Vert.x and a simple socket server. I wanted to show the integration of Vert.x with JVx and so my server got a JVx application with some business logic for publishing messages.

The server "thing" was clear and for reading SMS' I wrote a simple polling app. The app reads SMS from my hardware via RS232 and forwards received SMS via JVx APIs to my server (with Vert.x' NetClient).
I didn't use the EventBus for sending messages becasue I wanted to show the seamless integration of JVx and Vert.x.

The code for forwarding messages:

MasterConnection macon = new MasterConnection(new NetSocketConnection("10.0.0.39"));
macon.setApplicationName("demo");
macon.setUserName("user");
macon.setPassword("password");
macon.setAliveInterval(-1);
macon.open();

macon.callAction("publishMessage", msg.getOriginator(), msg.getText());

The server application is a standard JVx application (only server-side). It uses a standard XmlSecurityManager without the need for a database. The "business logic" is very simple:

public Vertx getVertx()
{
    return (Vertx)get("vertx");
}

public void publishMessage(String pNr, String pMessage)
{
    System.out.println("publishMessage (" + pMessage + ")");
       
    String sNumber = pNr;

    sNumber = sNumber.substring(0, 5);

    //hide last characters
    for (int i = 5; i < pNr.length(); i++)
    {
        sNumber += "*";
    }
       
    JsonObject jsobj = new JsonObject();
    jsobj.putString("number", sNumber);
    jsobj.putString("message", pMessage);
       
    getVertx().eventBus().publish("sms.received", jsobj);
}

I made some tests with vert.x clustering and decided to implement a (very) simple JavaFX application that shows published SMS'. The application contains following code:

vertx = Vertx.newVertx(25502, "10.0.0.11");

EventBus ebus = vertx.eventBus();
ebus.registerHandler("sms.received", new Handler<Message<JsonObject>>()
{
    public void handle(final Message<JsonObject> pMessage)
    {
        Platform.runLater(new Runnable()
        {
            public void run()
            {
                try
                {
                    mdb.insert(false);
                    mdb.setValues(new String[] {"NUMBER", "MESSAGE"},
                                  new String[] {pMessage.body.getString("number"),
                                                pMessage.body.getString("message")});
                    mdb.saveSelectedRow();
                }
                catch (ModelException me)
                {
                    throw new RuntimeException(me);
                }
            }
        });
    }
});

Finally, I created a short video that shows all in action. It shows three applications on the same laptop. The first is the JavaFX application that shows published SMS. The second is the Power control (includes SMS check), started via PuTTY. The third application is the server instance, started via PuTTY. You can see a table lamp that will be turned on and off with SMS, sent from a smartphone.

Enjoy it :)


Power Control with RaspberryPi

Welcome RaspberryPi

I ordered a Raspberry Pi model B two month ago from RS-Components... it arrived today. It was not a problem because I had a Beagleboard for tests and JavaFX for Pi is available since yesterday.

One of my friends received a (more expensive) Pi some weeks ago and we made some tests with JBossAS 7.1 and JavaSE 7 (without JavaFX). It worked like a charm and it's cool to have a JBossAS on a Pi. But without JavaFX it was not too funny.

So, back to my Pi.

The installation was very easy: Simply read the short version of Stephen Chin or the long version.

I had some smaller problems:

  • Win32DiskImager did not work with my Laptop and the builtin card-reader, and I had no external reader
  • I didn't know the username and password for login

I solved the first problem with flashnul:

flashnul 2 -L 2012-12-16-wheezy-raspbian.img

My first attempt didn't work - Raspberry Pi didn't boot (no flashing lights on my Pi - only PWR, screen was black) .... Wrote the image once again and removed the device cleanly from my Laptop - worked.

The second problem was not really a problem, but I had no idea. Used pi as username and raspberry as password (see here)

First actions after boot and setup:

apt-get update
apt-get install librxtx-java mc locate

Pi is up and running, but the image is not comparable with my Angstrom image. Some modules/drivers are missing... but that's not too important now.

My Time tracking software works on my Pi without problems. Startup time is a little bit longer as on my Beagleboard.

The next steps are some performance tests...

But Pi is definitely a MUST have.
Order your own one asap and enter the world of embedded systems with JavaFX.

Time tracking in Action

If you read previous articles about my experiments with JavaFX and embedded hardware you might be interested in the result.

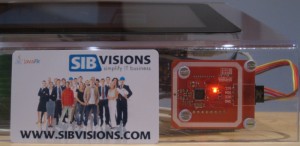
SIB Visions card

SIB Visions card

  This is the NFC card reader and one of our user cards.

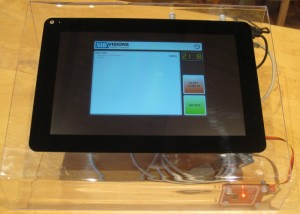
Hardware and case

Hardware and case

  This is the whole system with a nice looking case. This case is hand-made and you can't buy it in a store :)

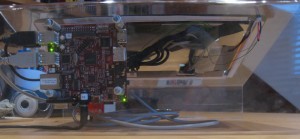
Beagleboard-xm

Beagleboard-xm

  The back shows the Beagleboard.

Finally, a short video because the solution needs sound to be cool:


Time tracking in action


There are 3 different sounds: OK, OK + completed (whistle) and ERROR. If you hear OK, it means "come in", OK + completed means "Go out". An ERROR means "unknown card".

Have fun.

JavaFX TimeTracking with Beagleboard-xm

My first JavaFX "embedded" application is ready.

The application is a time tracking tool. It uses RFID cards for user authentication and sends time entries to a remote Redmine project management tool. It works great.... now.

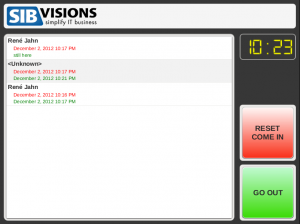
Before I continue, a screenshot of the current application taken via VNC from my Beagleboard:

Time tracking

Time tracking

... I'm not a UI designer ;-)

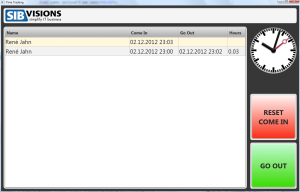
My first design was a little bit different because I began to develop on my Windows Laptop and used some nice transitions and effects. The first layout was this:

Time tracking (Laptop)

Time tracking (Laptop)

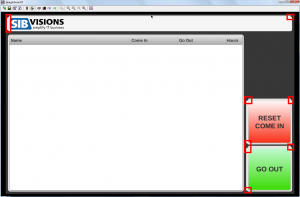
Some problems with this design - on my Beagleboard - were bad peformance of TableView updates, slow transitions, problems with innershadow effect:

Time tracking (1:1)

Time tracking (1:1)

I don't know why the shadow effect worked for the table border, but the UI was not usable. It was too slow and the clock was not shown because of other problems described from Gerrit Grunwald.

After short frustration, I began to tweak:

  • Replaced TableView with ListView
  • Replaced Clock from JFXtras with a styled Label
  • Smaller buttons for better performance
  • Specific stylesheets for embedded environment

It was not a lot of work to change the application, but I thought the performance would be better. It's very important to reduce effects and transitions for applications that should run on an embedded device like Beagleboard-xm. It's a little bit like developing mobile applications (touch instead of mouse, screen size, performance, ...).

The current JavaFX embedded runtime is not perfect and the performance could be better, but if you are careful, you can create very useful applications.

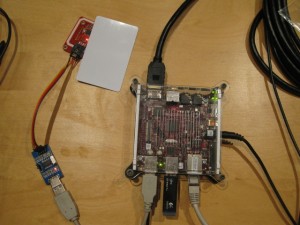
And finally a picture of my hardware:

Hardware

Hardware

JavaFX development for Beagleboard xm

TableView

TableView

  This is my first application for the board.
It's not rocket science but was already developed :)

This screenshot was captured via VNC. The installation of VNC was very easy:

opkg install angstrom-x11vnc-xinit
killall Xorg

Wait until X was restarted and use a VNC Viewer (e.g. TightVNC) to create a connection to port 5900. More details are available here.

The application was developed with JavaFX 2.2.2, but on the beagleboard (with the current preview version) it is version 8.0.0-ea-b55. If you develop custom controls be careful because SkinBase was moved to javafx.scene.control. If you want develop with an 8.x version, you must download a JDK8 EA version. It works for me but some methods are different in 8.x as in 2.x and of course they removed some deprecated "impl_" methods :)

Another problem with my test application is that I have no scrollbars (see screenshot) and scrolling with my mouse does not work. Sort on header and resize columns is not possible.

Don't expect too much from the current JavaFX support for ARM. It's in a very early phase, but if you create your own "controls" you get a powerful toy.

JavaFX + ScenicView + Javeleon = LiveFX

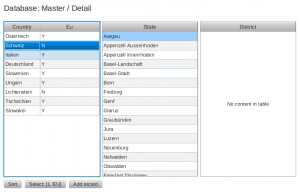
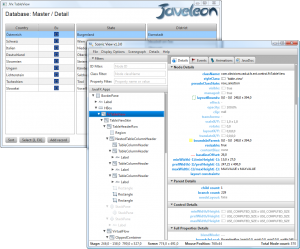
JavaFx + ScenicView

JavaFx + ScenicView

  If you use JavaFX for development, normally you create applications with a GUI - so far so good. How often do you restart your application to check if a simple code change works? Many times?

If you develop a control, wouldn't it be great to see your code changes immediately?

We use Javeleon for application development together with JVx because it saves a lot of development time and creates live feeling. We thought that Javeleon could also be useful for JavaFX application or control development because application restarts always waste development time.

The integration of Javeleon in your JavaFX application is not difficult, simply add two VM arguments

-Xbootclasspath/p:"D:\temp\JaveleonBoot\default"
-javaagent:D:\libs\javeleon\javeleon.jar

to your launch/run configuration (use your directories). If you use Javeleon for development, it reduces application restarts to a bare minimum, but you should know the limits.

Javeleon reloads classes directly in your VM, but it does not recreate members of your loaded instances and does not call the constructor of your classes again.

You should use a Javeleon reload listener to trigger reload of resource files (css, xml) and call specific methods after reload e.g. call init again.

Imagine you have a GUI with a button and on click you start the creation of a report or execute some business logic, etc. If you change the source code for your button click action or change a method used in the action, your application always invokes the changed "code".

Sounds tricky? It isn't, but live coding is not well known.

If you are interested, simply try it out!

I'm not sure whether the current downloadable Javeleon 3.0 is up-to-date because I found some smaller problems with ScenicView. The problems were already fixed and hopefully released asap.
My working version number: Javeleon version 3.0.1 dev 2012-11-13 (r699).

If you have problems, simply contact the Javeleon team.

JavaFX and my Beagleboard xm

Inspired from the JavaOne Technical Keynote, I ordered a Beagleboard xm and all needed stuff like touch display, micro sd card, power supply and a nice looking case. I was fascinated from the features of the board and the JavaFX preview version for ARM - and it is not really expensive, of course it costs more than the Raspberry Pi (btw the Raspi will be my next project).

I developed different applications with GSM modems, push buttons (buzzers) - connected to RS232 - in the past, with desktop hardware. The applications were written in Java and used rxtx heavily. So I thought that it would be a good start to test my old applications or the RS232 communication with my new board. The next step could be a modern JavaFX UI for my old applications.

That was the idea... but first it was important to build/create the SD card for the board. I had different options because Oracle published a document about the creation of their image and Gerrit Grunwald created his own image based on the documentation. He published his files and it was possible to use his image.

I decided to build my own image because I love to hack with linux, I wanted to understand the build process and I did not want to miss the experience. To be honest, the documentation was so short and simple and I thought it should be very easy :)

Well, I won't post all steps for the creation of my image, instead I'll post my problems with the original guide and the differences. Start with this documentation and go to the chapter Rebuilding Ångström 12.05.

I loaded Ubuntu 12.04.1 LTS Desktop and installed it in a fresh VirtualBox VM (30G disk image is enough, but 40G is better). The installation was not very special, only standard packages. After the installation I did:

apt-get update
apt-get upgrade

I continued with the installation of important tools, as described in the documentation, but don't forget the package gawk and please install ia32-libs-multiarch. The next steps from the documentation worked like a charm... but I had some smaller problems with my proxy. The configuration was not the problem because documentation mentions proxy setup. I'm not sure if the cause of the problem was the old squid version or an old configuration file. In order to use git through my proxy, I had to allow CONNECT to port 9418:

//new
acl git_port port 9418

//new
http_access allow CONNECT git_port
//existing
http_access deny CONNECT !SSL_ports

In my environment the http URL did not work, so I switched to https and git clone worked. During the build I had two problems. The first was a manual cancel of the build process because I pressed the wrong keys. But it was no problem to start the build again because it continued (standard make behaviour) and did not restart the whole build. The other problem was with XML parsing (xmlto/xmlling failed with docbook... fetch). The problem was gone after some experiments... I am not sure what exactly solved the problem because I installed the docbook-utils again and restarted my VM and afterwards the build continued without errors?

The Oracle documentation contains the info that the build process "takes several hours to run". In my case and with my environment, the whole build process took about 24 hours ;-)

After successful creation of the SD card, it was time to power up the board. I did not attach a serial console and was a little bit unsure what happened, because my screen (standard LCD 19" without touch) only showed a beagleboard image, but hurray the first start was faster than described - about 10 minutes (class 10 SD Card, 8G) - and gnome started automatically.

I continued with JDK + examples installation and verified that everything worked - and it did!

One problem was that gnome was not repainted after I stopped a JavaFX application, but maybe I should not use gnome together with JavaFX (I read this anywhere, but can't remember).

The documentation describes that you must restart the Beagleboard xm because it is not possible to close the OGLES2Water demo... C'mon it's linux. If you have no better ideas, simply kill the OGLES2Water process and gnome and restart gnome. That's it.

If you are working on a windows machine, I recommend winscp for file transfers, to the board, because it is a GUI for scp. I love using vi and know ALL shortcuts (believe me ;-) ) and it is a really great tool but sometimes it is easier to use "modern" tools like midnight commander. So I installed mc:

opkg update
opkg install mc

I think it's easier and you are faster with mc compared to the console.

After everything worked - it was time to test the serial input with some source code.

The beagleboard has a RS232 interface and I thought I could use it without problems - bad idea.
I started with the installation of rxtx:

opkg install rxtx
opkg install librxtx-java

(Add /usr/share/java/RXTXcomm.jar to your classpath and /var/lib/jni in your java.library.path)

After the installation, I used my existing serial interface java implementation and started my tests and had following problems:

  • rxtx did not find serial interfaces
  • the device name was /dev/ttyO2 and not /dev/ttyS0
  • dmesg|grep tty showed that /deb/ttyO2 was already in use

Fixed first problems with an additional system property:

-Dgnu.io.rxtx.SerialPorts=/dev/ttyO0:/dev/ttyO1:/dev/ttyO2:/dev/ttyO3

and set console="" in my uEnv.txt to solve the last problem. I didn't need a serial console!

The next problem was that my buzzer test application did not work because the RS232 received "no signals". I tried to find out why and found the "problem". The standard RS232 header on Beagleboard xm only supports RX, TX, GND (send and receive data) and all other pins are ignored or not connected. Read the documentation (BEAGLE-xM_SRM_REV_C_1_0.pdf, page 102) for the details.

So, I connected an USB to serial adapter and removed the manual serial port configuration for my application because /dev/ttyUSB0 was detected automatically. After a restart of my application, everything worked as expected.

Now I'm ready for a JavaFX application :)

JavaFX + Beagleboard in Action (NightHacking)

See JavaFX on a Beagleboard in Action:

NightHacking/ tour

A nice application.

Start with JavaFX embedded

Some useful links if you plan to start some experiments with JavaFX for embedded devices like Raspberry Pi or BeagleBoard-xM:

And finally, a very useful and detailed howto from Gerrit Grunwald: Who let the dogs out