My third year at SIB Visions is now coming to an end, once more it is time to take a deep breath, sit down and have a look at everything that has happened so far.
My year has been filled with a lot of non-public work, so please forgive me if I cannot go into details on various fronts.
Prototypes
Quite a few customers approached us and asked if we could implement prototypes for their projects, for one reason or another they all ended up on my table, the prototypes, that is. I like working on prototypes, because they allow me to quickly and easily explore new concepts and they have a definitive, narrow scope. Also we can finally use and show off all these cool new features we have built, like the new client-side layouts which we've created for our Vaadin implementation.
In the course of the year I've worked on over half a dozen prototypes for different customers. They all came with their own set of requirements and goals, obviously, and so they were very different to work on. The most interesting part about these prototypes is the vast spectrum of different designs and ideas. I unfortunately can't go into much detail here, but we've created application frames ranging from simple Swing input forms to highly customized Vaadin dashboards and information screens. Further down I'll talk a little more about these concepts and ideas.
Improved MySQL Fetching
Our MySQL implementation did suffer from a major problem, it fetched all records, always. That is not just an inconvenience as you can imagine, it might also lead to OutOfMemoryExceptions and similar problems. So one fine day we sat down and did take a deep look at our possibilities to either mitigate or completely fix this problem. As it turned out, the fix was far simpler and easier to implement than we imagined.
To cut an already told long story short, we are now utilizing the MySQL support to limit the fetched datasets (the LIMIT keyword). Which means that we are not only able to display initial data faster, but also fetching of more rows is now working as one would expect.
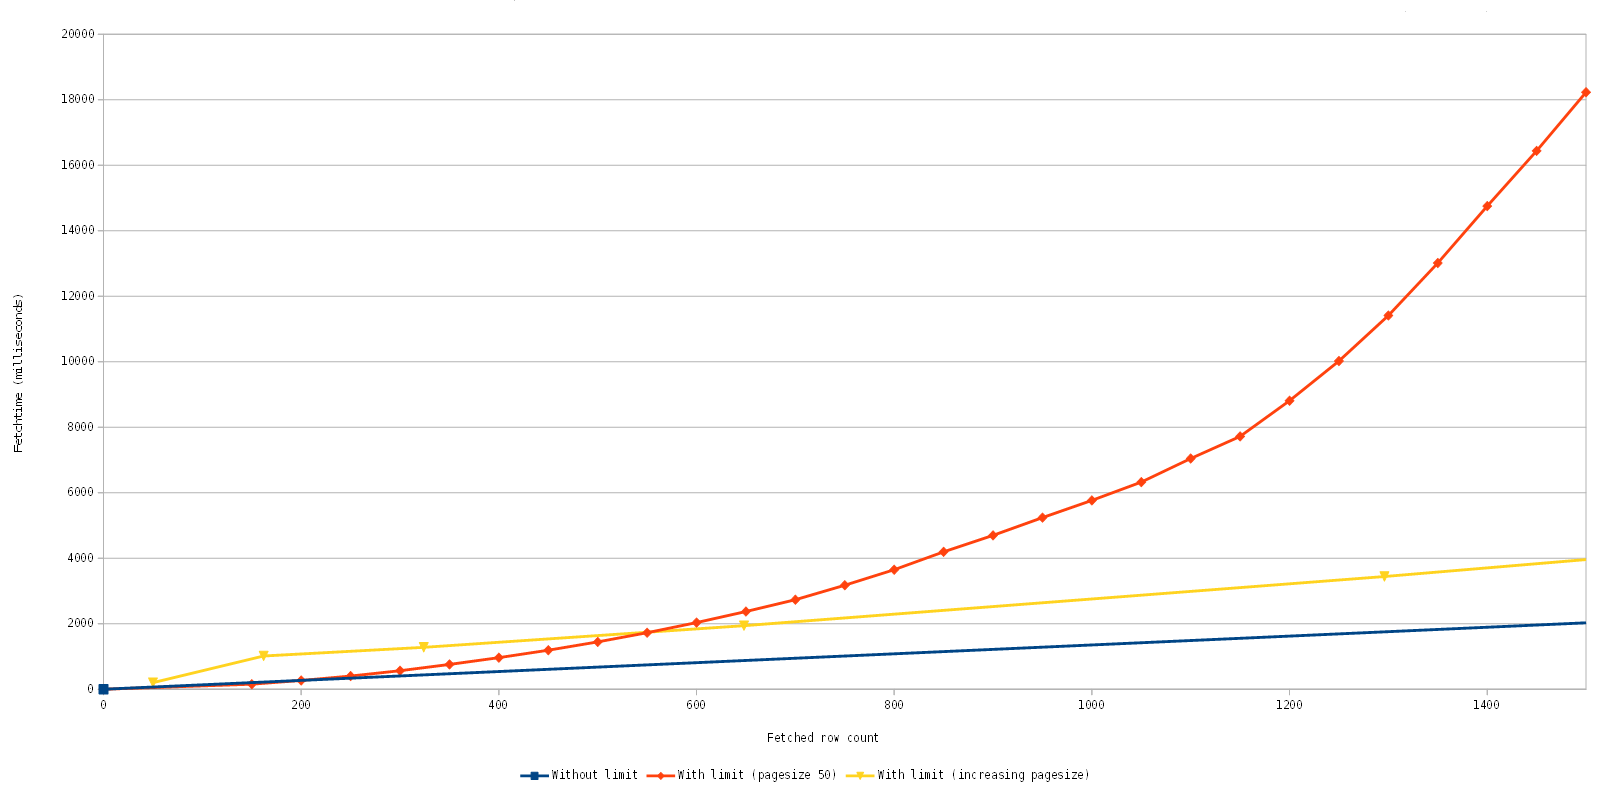
As you can see, we can now display initial data a lot quicker than before.
Vaadin Client-Side Layouts
More work has been poured into the aforementioned new client-side layouts and they are now usable for testing and (limited) productive usage.
Since the beginning we had trouble to sculpt the Vaadin layouts into the necessary shape to support our ideas about layouts. Over a year ago we started to work an new layout implementations which would operate completely client-side, most of the work was based off earlier work to improve the FormLayout. These new layouts have no logic on the server-side, but instead operate completely client-side only using "hints" from the server. That means that one can implement quite complicated layout logic (like our FormLayout) with ease.
We've implemented a new component, the so called LayoutedPanel, which can have different layouts. It does provide the base component for the new layouts but does not provide any logic itself. Instead it delegates all the layouting logic to layout implementations, that means it basically works the same as the Panel from AWT/Swing. Performing the layout logic on the client has multiple upsides, for example that the actual size of the components is known and that you can do it with a lot less elements.
Let's have a short look at how the usage of the LayoutedPanel looks like in pure Vaadin:
// Assume the following classes:
// com.sibvisions.rad.ui.vaadin.ext.ui.panel.LayoutedPanel
// com.sibvisions.rad.ui.vaadin.ext.ui.panel.layout.FormLayout
// com.vaadin.ui.Label
FormLayout layout = new FormLayout();
LayoutedPanel panel = new LayoutedPanel();
panel.setLayout(layout);
panel.addComponent(new Label("Some label"), layout.getConstraints(0, 0));
panel.addComponent(new Label("On the right side"), layout.getConstraints(-1, 0));
As you can see, it is quite easy to use and works nearly identical to our panel/layouts. Let's take a further look into what is happening on the server and what is happening on the client.
Server
On the server the LayoutedPanel manages the list of components which have been added, what layout is currently in use and the constraints of the added components. There are layout classes/implementations on the server, but they are mere placeholders (so that the LayoutedPanel on the client side knows which layout to use) and provide only limited logic (for example how to write the constraints into the state which is send to the client).
Client
On the client side there is the ClientSideLayoutedPanel, with some basic logic for adding the components to the DOM and layouting, but does otherwise delegate all the work to the current layout. The DOM structure created consists of two divs, the main element and the "canvas" element:
As mentioned in my last years post, the panel must fulfill two seemingly contradicting properties:
- It must resize itself to the size of/fill the parent container.
- It must dictate its own size.
This is necessary because the panel always must fill the parent, but at the same time it must dictate its own size so that the parent does not collapse if it does not have a fixed size set. The next stumbling block on the road was that the children of that panel would be absolute positioned. That means that the panel itself would not have a size because absolute positioned children are skipped when it comes to calculating the size of an element. Quite complex, but there is a rather simple solution:
- panel (width: 100%, height: 100%)
- canvas (min-width: 100%, min-height: 100%)
- child (position: absolute)
Additionally, the size of the canvas is always set to the same size as the panel, to prevent the element from collapsing. There is of course more logic in place to make it all feasible and usable, but I won't go into any further detail here.
The layouts itself are simple to implement, they have a list of components and the size of the container, and they set the location and size of each component.
Summary
For everyone adventurous and daring enough, the source for the new layouts is available in the com.sibvisions.rad.ui.vaadin.ext.ui.panel and com.sibvisions.rad.ui.vaadin.ext.ui.client.panel packages in the JVx.Vaadin project.
For those who want to give these new layouts a spin in their application, you must simply set a property on the VaadinFactory to enable them:
UIFactoryManager.getFactory().setProperty(
VaadinFactory.PROPERTY_COMPONENT_CLIENT_LAYOUTS,
Boolean.TRUE);
Or if you don't want to import VaadinFactory:
UIFactoryManager.getFactory().setProperty(
"vaadin.component.client_layouts",
Boolean.TRUE);
From that moment on, every layout created will use the client-side layouts. Of course you can always set it to false or true inside your code, to get either new or old layouts.
Swing GridLayout improvements
We've also improved the GridLayout in Swing, previously the Swing GridLayout would show gaps every time it is resized. After some back and forth, we've managed to implement a new way to prevent/fill these gaps. That means that the Swing GridLayout is now distributing "left over space" through out its entirety, instead of just to the last column. This creates a very "organic" feel when it is resized and it is barely noticeable that some elements are a pixel wider than others.
More databases
Hurray! Over the course of the year we've added two new databases to JVx!
SQLite
The first one is SQLite. In case you don't know what SQLite is, it is a simple, lightweight and easy to use database which is embedded into the application which uses it. That means there is no server or connection, not even a different thread for the database engine, there is just the driver which does everything. This is interesting for many reasons, but the main one is to allow embedded applications to use a lightweight database. It also supports an in-memory mode, which means that it never must write the data to any kind of storage.
We've added support for it to allow JVx applications to use it as fast and easy database backend whenever there are either system constraints (little memory or CPU power) or if there is no network connection. It can be easily used, like any other database which is supported by JVx:
DBAccess dbAccess
= DBAccess.
getDBAccess("jdbc:sqlite:");
dba.
setUrl("jdbc:sqlite:/var/data/your-database.sqlite");
dba.
open();
// Or in-memory:
DBAccess dbAccess = DBAccess.getDBAccess("jdbc:sqlite:");
dba.setUrl("jdbc:sqlite::memory:");
dba.open();
Because SQLite is designed to be used in embedded applications (or at least embedded in applications) it has quite limited functionality, like no triggers, functions or sequences. But nothing beats the minimal footprint and ease of use it has.
H2
Another database which we now support is H2. H2 is a database written completely in Java, which can be started as a server or embedded into an application directly. Last but not least, it does also support an in-memory mode and nearly most features you got used to when using databases. It can be easily used, like any other database which is supported by JVx:
DBAccess dbAccess
= DBAccess.
getDBAccess("jdbc:h2:");
dba.
setUrl("jdbc:h2:/var/data/your-database.h2");
dba.
open();
// Or in-memory:
DBAccess dbAccess = DBAccess.getDBAccess("jdbc:h2:");
dba.setUrl("jdbc:h2:mem:your-database");
dba.open();
Personally, I'm quite excited to support the H2, because it is a very easy to use and yet powerful and flexible database engine. I'm looking forward to use it in projects.
Intern
For the summer we actually had an intern which wanted to take a sneak peek into the world of software development. As it is with interns (at least around these parts), they are young, foolish and shy. What took me by surprise about this one was not only the eagerness with which he set to work, but also the will to learn new things as fast as possible. No matter how much information I threw at him (not literally, though, I was disallowed that, too) in the form of books and short lectures, he seemed to be able to digest and at least follow it, that impressed me very much. With very, very few exceptions ("Did you just fetch a Timestamp from a DataBook as String, parse that String to a Date and then convert it back to a Timestamp?") he was up to speed with Java and JVx in no time and wrote very good code. As I said, I am very impressed with how he held up.
Daniel, was a honor having you!
EPlug 1.2.5
Of course the year also brought more work on our Eclipse plugin, called EPlug, and the update to 1.2.5 was released in late summer.
Some of the highlights are:
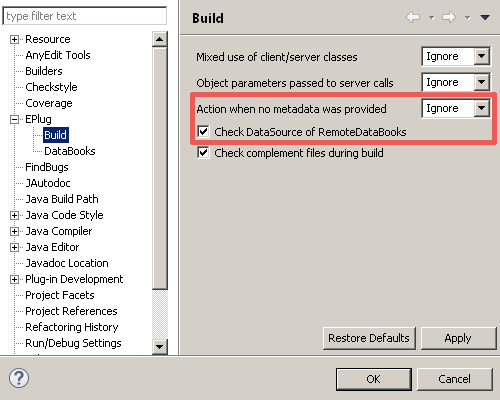
- Better hover information/tooltips
- More and better ways to retrieve metadata
- More options to control the errors/warnings issued by EPlug
- QuickFixes for misspelled column names
- And various more improvements and bug fixes
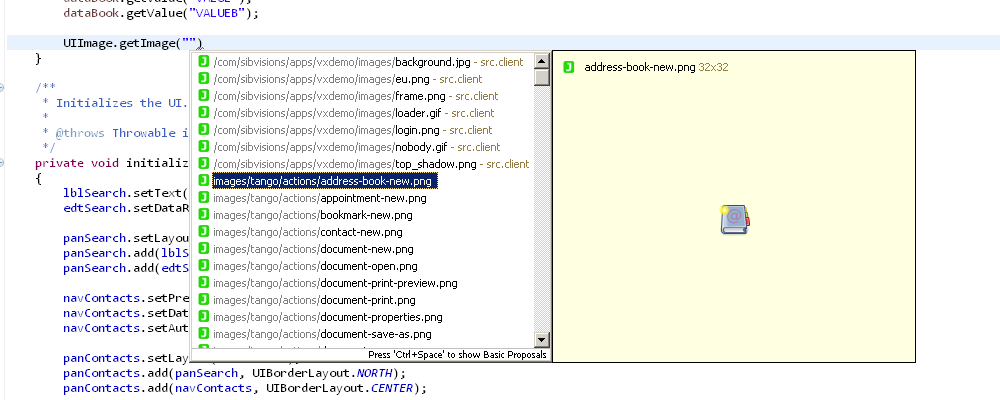
The most important new feature in this release might be the extended and improved tooltips, which look like this:
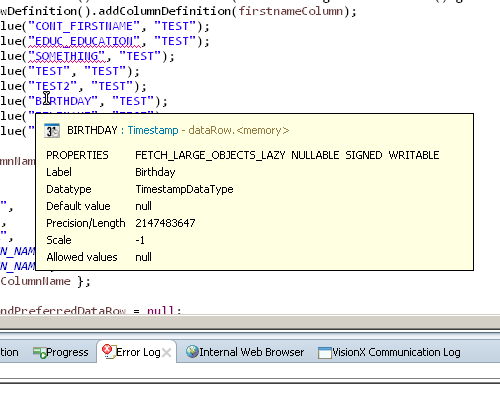
For this to work we had to rewrite how tooltips were presented to the user. For those familiar with the Eclipse tooltip system, there is the IInformationControl interface which allows to display tooltips and similar. In previous versions we used an implementation which embedded a HTML renderer into the tooltip. That allowed the clients to have absolute control over the content, but it also meant that there were sever restrictions, for example autosizing the tooltip was tough.
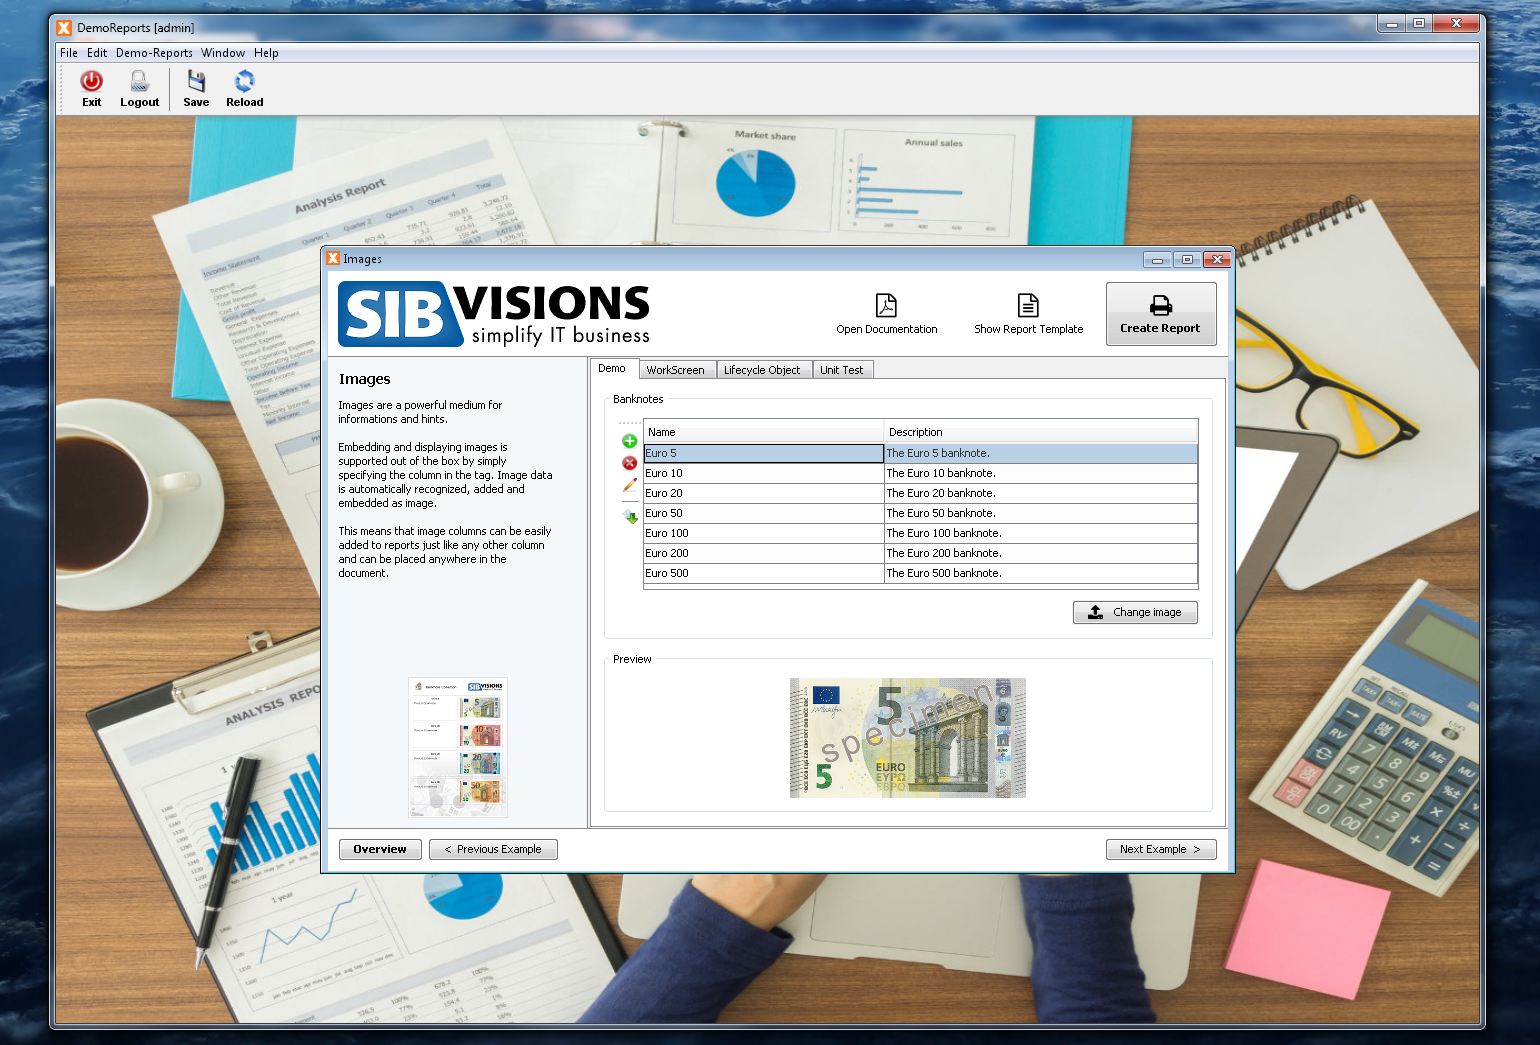
With this version we used a new implementation which uses plain old SWT components and displays well prepared information, like this list of properties. This also has the upside that we now have absolute control over how images are treated, so they are now always fully displayed in the preview:
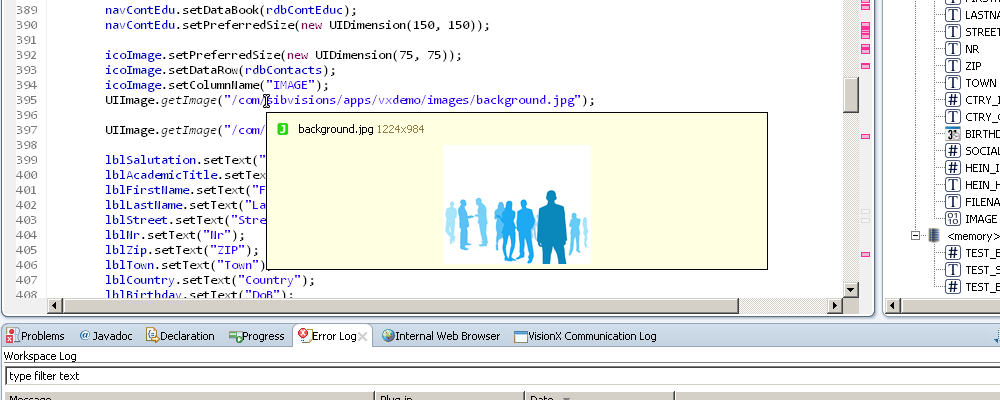
All that is accomplished by a rather simple system. It's nothing more than a control with an icon (top-left), a title (top) and the content, which can either be an object or an image. If it is an object there are just a few ifs which are determining how to display that information.
What I took away from that was a quite important lesson. The initial implementation tried to be as flexible as possible by using a HTML rendering engine, the new implementation is not as flexible, but has a clear and well defined behavior and does have definitive advantages. So my advice is one that has been repeated way too often: YAGNI, You Ain't Gonna Need It. Start out small, and start building up as the need arises.
Oracle Forms Importer Improvements
As some of you might remember, one of the first tasks I was assigned to was to create an Oracle Forms Importer, which we do offer to VisionX customers. It is a rather simple piece of software which allows to import Forms directly into VisionX.
In autumn we took another shot at it and improved the import system, so that it now recognizes and correctly imports an even more varied range of forms.
Some of the major changes are:
- Better recognition of bound controls
- Improved setup of cell editors
- Various other layout fixes (for example checkboxes are now correctly size)
- And other improvements (for example the table column order is now correct)
Importing a form is still quite because of the outlined differences between Forms and JVx, but I believe that we are on a very good track and the current solution works quite well for a wide variety of forms.
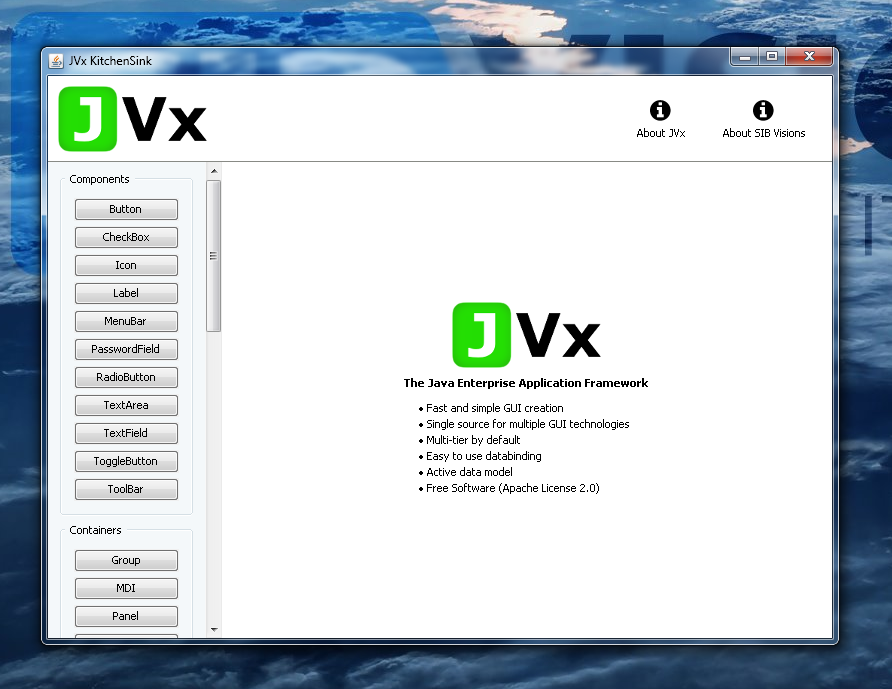
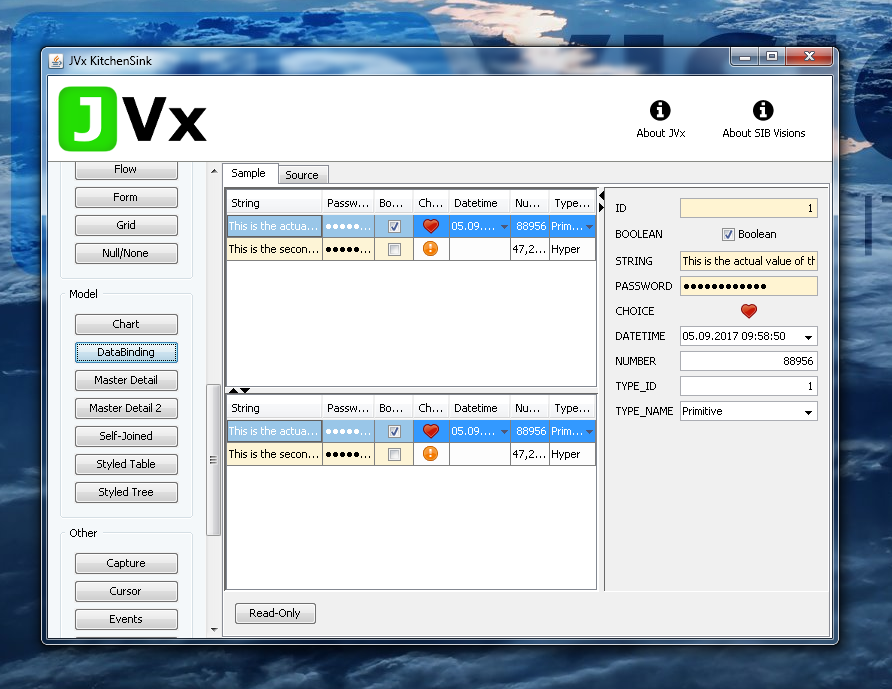
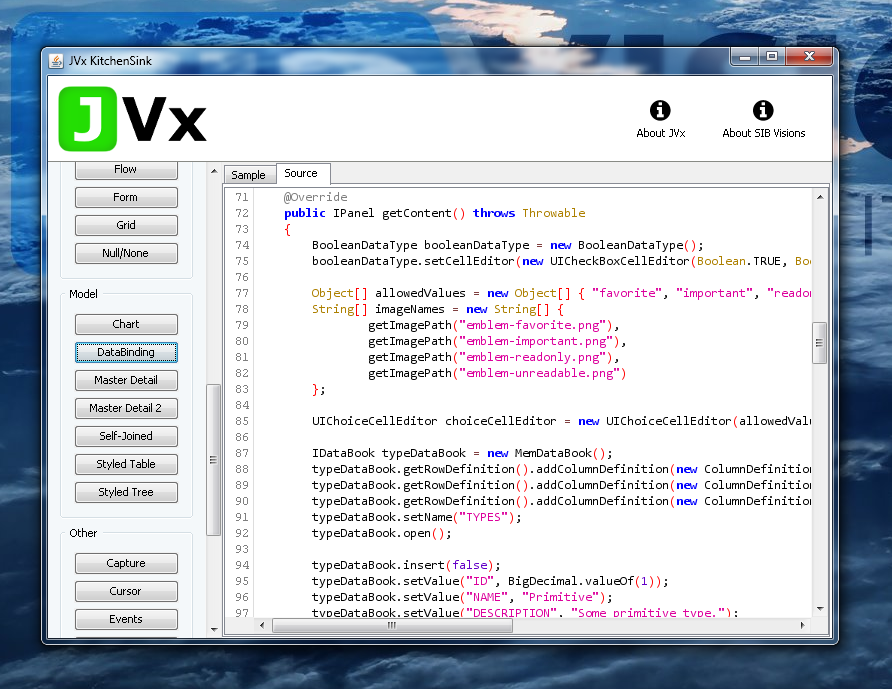
Kitchensink improvements
Our Kitchensink, a simple demo application with all components and controls, has seen some improvements throughout the last year:
- JVx has been updated
- There are now all libraries and starters in place to get it to run
- A new sample showing the FontAwesome icons
- Improved the StyledTableSample and StyledTreeSample
- Various minor improvements and more options
The Kitchensink is an Eclipse project, that means all you have to do is download or clone the source and import the project into Eclipse. With the included launchers you can now start it either with Swing or JavaFX frontend.
We are currently considering to embed a lightweight application server, so that testing the Vaadin frontend also becomes as easy as starting the Swing variant. That would mean that all three major frontends could be easily tested from the Kitchensink, which would be awesome.
Custom components
Some of our customers requested that we build custom components for them, these component should work in Swing and Vaadin in the same way. As I've outlined in a previous blog post, this is actually easily done depending on what your exact use-case is.
One of the most notable examples is a calendar which we've built on the technology layer. For Swing we've used the java-swing-calendar project and for Vaadin the Vaadin Calendar. Unfortunately, Vaadin has discontinued their Calendar for the time being. Anyway, we've implemented the calendar component and also added bindings for the databook to provide events, which was quite straight forward.
I do have to rant about the Vaadin Calendar, though. It does support two sources for the data, the Container interface and a calendar specific CalendarEventProvider interface. As we already had an implementation for a Container, I used that one and adjusted it so that it could be easily used with the Calendar. All fine and dandy, until I started to work with events, which are only providing a CalendarEvent as information on what event is affected. This CalendarEvent has zero information about the model, and I mean zero. There is no way to track the model from the CalendarEvent, you just don't know what event just was clicked or dragged. The only way is to not use a Container and instead use a CalendarEventProvider which returns custom CalendarEvent extensions which know about the model.
Otherwise implementing these components was very smooth.
EPlug 1.2.6
At the beginning of this year, we did some more work on EPlug and we could release EPlug 1.2.6 after a short time:
- Cleaned up context menu
- Resources (Images, etc.) are now also available from outside the source folders
- Even better handling of DataBooks
- Some bug fixes and other new features
The updates are available in the marketplace, so Eclipse can automatically update to it.
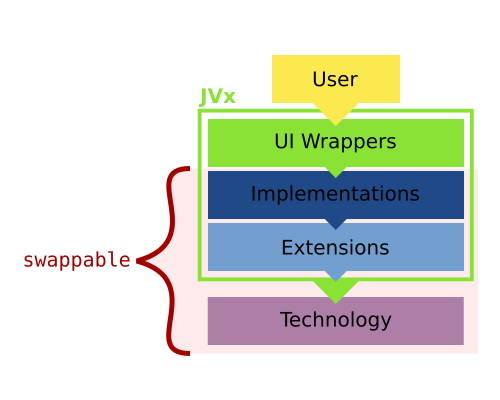
JVx References
For the last few months I have started to write a series of blog posts about various topics around JVx, the JVx Reference series. The goal is to provide a concise and easy to digest insight into JVx and various of its mechanics and techniques. There are currently three posts published:
And there are more in the pipeline:
- About DataBooks
- An Overview of how JVx works
- What Resources and UIResources are in JVx
So stay tuned!
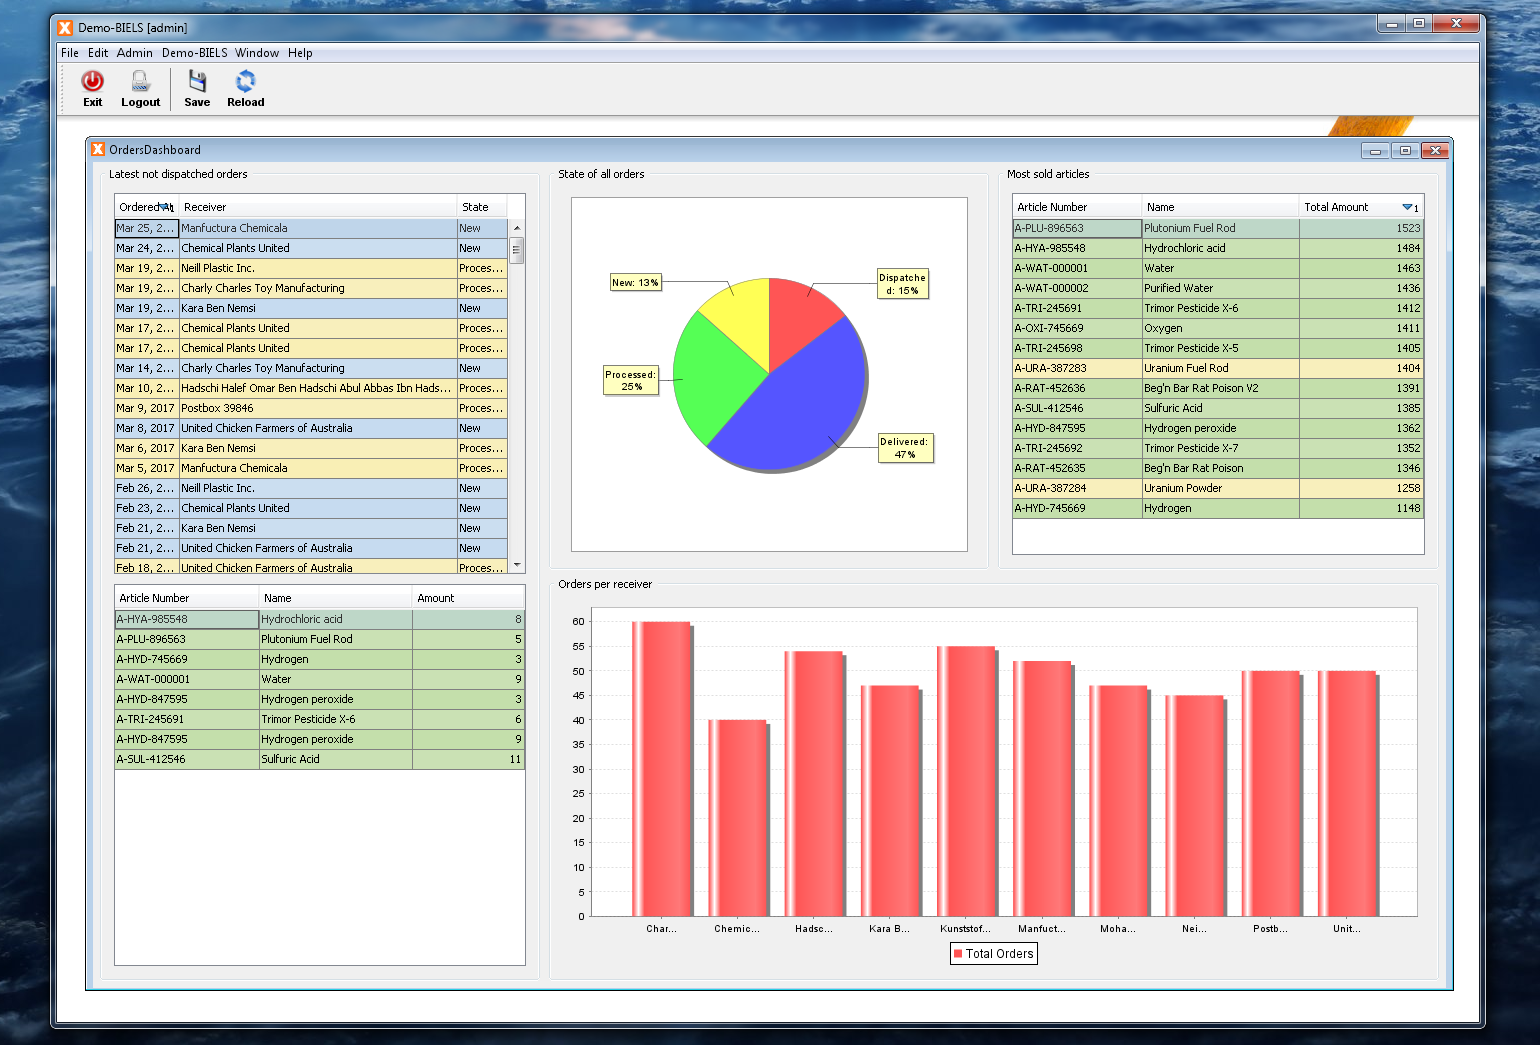
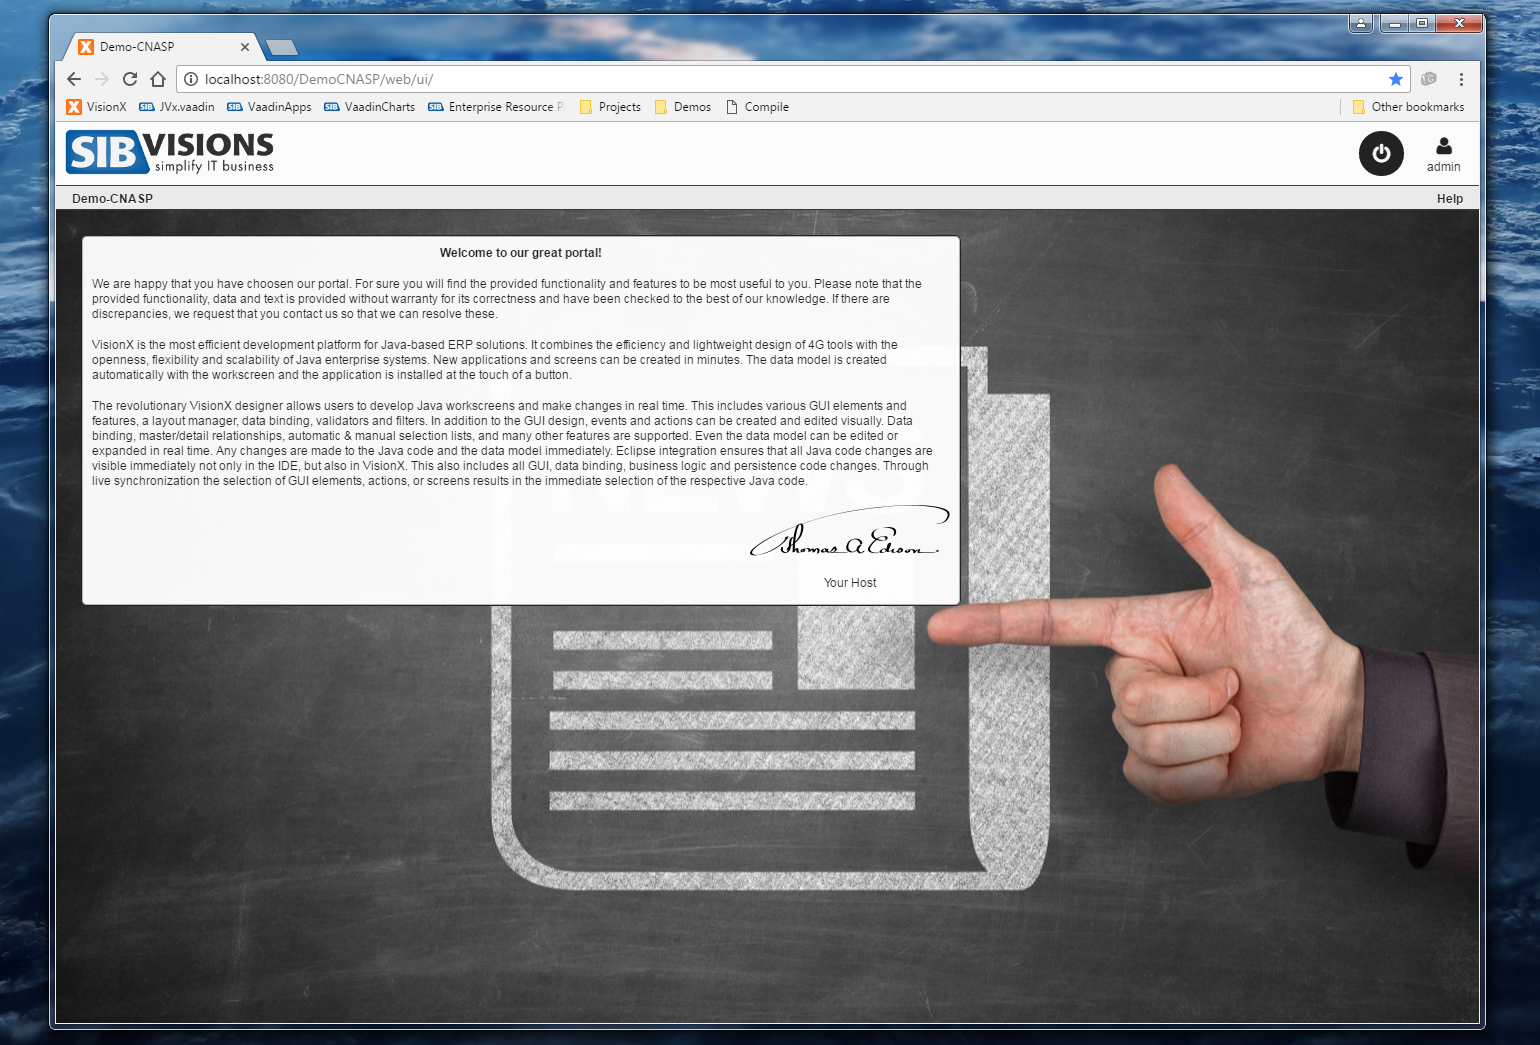
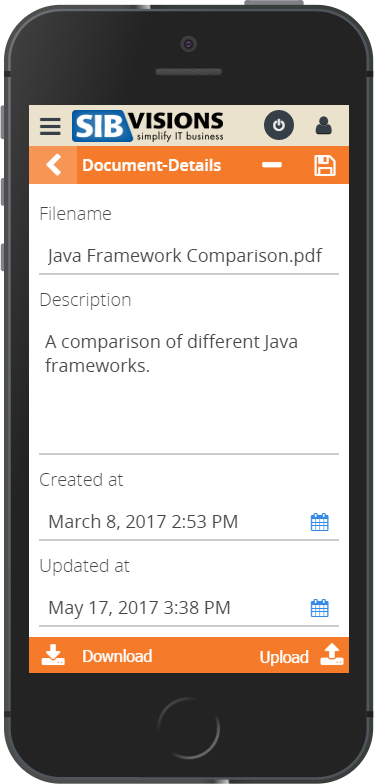
Demos
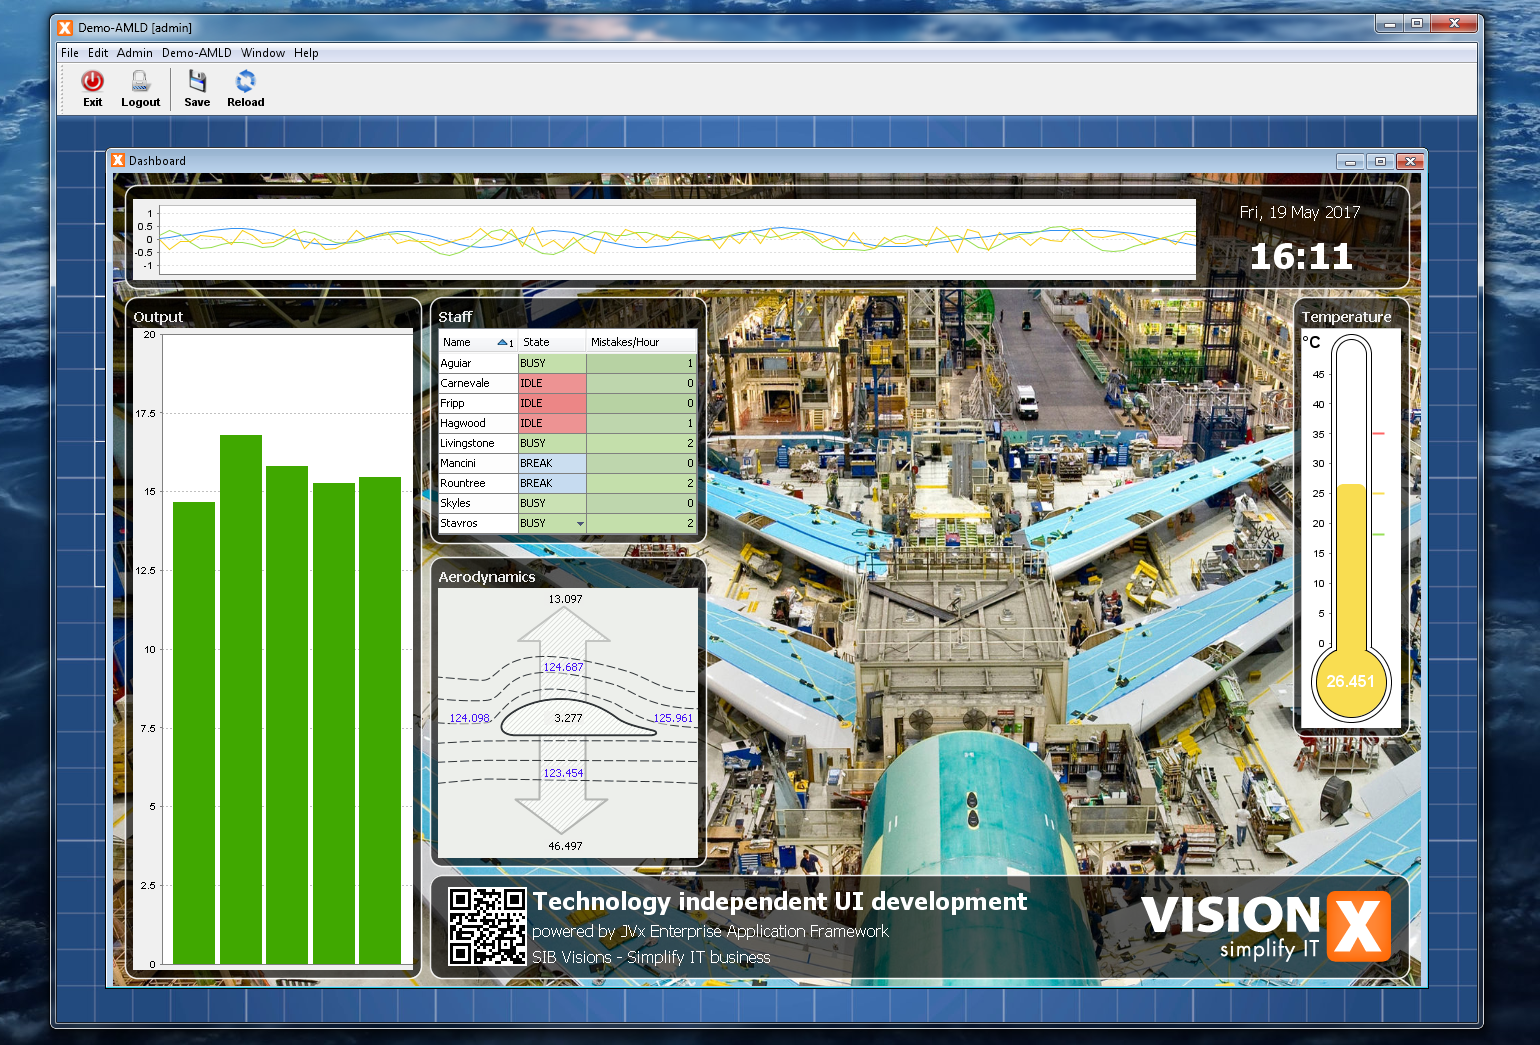
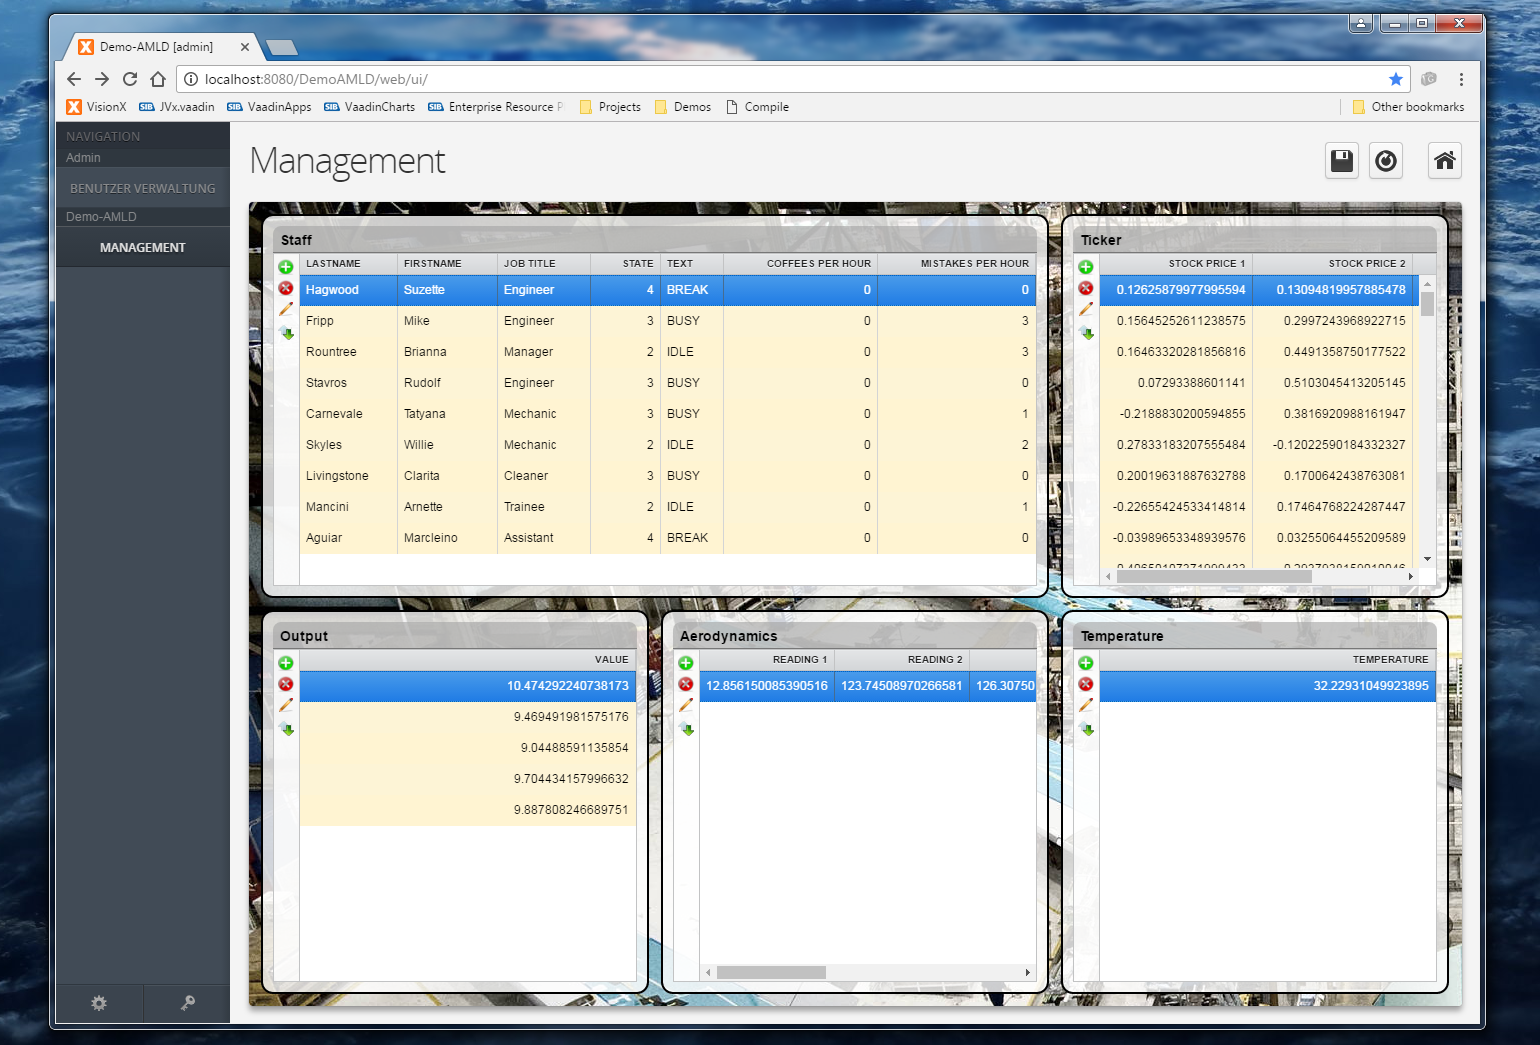
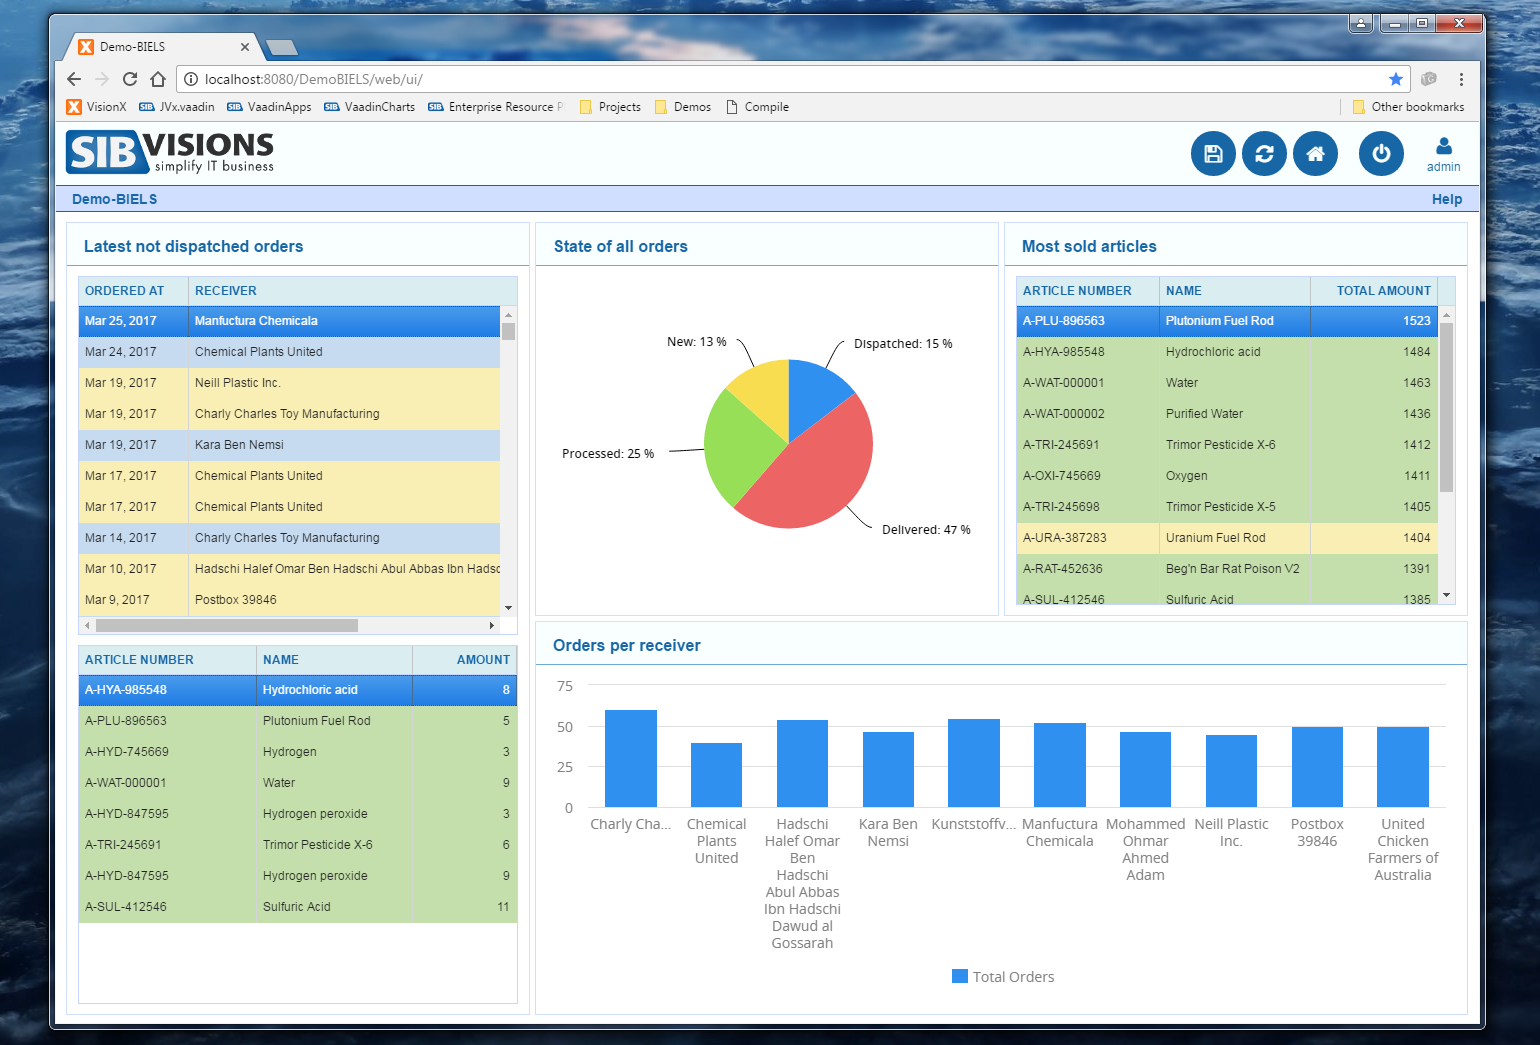
Out of the work on prototypes for our customers arose the idea to provide quite a few these new ideas to VisionX users in the form of demo projects. We've prepared these demo projects over the last few weeks and they will be released to the VisionX solution store within the next time.
Here is a sneak peek at those:
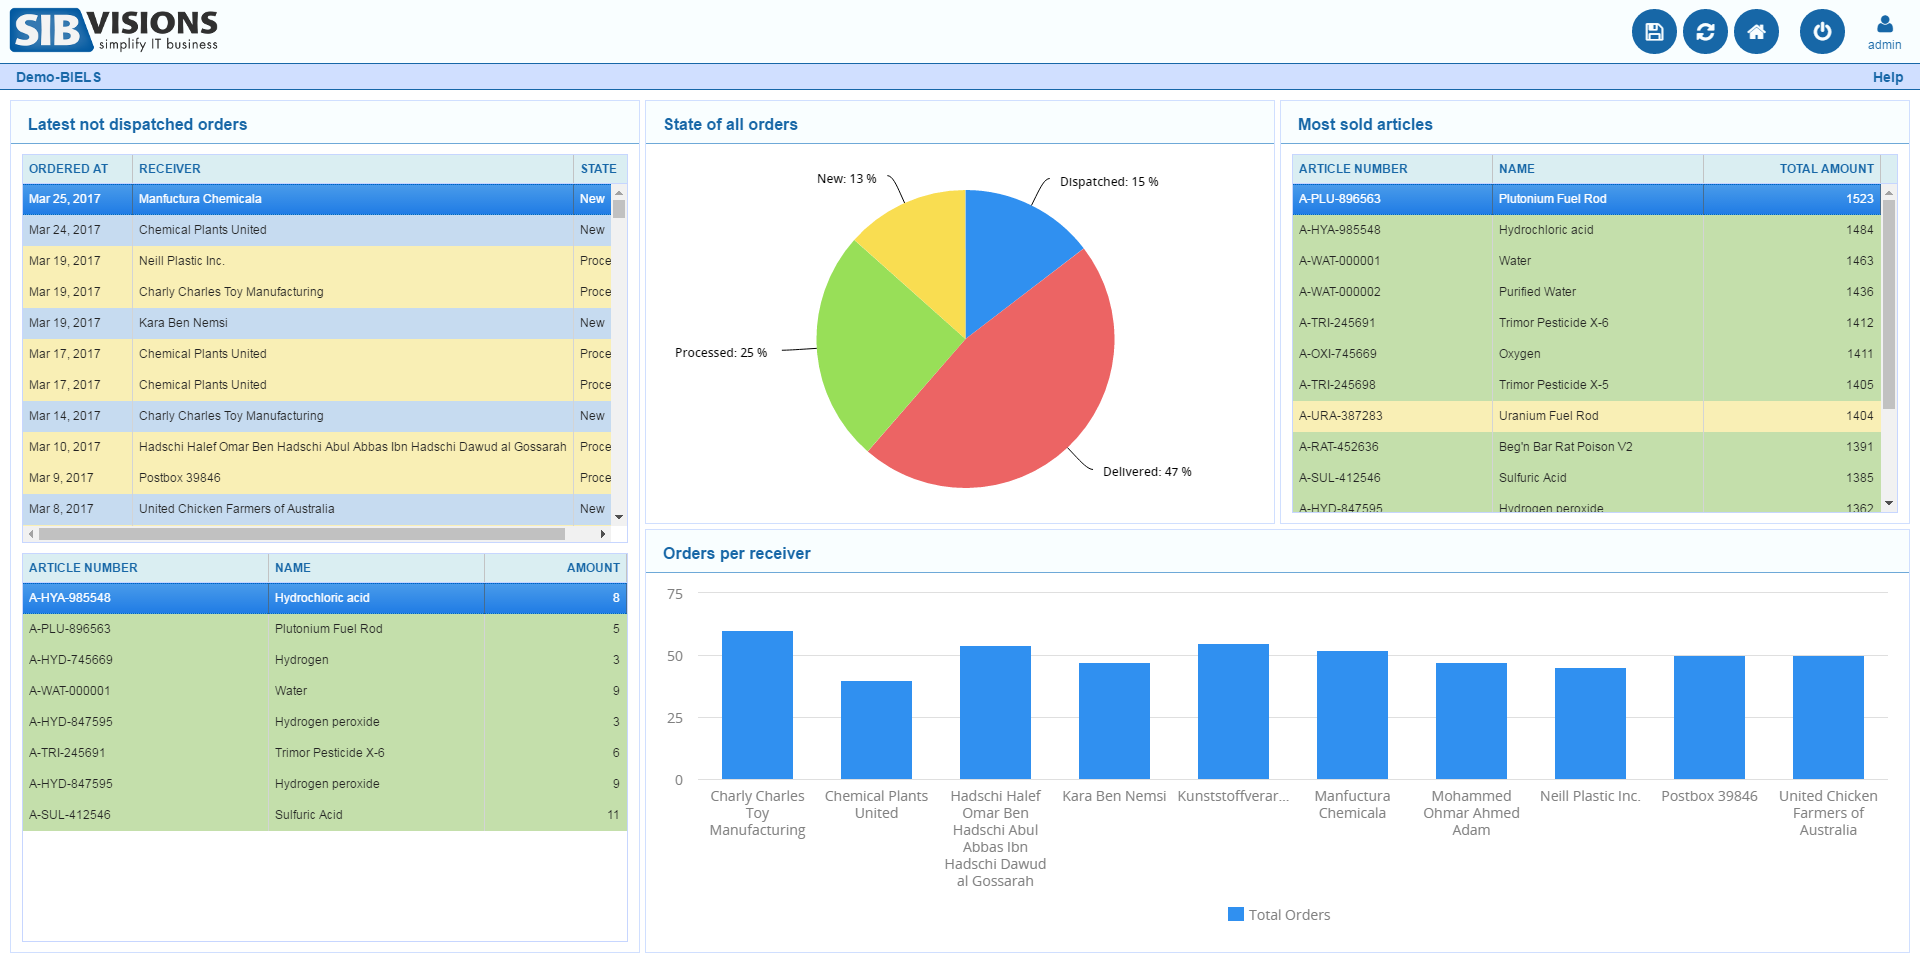
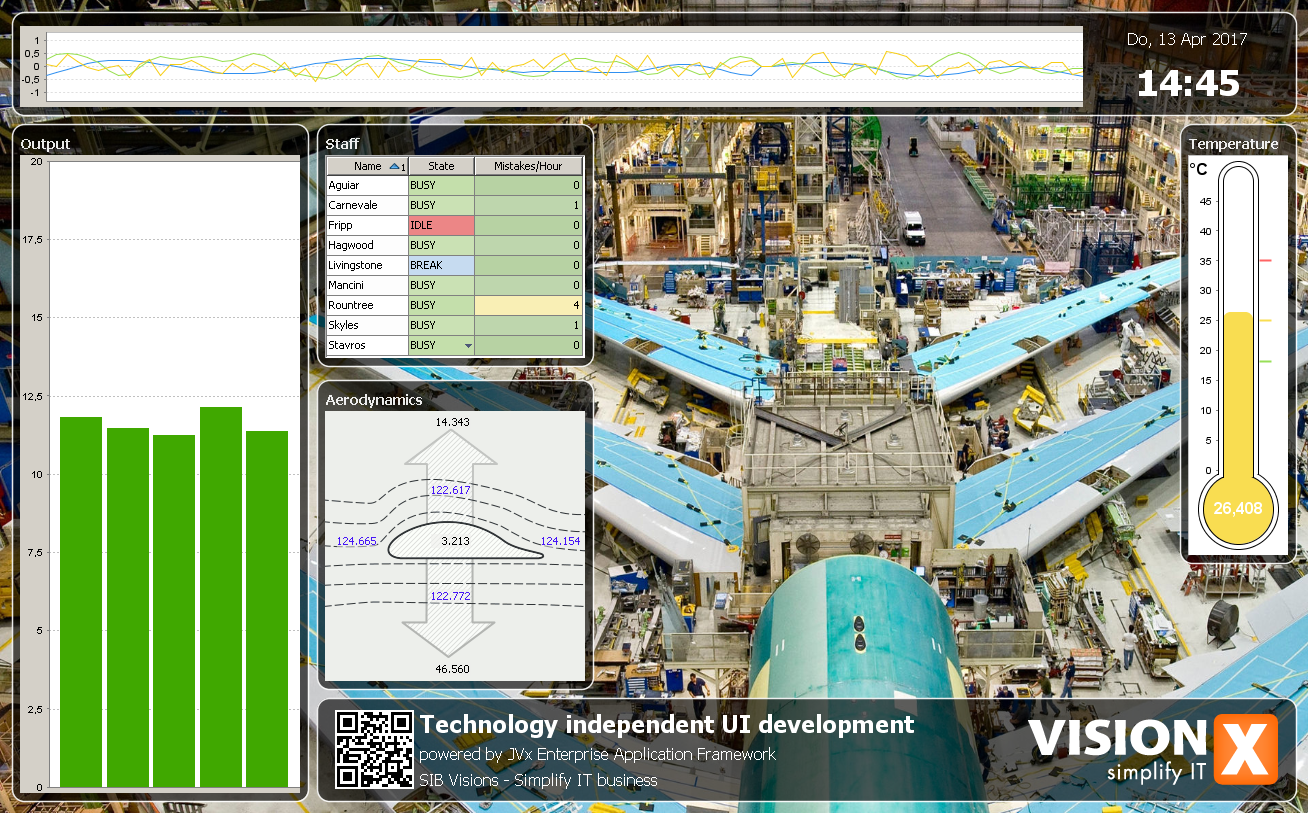
As said, these demo applications will be available in the VisionX Solution Store.
The look ahead
Wow, that has been an interesting year. A lot of things happened and we made a lot more happen, with even more stuff in the pipeline and yet even more stuff on the horizon. From where I'm sitting, the next year looks very interesting with a lot of new challenges, which we will for sure master.
Thanks to everyone at SIB Visions, it's been an awesome year and I'm looking forward to another one with all of you!

 RSS-Feed