This website uses cookies for visitor traffic analysis. By using the website, you agree with storing the cookies on your computer.More information

Alexa, shutter control

It's time for some words about my "shutter control" side project.

My house has electrical roller shutters with remote control units for every window. It was/is possible to close and open the shutters with these remote control units without any problems. But it wasn't possible to open/close them automatically because I don't own a central control unit. I'm not sure if such a central control unit is available for my "old" receiver modules?
Anyway, I'm a researcher and builder. So I built a central control unit based on a Raspberry Pi. I wrote about it in the past:

In the meantime, the project got a lux sensor to close the shutter if it's dark outside and it recognizes public holidays for later opening. It's not a good idea to open shutters on public holidays at 6 am :) The whole project is working very stable and it's so useful!

A few months ago, I heard about Google Home and Amazon Echo because both systems offer Voice control. I thought that voice control would be an awesome feature for my shutter control because sometimes it happens that my smartphone or remote control units are not at hand. And voice control is faster than using a smartphone or remote control. The only problem was that Google Home and Amazon Echo weren't available in Austria, not for German language and I didn't find any information about their APIs and whether if it's possible to develop addons. ... Sometimes you have to wait...

Things have changed in the meantime and both devices have APIs but only Amazon Echo is available for German language. I read some test reviews about both devices and Amazon is the pioneer. It supports more 3rd party devices than Home and looks proven. I had no preferences for Echo or Home, but Echo was available. The decision was simple :)

I made some simple tests with Echo because I tried to find out if it's really useful to have such a thing at home. And for sure, it is. It works really great and saves time :) It's great as replacement for standard radios or to stream your favourite music. It's also nice to listen to daily news or the weather forecast. A nice feature is the alarm clock!

But enough, it's a nice and useful device which simply works. The idea was voice control of my roller shutters.

Amazon Echo allows developers to create AddOns. Such AddOns are called Skills. It's not trivial but also not complex to create a custom Skill. The getting started is well documented and more documentation is available online. A developer forum exists and is active enough. It's really no problem to start but some pieces of the puzzle are unclear. I didn't find a detailed technical overview or didn't search long enough. It also was unclear where the Skills will be executed. I thought a skill is like an app and runs directly on the device... This was not the case.

Amazon Echo is a simple client and sends all requests to the amazon cloud. It handles responses but the brain is in the cloud. This means that all your services must be in the cloud. It's not a problem to host your own services in your own infrastrcuture but all your services have to be available via Internet. It's not possible to access a server in your Intranet directly. It's not possible to tweak with custom router configurations or custom dns records. Your services have to be available as cloud services. I found many solutions with service proxies or request forwarding but I didn't like this solutions because my home network is private.

But this was the only limitation and not really a problem because we have technologies like MQTT. I didn't use MQTT in the past but read a lot about it. The problem was that I didn't have a use-case for it. This was changed with Echo.

I played around with Mosquitto some hours and after TLS with and without user certificates were working, I was ready for connecting my shutter client. I don't write about my Mosquitto configuration here because there are so many good blog entries available in the wild.
It might be interesting that I use Eclipse paho as Java client library.

Ooh... and this utility class was really helpful. It made it possible to communicate secure to my Mosquitto broker. The class didn't support authentication without user certificate and it didn't read from InputStreams, but it was a good starting point. It also didn't work in with my Jetty application server. Here's a snippet of my code:

public static SSLSocketFactory getSocketFactory(Object pCACrt, Object pCrt,
                                Object pKey, String pPassword)
{
    try
    {
        // Load Certificate Authority (CA) certificate
        PEMParser reader = new PEMParser(createReader(pCACrt));
        X509CertificateHolder caCertHolder = (X509CertificateHolder)reader.readObject();
        reader.close();

        JcaX509CertificateConverter conv = new JcaX509CertificateConverter();
       
        X509Certificate caCert = conv.getCertificate((X509CertificateHolder)caCertHolder);
       
        // CA certificate is used to authenticate server
        KeyStore caKeyStore = KeyStore.getInstance(KeyStore.getDefaultType());
        caKeyStore.load(null, null);
        caKeyStore.setCertificateEntry("ca-certificate", caCert);

        TrustManagerFactory trustManagerFactory = TrustManagerFactory.getInstance(
                                TrustManagerFactory.getDefaultAlgorithm());
        trustManagerFactory.init(caKeyStore);
       
        // Create SSL socket factory
        SSLContext context = SSLContext.getInstance("TLSv1.2");

        if (exists(pCrt))
        {
            // Load client certificate
            reader = new PEMParser(createReader(pCrt));
            X509CertificateHolder certHolder = (X509CertificateHolder)reader.readObject();
            reader.close();

            X509Certificate cert = conv.getCertificate(certHolder);

            // Load client private key
            reader = new PEMParser(createReader(pKey));
            Object keyObject = reader.readObject();
            reader.close();

            PEMDecryptorProvider provider = new JcePEMDecryptorProviderBuilder().
                                build(pPassword.toCharArray());
            JcaPEMKeyConverter keyConverter = new JcaPEMKeyConverter().setProvider("BC");

            KeyPair key;

            if (keyObject instanceof PEMEncryptedKeyPair)
            {
                key = keyConverter.getKeyPair(((PEMEncryptedKeyPair)keyObject).
                                decryptKeyPair(provider));
            }
            else
            {
                key = keyConverter.getKeyPair((PEMKeyPair)keyObject);
            }

            // Client key and certificates are sent to server so it can authenticate
            // the client
            KeyStore clientKeyStore = KeyStore.getInstance(KeyStore.getDefaultType());
            clientKeyStore.load(null, null);
            clientKeyStore.setCertificateEntry("certificate", cert);
            clientKeyStore.setKeyEntry("private-key", key.getPrivate(),
                                pPassword.toCharArray(), new Certificate[] { cert });

            KeyManagerFactory keyManagerFactory = KeyManagerFactory.getInstance(
                                KeyManagerFactory.getDefaultAlgorithm());
            keyManagerFactory.init(clientKeyStore, pPassword.toCharArray());
           
            context.init(keyManagerFactory.getKeyManagers(),
                                trustManagerFactory.getTrustManagers(), null);
        }
        else
        {
            context.init(null, trustManagerFactory.getTrustManagers(), null);
        }

        return context.getSocketFactory();
    }
    catch (Exception e)
    {
        throw new RuntimeException(e);
    }
}

So, the communication via MQTT was configured and ready to use. The next step was the creation of a Skill. Echo supports using external services via https. The Skills-API comes with a special Servlet, the SpeechletServlet. You have to extend this servlet for every service. This creates boilerplate code because the servlet does nothing special. It usually configures the Speechlet. A Speechlet is more or less the main class for your service. So I decided to create a generic Servlet:

public class GenericServlet extends SpeechletServlet
{
    public void init(ServletConfig pConfig) throws ServletException
    {
        String sSpeechlet = pConfig.getInitParameter("speechlet");
       
        try
        {
            Class<?> clazz = Class.forName(sSpeechlet);
           
            Object obj = clazz.newInstance();
           
            if (obj instanceof Speechlet)
            {
                setSpeechlet((Speechlet)obj);
            }
            else
            {
                setSpeechlet((SpeechletV2)obj);
            }
        }
        catch (Exception e)
        {
            throw new ServletException("Can't init speechlet, e");
        }
       
        super.init(pConfig);
    }

}   // GenericServlet

Simple configuration in web.xml and no additional servlets needed:

<servlet>
    <servlet-name>ShutterService</servlet-name>
    <servlet-class>com.sibvisions.alexa.services.GenericServlet</servlet-class>

  <init-param>
    <param-name>speechlet</param-name>
    <param-value>com.sibvisions.alexa.services.shutter.ShutterSpeechlet</param-value>
  </init-param>
</servlet>

The Skill itself doesn't need source code. Amazon offers a web UI for the configuration and a simple test tool. The creation was straight forward and I simply followed an example from the Skills-API package. One tricky step was the certificate configuration, but Amazon supports self-signed certificates and wildcard certificates without problems. So, the Skill creation was done very fast because everything was done online without coding.

The custom service creation wasn't very difficult because the API is really simple and doesn't need more than implementing 4 interface methods:

@Override
public void onSessionStarted(SessionStartedRequest pRequest, Session pSession) throws SpeechletException
{
}

@Override
public void onSessionEnded(SessionEndedRequest pRequest, Session pSession) throws SpeechletException
{
}

@Override
public SpeechletResponse onIntent(IntentRequest pRequest, Session pSession) throws SpeechletException
{
    Intent intent = pRequest.getIntent();
   
    String intentName = (intent != null) ? intent.getName() : null;

    TranslationMap tmap = getTranslation(pRequest);
   
    if ("DownIntent".equals(intentName)
        || "UpIntent".equals(intentName)
        || "HaltIntent".equals(intentName))
    {
        String sText;

        try
        {
            if ("DownIntent".equals(intentName))
            {
                client.down();
               
                sText = "The shutters are moving down!";
            }
            else if ("UpIntent".equals(intentName))
            {
                client.up();
               
                sText = "The shutters are moving up!";
            }
            else
            {
                client.halt();
               
                sText = "The shutters are stopping!";
            }
        }
        catch (Exception e)
        {
            sText = "Shutter control not possible!";
        }
       
        sText = tmap.translate(sText);
       
        // Create the Simple card content.
        SimpleCard card = new SimpleCard();
        card.setTitle(tmap.translate("Shutter control"));
        card.setContent(sText);

        // Create the plain text output.
        PlainTextOutputSpeech speech = new PlainTextOutputSpeech();
        speech.setText(sText);

        return SpeechletResponse.newTellResponse(speech, card);
    }
    else
    {
        throw new SpeechletException(tmap.translate("Invalid intent!"));
    }
}

@Override
public SpeechletResponse onLaunch(LaunchRequest pRequest, Session pSession) throws SpeechletException
{
    TranslationMap tmap = getTranslation(pRequest);
   
    String sText = tmap.translate("Here we go!");
   
    // Create the Simple card content.
    SimpleCard card = new SimpleCard();
    card.setTitle(tmap.translate("Shutter control"));
    card.setContent(sText);

    // Create the plain text output.
    PlainTextOutputSpeech speech = new PlainTextOutputSpeech();
    speech.setText(sText);

    PlainTextOutputSpeech repromptSpeech = new PlainTextOutputSpeech();
    repromptSpeech.setText(tmap.translate("Tell me the direction!"));
   
    Reprompt reprompt = new Reprompt();
    reprompt.setOutputSpeech(repromptSpeech);

    return SpeechletResponse.newAskResponse(speech, reprompt, card);
}

It's also possible to use Amazons infrastructure for your services, but I have my own application server.

After some days, my roller shutters were controlled by Amazon Echo aka Alexa with voice commands. It was really cool and simple!

Here's a demonstration of the result (it's in German):

Alexa in action

I can only recommend this device!

Three years SIB Visions, a look back and ahead

My third year at SIB Visions is now coming to an end, once more it is time to take a deep breath, sit down and have a look at everything that has happened so far.

My year has been filled with a lot of non-public work, so please forgive me if I cannot go into details on various fronts.

Prototypes

Quite a few customers approached us and asked if we could implement prototypes for their projects, for one reason or another they all ended up on my table, the prototypes, that is. I like working on prototypes, because they allow me to quickly and easily explore new concepts and they have a definitive, narrow scope. Also we can finally use and show off all these cool new features we have built, like the new client-side layouts which we've created for our Vaadin implementation.

In the course of the year I've worked on over half a dozen prototypes for different customers. They all came with their own set of requirements and goals, obviously, and so they were very different to work on. The most interesting part about these prototypes is the vast spectrum of different designs and ideas. I unfortunately can't go into much detail here, but we've created application frames ranging from simple Swing input forms to highly customized Vaadin dashboards and information screens. Further down I'll talk a little more about these concepts and ideas.

Improved MySQL Fetching

Our MySQL implementation did suffer from a major problem, it fetched all records, always. That is not just an inconvenience as you can imagine, it might also lead to OutOfMemoryExceptions and similar problems. So one fine day we sat down and did take a deep look at our possibilities to either mitigate or completely fix this problem. As it turned out, the fix was far simpler and easier to implement than we imagined.

To cut an already told long story short, we are now utilizing the MySQL support to limit the fetched datasets (the LIMIT keyword). Which means that we are not only able to display initial data faster, but also fetching of more rows is now working as one would expect.

Impressions

As you can see, we can now display initial data a lot quicker than before.

Vaadin Client-Side Layouts

More work has been poured into the aforementioned new client-side layouts and they are now usable for testing and (limited) productive usage.

Since the beginning we had trouble to sculpt the Vaadin layouts into the necessary shape to support our ideas about layouts. Over a year ago we started to work an new layout implementations which would operate completely client-side, most of the work was based off earlier work to improve the FormLayout. These new layouts have no logic on the server-side, but instead operate completely client-side only using "hints" from the server. That means that one can implement quite complicated layout logic (like our FormLayout) with ease.

We've implemented a new component, the so called LayoutedPanel, which can have different layouts. It does provide the base component for the new layouts but does not provide any logic itself. Instead it delegates all the layouting logic to layout implementations, that means it basically works the same as the Panel from AWT/Swing. Performing the layout logic on the client has multiple upsides, for example that the actual size of the components is known and that you can do it with a lot less elements.

Let's have a short look at how the usage of the LayoutedPanel looks like in pure Vaadin:

// Assume the following classes:
//    com.sibvisions.rad.ui.vaadin.ext.ui.panel.LayoutedPanel
//    com.sibvisions.rad.ui.vaadin.ext.ui.panel.layout.FormLayout
//    com.vaadin.ui.Label

FormLayout layout = new FormLayout();

LayoutedPanel panel = new LayoutedPanel();
panel.setLayout(layout);

panel.addComponent(new Label("Some label"), layout.getConstraints(0, 0));
panel.addComponent(new Label("On the right side"), layout.getConstraints(-1, 0));

As you can see, it is quite easy to use and works nearly identical to our panel/layouts. Let's take a further look into what is happening on the server and what is happening on the client.

Server

On the server the LayoutedPanel manages the list of components which have been added, what layout is currently in use and the constraints of the added components. There are layout classes/implementations on the server, but they are mere placeholders (so that the LayoutedPanel on the client side knows which layout to use) and provide only limited logic (for example how to write the constraints into the state which is send to the client).

Client

On the client side there is the ClientSideLayoutedPanel, with some basic logic for adding the components to the DOM and layouting, but does otherwise delegate all the work to the current layout. The DOM structure created consists of two divs, the main element and the "canvas" element:

  • panel
    • canvas
      • child
      • child
      • child
      • child

As mentioned in my last years post, the panel must fulfill two seemingly contradicting properties:

  1. It must resize itself to the size of/fill the parent container.
  2. It must dictate its own size.

This is necessary because the panel always must fill the parent, but at the same time it must dictate its own size so that the parent does not collapse if it does not have a fixed size set. The next stumbling block on the road was that the children of that panel would be absolute positioned. That means that the panel itself would not have a size because absolute positioned children are skipped when it comes to calculating the size of an element. Quite complex, but there is a rather simple solution:

  • panel (width: 100%, height: 100%)
    • canvas (min-width: 100%, min-height: 100%)
      • child (position: absolute)

Additionally, the size of the canvas is always set to the same size as the panel, to prevent the element from collapsing. There is of course more logic in place to make it all feasible and usable, but I won't go into any further detail here.

The layouts itself are simple to implement, they have a list of components and the size of the container, and they set the location and size of each component.

Summary

For everyone adventurous and daring enough, the source for the new layouts is available in the com.sibvisions.rad.ui.vaadin.ext.ui.panel and com.sibvisions.rad.ui.vaadin.ext.ui.client.panel packages in the JVx.Vaadin project.

For those who want to give these new layouts a spin in their application, you must simply set a property on the VaadinFactory to enable them:

UIFactoryManager.getFactory().setProperty(
    VaadinFactory.PROPERTY_COMPONENT_CLIENT_LAYOUTS,
    Boolean.TRUE);

Or if you don't want to import VaadinFactory:

UIFactoryManager.getFactory().setProperty(
    "vaadin.component.client_layouts",
    Boolean.TRUE);

From that moment on, every layout created will use the client-side layouts. Of course you can always set it to false or true inside your code, to get either new or old layouts.

Swing GridLayout improvements

We've also improved the GridLayout in Swing, previously the Swing GridLayout would show gaps every time it is resized. After some back and forth, we've managed to implement a new way to prevent/fill these gaps. That means that the Swing GridLayout is now distributing "left over space" through out its entirety, instead of just to the last column. This creates a very "organic" feel when it is resized and it is barely noticeable that some elements are a pixel wider than others.

More databases

Hurray! Over the course of the year we've added two new databases to JVx!

SQLite

The first one is SQLite. In case you don't know what SQLite is, it is a simple, lightweight and easy to use database which is embedded into the application which uses it. That means there is no server or connection, not even a different thread for the database engine, there is just the driver which does everything. This is interesting for many reasons, but the main one is to allow embedded applications to use a lightweight database. It also supports an in-memory mode, which means that it never must write the data to any kind of storage.

We've added support for it to allow JVx applications to use it as fast and easy database backend whenever there are either system constraints (little memory or CPU power) or if there is no network connection. It can be easily used, like any other database which is supported by JVx:

DBAccess dbAccess = DBAccess.getDBAccess("jdbc:sqlite:");
dba.setUrl("jdbc:sqlite:/var/data/your-database.sqlite");
dba.open();

// Or in-memory:
DBAccess dbAccess = DBAccess.getDBAccess("jdbc:sqlite:");
dba.setUrl("jdbc:sqlite::memory:");
dba.open();

Because SQLite is designed to be used in embedded applications (or at least embedded in applications) it has quite limited functionality, like no triggers, functions or sequences. But nothing beats the minimal footprint and ease of use it has.

H2

Another database which we now support is H2. H2 is a database written completely in Java, which can be started as a server or embedded into an application directly. Last but not least, it does also support an in-memory mode and nearly most features you got used to when using databases. It can be easily used, like any other database which is supported by JVx:

DBAccess dbAccess = DBAccess.getDBAccess("jdbc:h2:");
dba.setUrl("jdbc:h2:/var/data/your-database.h2");
dba.open();

// Or in-memory:
DBAccess dbAccess = DBAccess.getDBAccess("jdbc:h2:");
dba.setUrl("jdbc:h2:mem:your-database");
dba.open();

Personally, I'm quite excited to support the H2, because it is a very easy to use and yet powerful and flexible database engine. I'm looking forward to use it in projects.

Intern

For the summer we actually had an intern which wanted to take a sneak peek into the world of software development. As it is with interns (at least around these parts), they are young, foolish and shy. What took me by surprise about this one was not only the eagerness with which he set to work, but also the will to learn new things as fast as possible. No matter how much information I threw at him (not literally, though, I was disallowed that, too) in the form of books and short lectures, he seemed to be able to digest and at least follow it, that impressed me very much. With very, very few exceptions ("Did you just fetch a Timestamp from a DataBook as String, parse that String to a Date and then convert it back to a Timestamp?") he was up to speed with Java and JVx in no time and wrote very good code. As I said, I am very impressed with how he held up.

Daniel, was a honor having you!

EPlug 1.2.5

Of course the year also brought more work on our Eclipse plugin, called EPlug, and the update to 1.2.5 was released in late summer.

Some of the highlights are:

  • Better hover information/tooltips
  • More and better ways to retrieve metadata
  • More options to control the errors/warnings issued by EPlug
  • QuickFixes for misspelled column names
  • And various more improvements and bug fixes

The most important new feature in this release might be the extended and improved tooltips, which look like this:
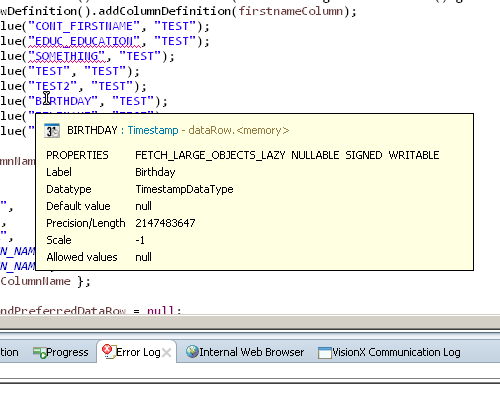
New hover information

For this to work we had to rewrite how tooltips were presented to the user. For those familiar with the Eclipse tooltip system, there is the IInformationControl interface which allows to display tooltips and similar. In previous versions we used an implementation which embedded a HTML renderer into the tooltip. That allowed the clients to have absolute control over the content, but it also meant that there were sever restrictions, for example autosizing the tooltip was tough.

With this version we used a new implementation which uses plain old SWT components and displays well prepared information, like this list of properties. This also has the upside that we now have absolute control over how images are treated, so they are now always fully displayed in the preview:
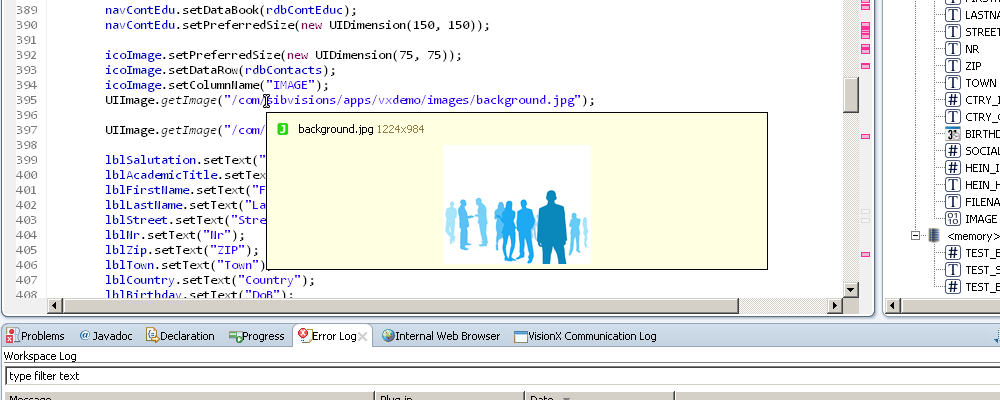
New hover information

All that is accomplished by a rather simple system. It's nothing more than a control with an icon (top-left), a title (top) and the content, which can either be an object or an image. If it is an object there are just a few ifs which are determining how to display that information.

What I took away from that was a quite important lesson. The initial implementation tried to be as flexible as possible by using a HTML rendering engine, the new implementation is not as flexible, but has a clear and well defined behavior and does have definitive advantages. So my advice is one that has been repeated way too often: YAGNI, You Ain't Gonna Need It. Start out small, and start building up as the need arises.

Oracle Forms Importer Improvements

As some of you might remember, one of the first tasks I was assigned to was to create an Oracle Forms Importer, which we do offer to VisionX customers. It is a rather simple piece of software which allows to import Forms directly into VisionX.

In autumn we took another shot at it and improved the import system, so that it now recognizes and correctly imports an even more varied range of forms.

Some of the major changes are:

  • Better recognition of bound controls
  • Improved setup of cell editors
  • Various other layout fixes (for example checkboxes are now correctly size)
  • And other improvements (for example the table column order is now correct)

Importing a form is still quite because of the outlined differences between Forms and JVx, but I believe that we are on a very good track and the current solution works quite well for a wide variety of forms.

Kitchensink improvements

Our Kitchensink, a simple demo application with all components and controls, has seen some improvements throughout the last year:

  • JVx has been updated
  • There are now all libraries and starters in place to get it to run
  • A new sample showing the FontAwesome icons
  • Improved the StyledTableSample and StyledTreeSample
  • Various minor improvements and more options

The Kitchensink is an Eclipse project, that means all you have to do is download or clone the source and import the project into Eclipse. With the included launchers you can now start it either with Swing or JavaFX frontend.

We are currently considering to embed a lightweight application server, so that testing the Vaadin frontend also becomes as easy as starting the Swing variant. That would mean that all three major frontends could be easily tested from the Kitchensink, which would be awesome.

Custom components

Some of our customers requested that we build custom components for them, these component should work in Swing and Vaadin in the same way. As I've outlined in a previous blog post, this is actually easily done depending on what your exact use-case is.

One of the most notable examples is a calendar which we've built on the technology layer. For Swing we've used the java-swing-calendar project and for Vaadin the Vaadin Calendar. Unfortunately, Vaadin has discontinued their Calendar for the time being. Anyway, we've implemented the calendar component and also added bindings for the databook to provide events, which was quite straight forward.

I do have to rant about the Vaadin Calendar, though. It does support two sources for the data, the Container interface and a calendar specific CalendarEventProvider interface. As we already had an implementation for a Container, I used that one and adjusted it so that it could be easily used with the Calendar. All fine and dandy, until I started to work with events, which are only providing a CalendarEvent as information on what event is affected. This CalendarEvent has zero information about the model, and I mean zero. There is no way to track the model from the CalendarEvent, you just don't know what event just was clicked or dragged. The only way is to not use a Container and instead use a CalendarEventProvider which returns custom CalendarEvent extensions which know about the model.

Otherwise implementing these components was very smooth.

EPlug 1.2.6

At the beginning of this year, we did some more work on EPlug and we could release EPlug 1.2.6 after a short time:

  • Cleaned up context menu
  • Resources (Images, etc.) are now also available from outside the source folders
  • Even better handling of DataBooks
  • Some bug fixes and other new features

The updates are available in the marketplace, so Eclipse can automatically update to it.

JVx References

For the last few months I have started to write a series of blog posts about various topics around JVx, the JVx Reference series. The goal is to provide a concise and easy to digest insight into JVx and various of its mechanics and techniques. There are currently three posts published:

And there are more in the pipeline:

  • About DataBooks
  • An Overview of how JVx works
  • What Resources and UIResources are in JVx

So stay tuned!

Demos

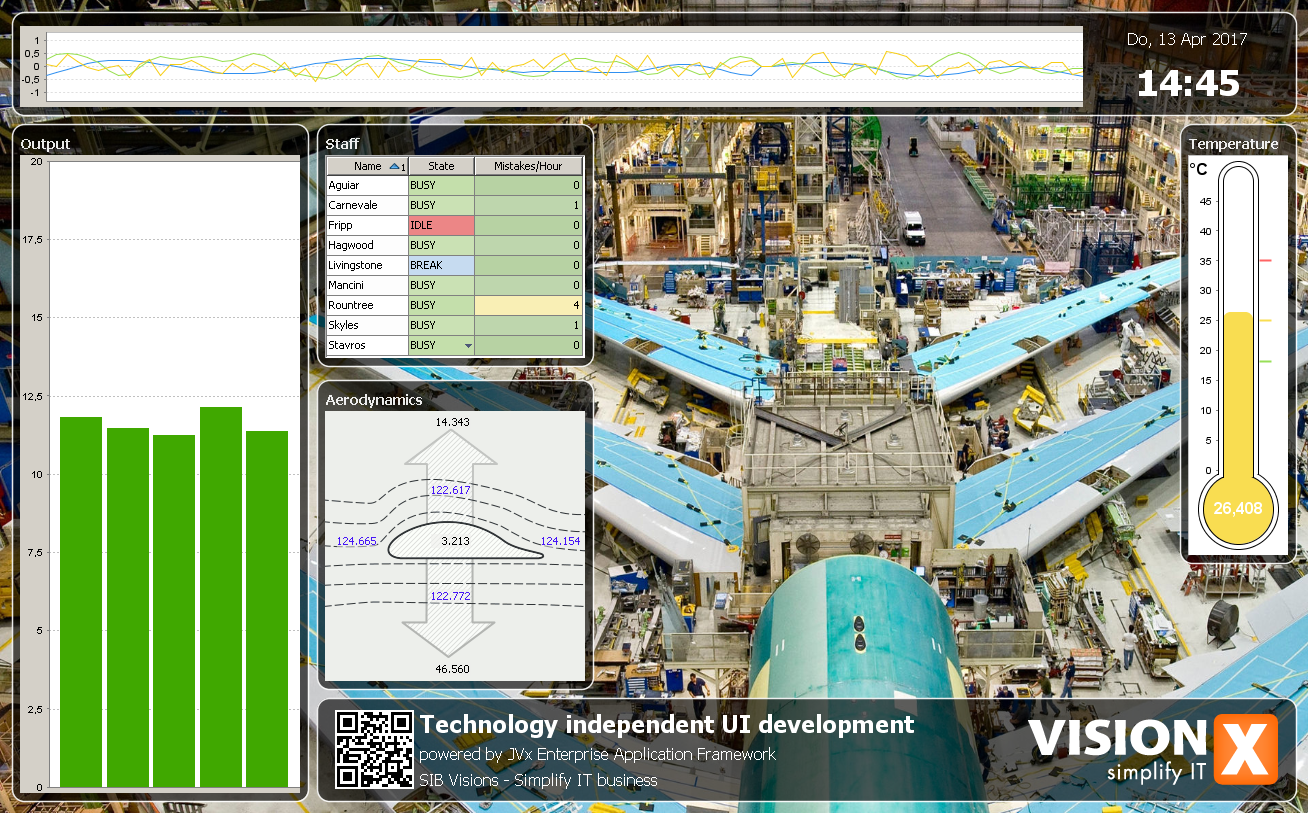
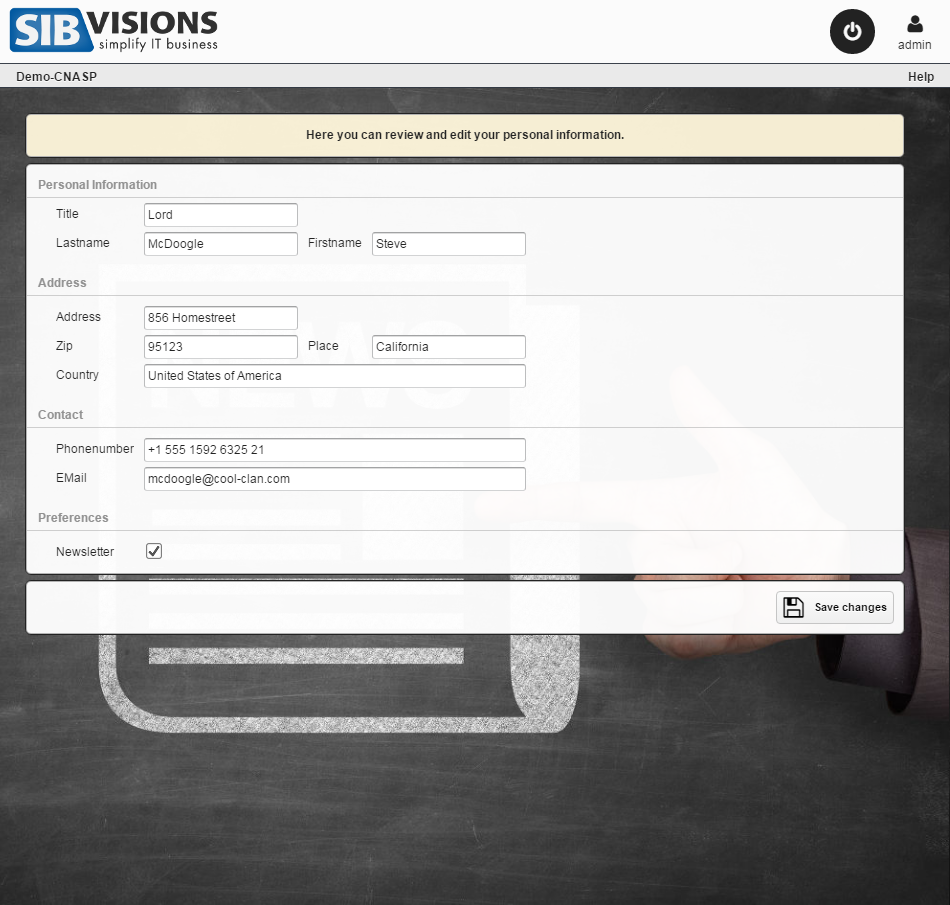
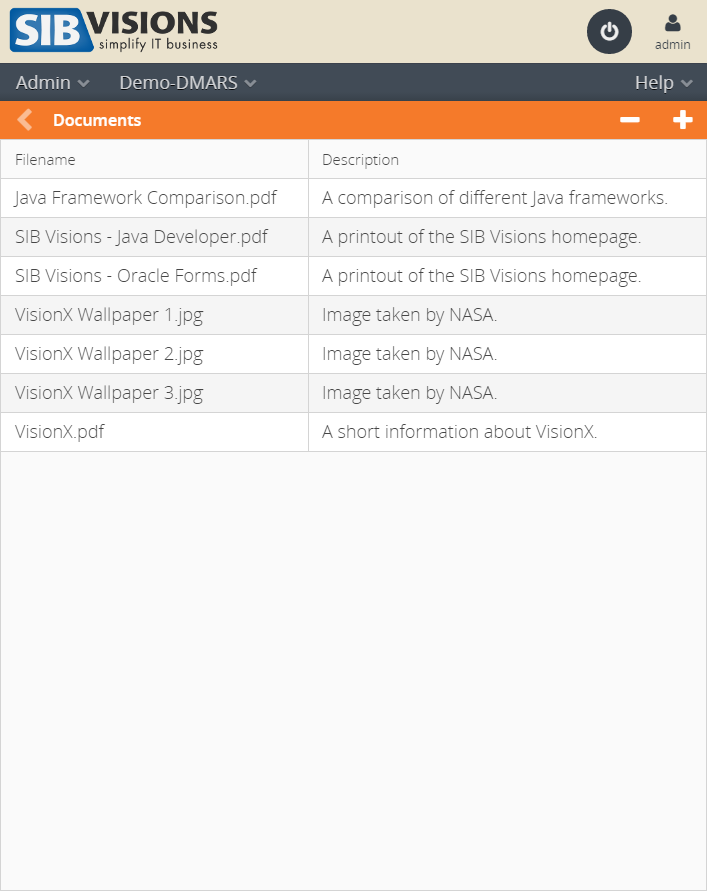
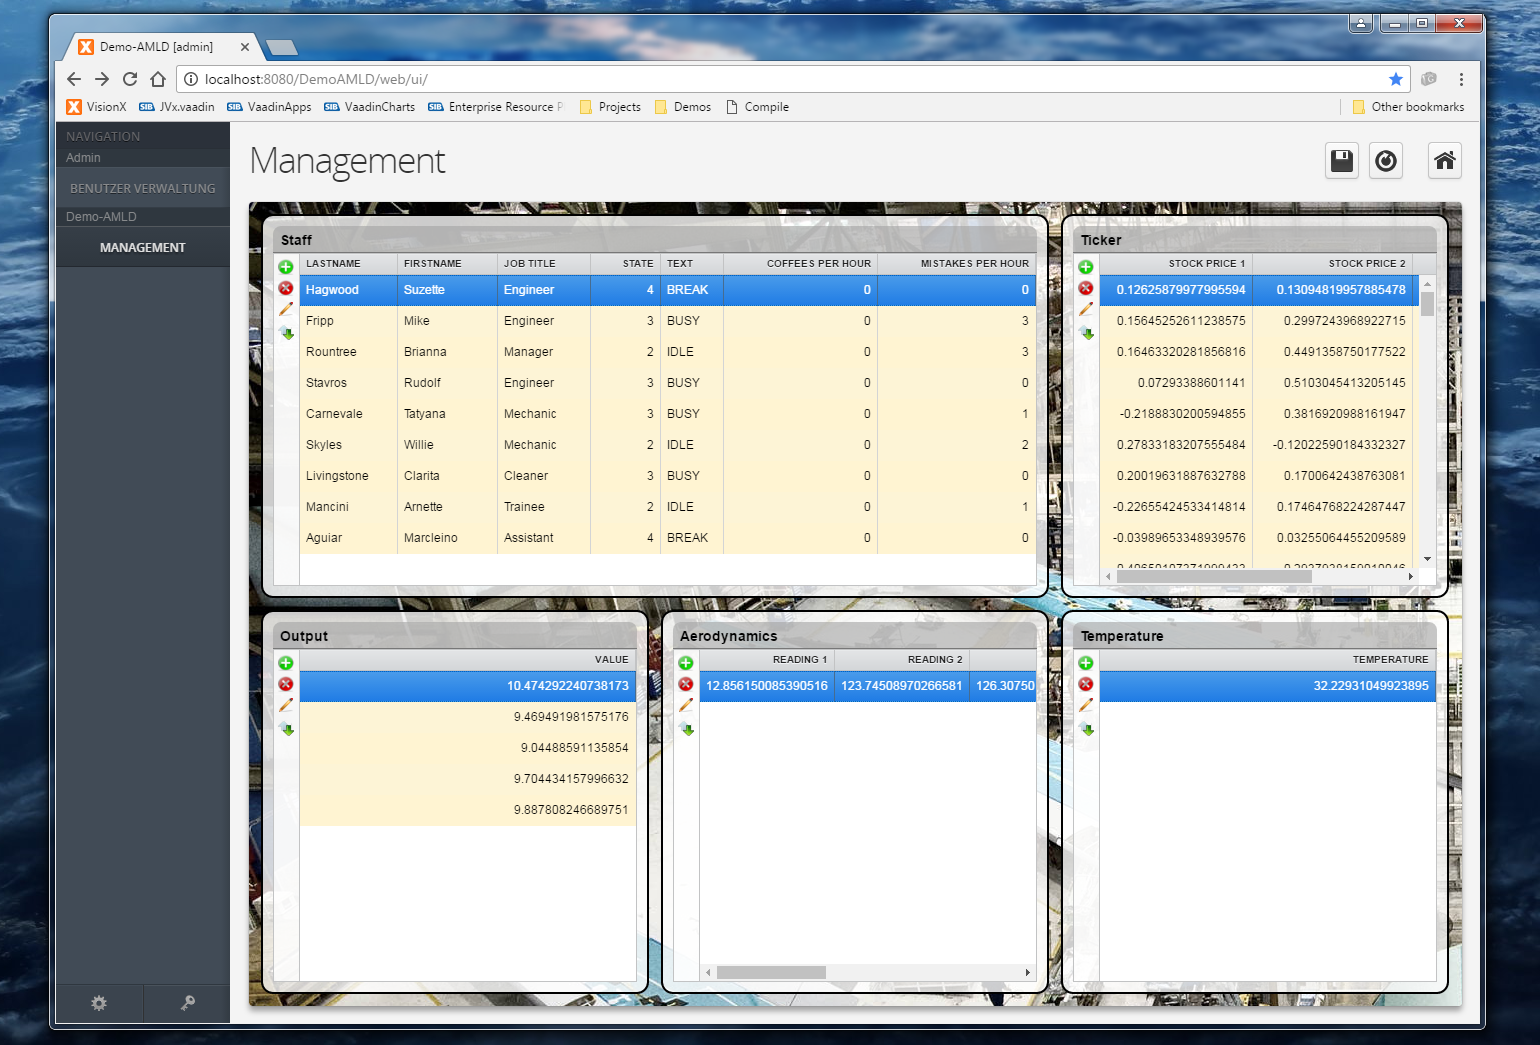
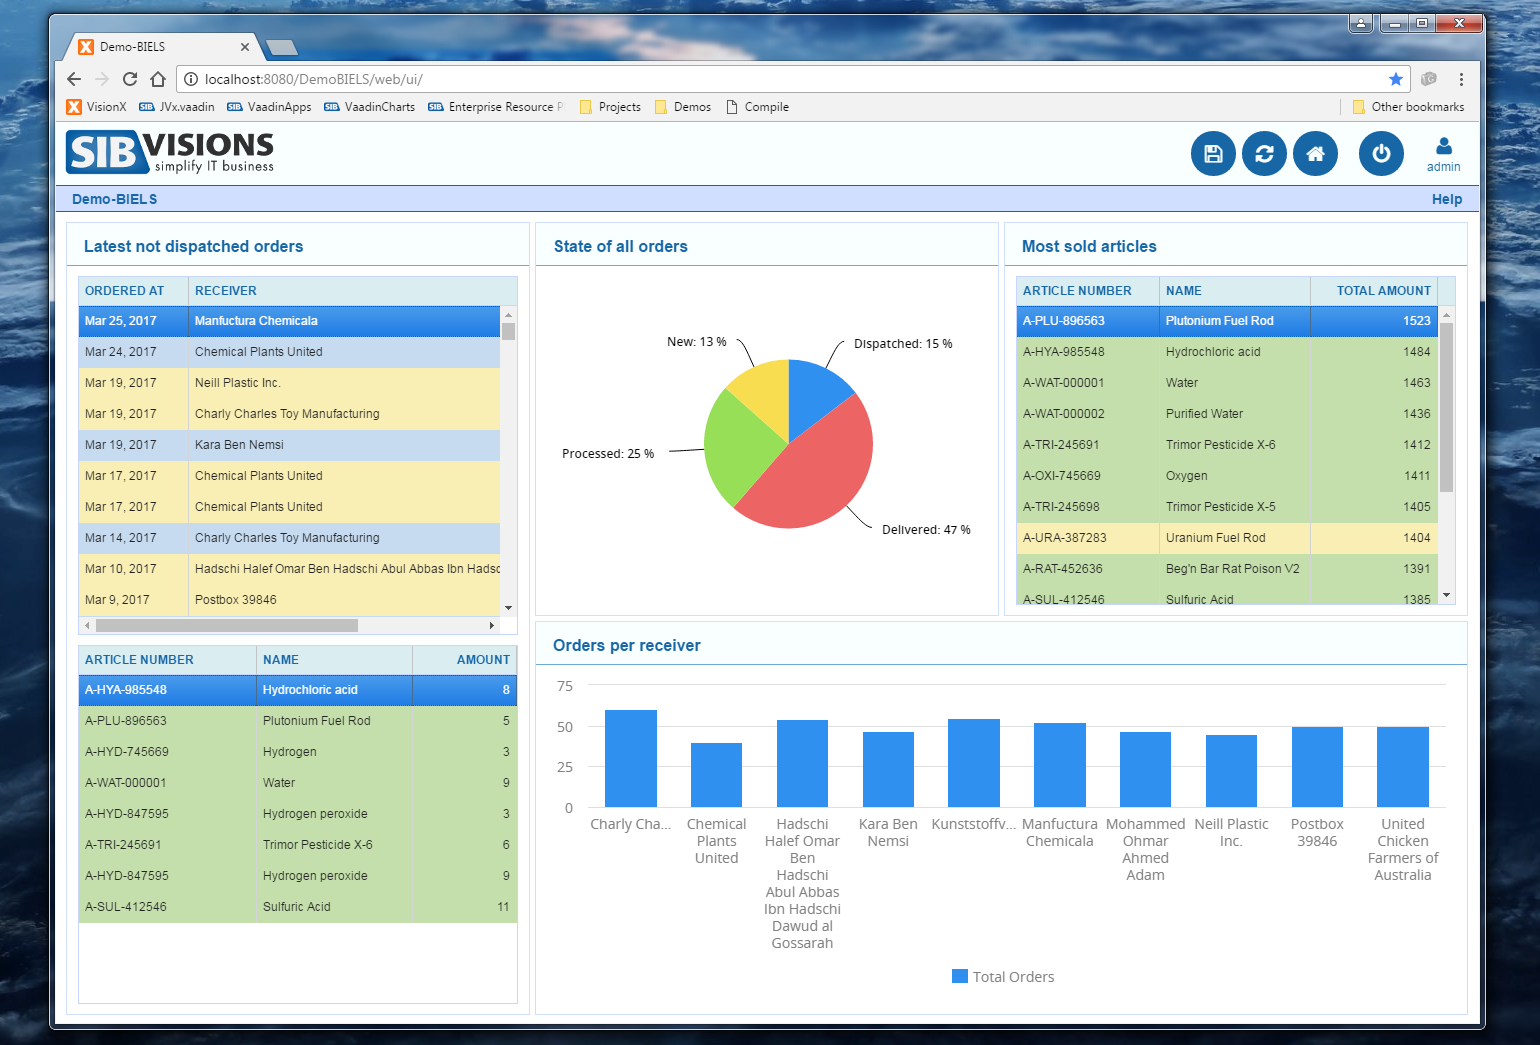
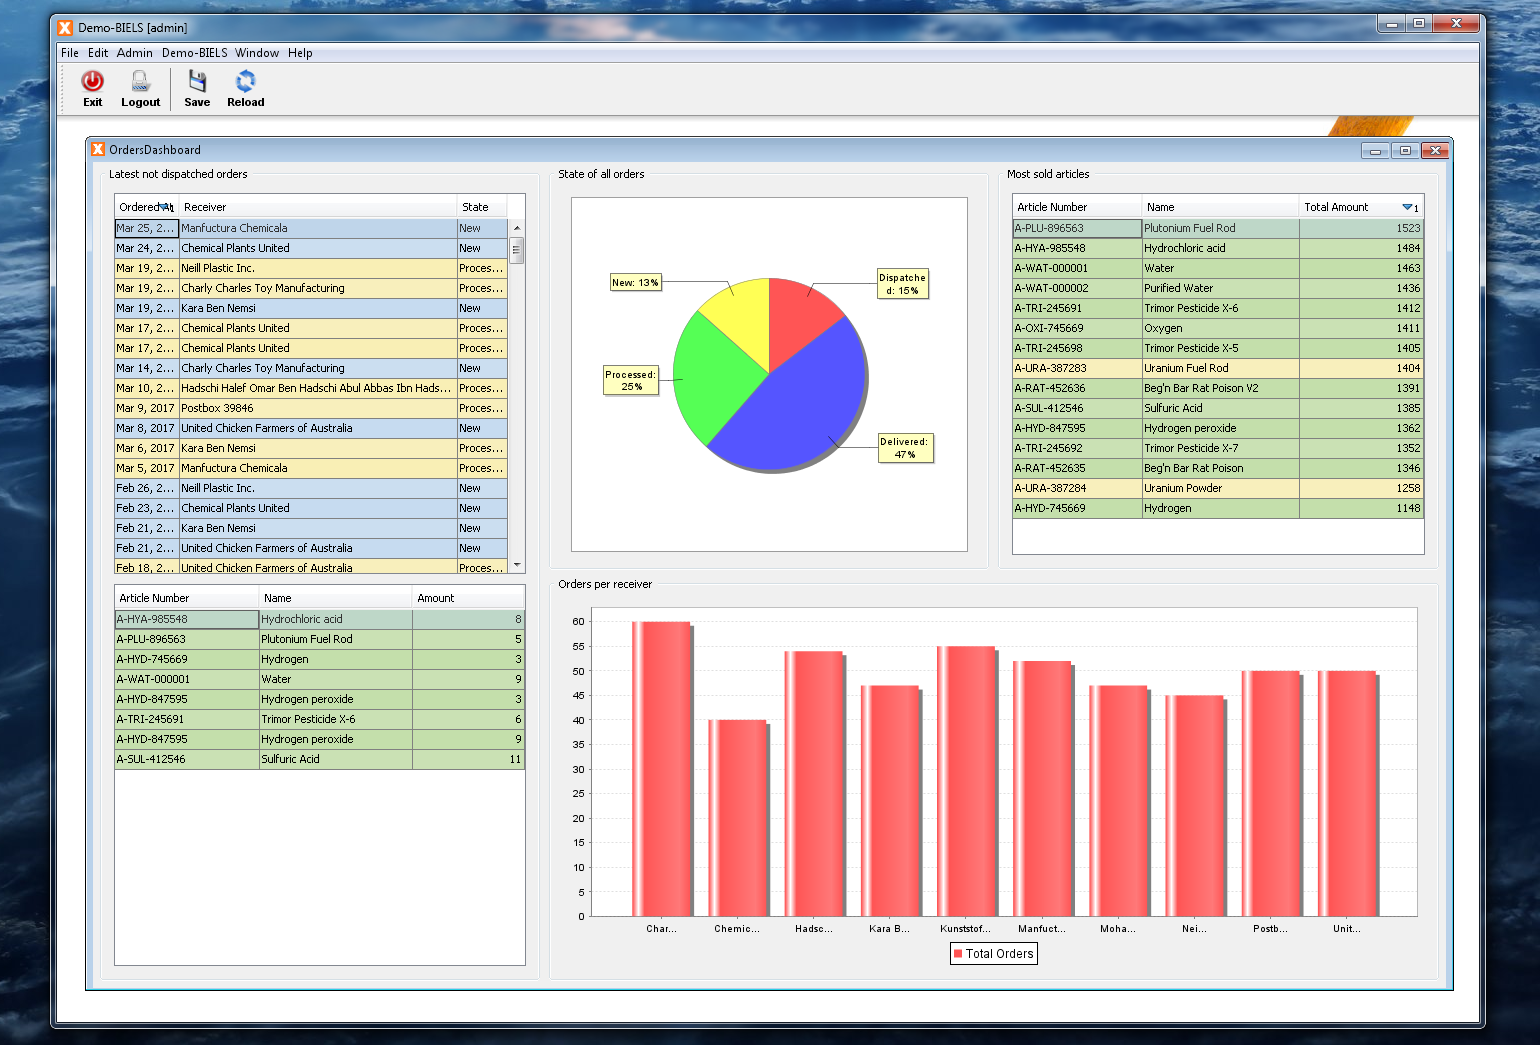
Out of the work on prototypes for our customers arose the idea to provide quite a few these new ideas to VisionX users in the form of demo projects. We've prepared these demo projects over the last few weeks and they will be released to the VisionX solution store within the next time.

Here is a sneak peek at those:
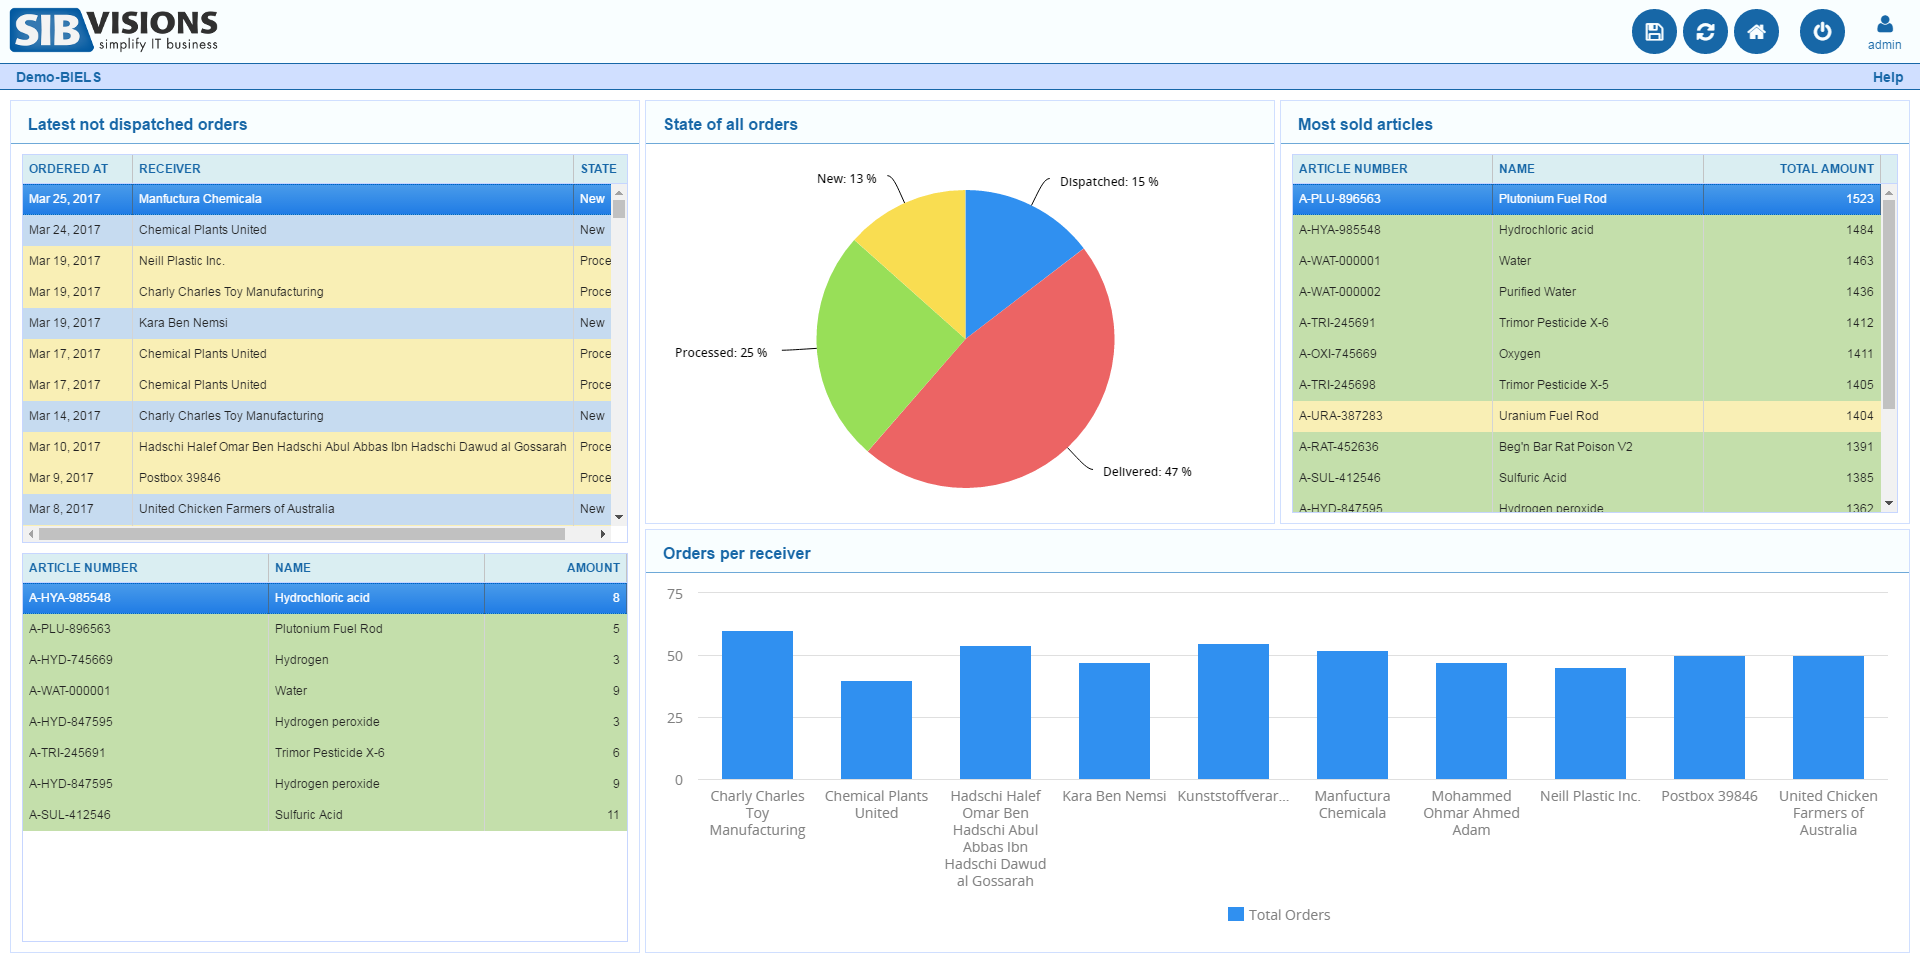
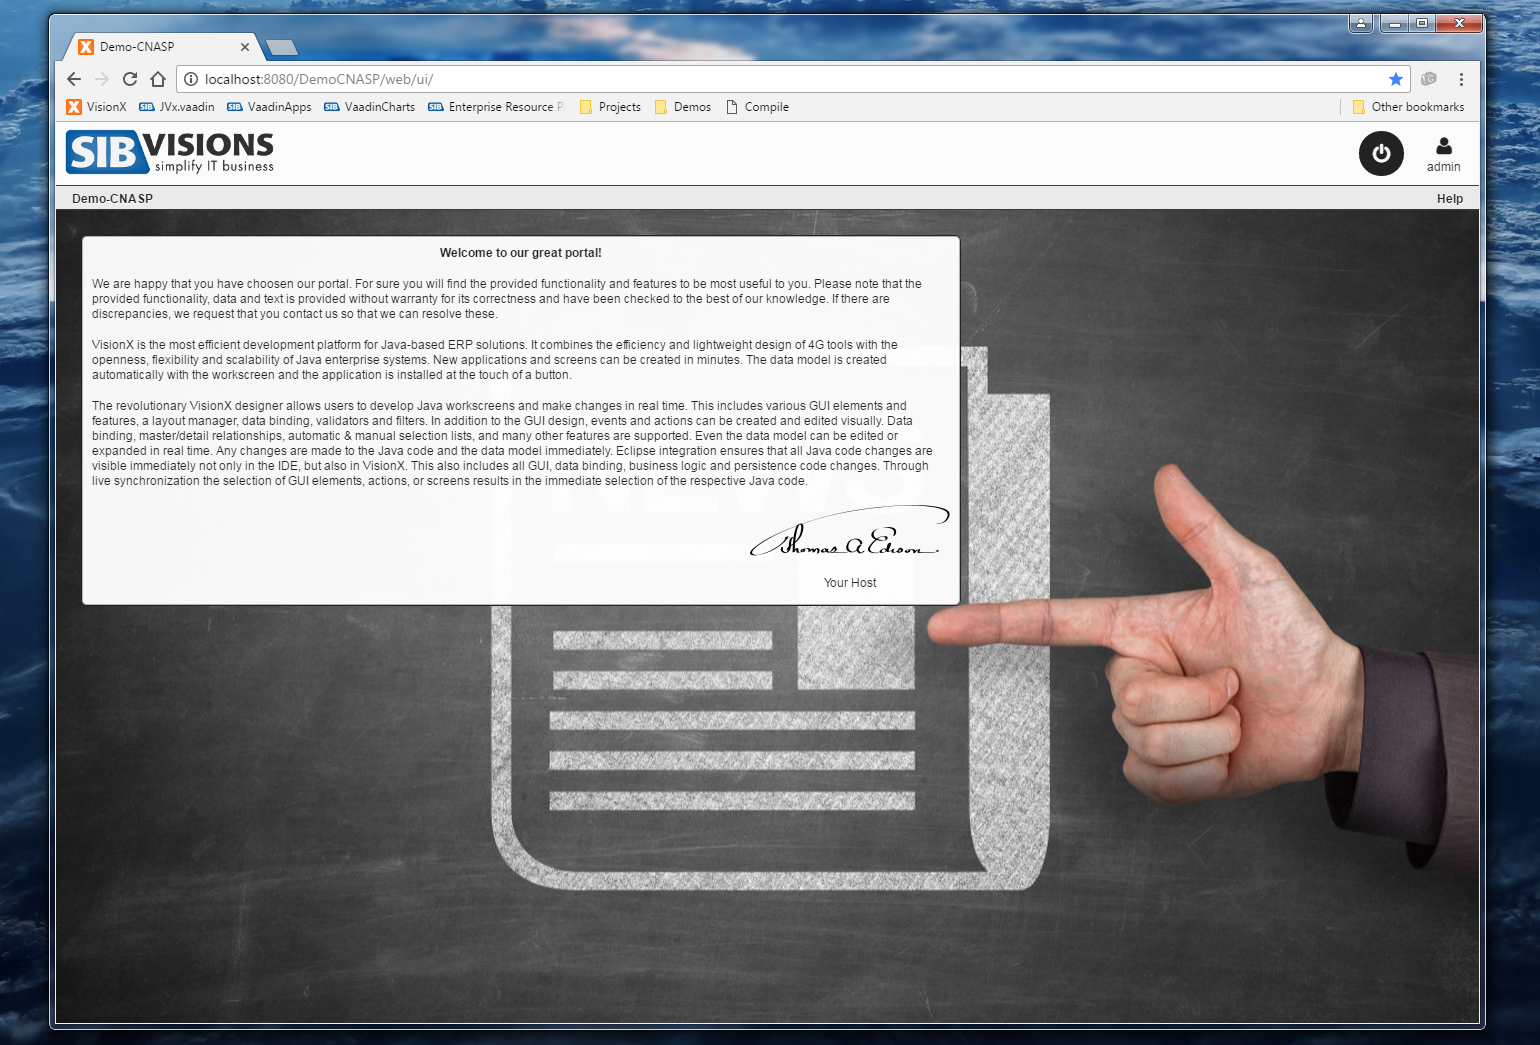
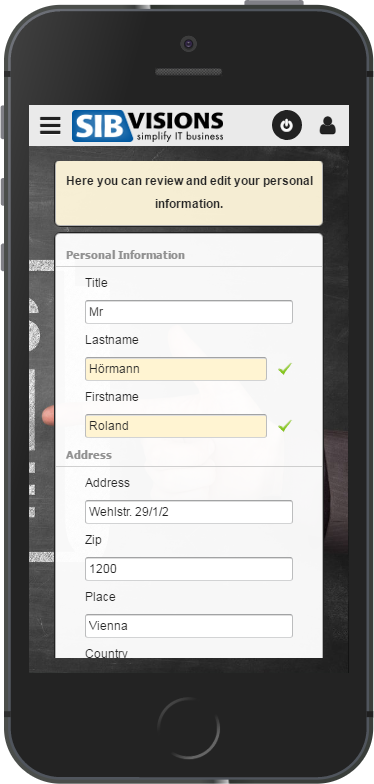
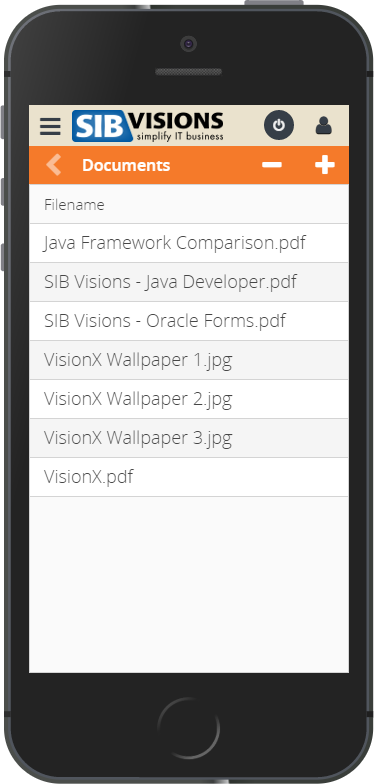
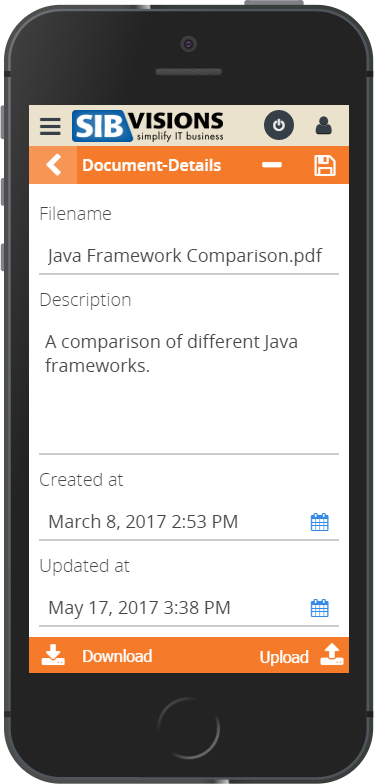
Demo BIELS

Demo AMLD

Demo CNASP

Demo BIELS

As said, these demo applications will be available in the VisionX Solution Store.

The look ahead

Wow, that has been an interesting year. A lot of things happened and we made a lot more happen, with even more stuff in the pipeline and yet even more stuff on the horizon. From where I'm sitting, the next year looks very interesting with a lot of new challenges, which we will for sure master.

Thanks to everyone at SIB Visions, it's been an awesome year and I'm looking forward to another one with all of you!

Simple Drop File Support for JVx applications

Our next update release of VisionX will support Dropping files. It's a very useful feature and was easy to implement. Sure, it's a Swing specific feature, but our VisionX is more or less JVx Swing UI based.

Get a first impression

VisionX Drop file support

We drop an exported application archive into VisionX and the import wizard is starting. It's also possible to Drop a file directly into the import wizard.

VisionX is a JVx application and it's super easy to implement such feature for your own JVx application. Here's a code snippet how it'll work:

public SimpleFileDropHandler addTarget(IComponent pTarget, IFileHandleReceiver pListener,
                                       String... pExtension)
{
    Object oResource = pTarget.getResource();
   
    if (!(oResource instanceof JComponent) && !(oResource instanceof JFrame))
    {
        throw new IllegalArgumentException("Given object can't be a drop target!");
    }
   
    SimpleFileDropHandler handler = new SimpleFileDropHandler(pListener, pExtension);
   
    if (oResource instanceof JFrame)
    {
        ((JFrame)oResource).setTransferHandler(handler);
    }
    else
    {
        JComponent jcomp = getComponent((JComponent)oResource);
       
        if (jcomp != null)
        {
            jcomp.setTransferHandler(handler);
        }
    }
}

private JComponent getComponent(JComponent pComponent)
{
    if (pComponent instanceof JVxEditor)
    {
        JComponent comp = ((JVxEditor)pComponent).
                          getCellEditorHandler().getCellEditorComponent();
       
        if (comp instanceof JScrollPane)
        {
            Component cView = ((JScrollPane)comp).getViewport().getView();
           
            if (cView instanceof JComponent)
            {
                return ((JComponent)cView);                    
            }
            else
            {
                return null;
            }
        }
        else
        {
            return comp;
        }
    }
    else
    {
        return pComponent;
    }        
}

In principle, we set the TransferHandler for a JComponent. Above code detects the right JComponent because there's a difference if you use an IEditor.

The TransferHandler could be implemented like our SimpleFileDropHandler

public class SimpleFileDropHandler extends TransferHandler
{
    private IFileHandleReceiver listener;
   
    private String[] extensions;
       
    public SimpleFileDropHandler(IFileHandleReceiver pListener, String... pExtension)
    {
        listener = pListener;
        extensions = pExtension;
    }
   
    @Override
    public boolean canImport(TransferHandler.TransferSupport pSupport)
    {
        if (!pSupport.isDrop())
        {
            return false;
        }

        if (!pSupport.isDataFlavorSupported(DataFlavor.javaFileListFlavor))
        {
            return false;
        }

        boolean copySupported = (COPY & pSupport.getSourceDropActions()) == COPY;
       
        if (copySupported)
        {
            pSupport.setDropAction(TransferHandler.COPY);
            return true;
        }            
       
        return false;
    }
   
    @Override
    public boolean importData(TransferHandler.TransferSupport support)
    {
        if (!support.isDrop())
        {
            return false;
        }

        List<File> files;
        try
        {
            files = (List<File>)support.getTransferable().
                    getTransferData(DataFlavor.javaFileListFlavor);
        }
        catch (UnsupportedFlavorException ex)
        {
            // should never happen (or JDK is buggy)
            return false;
        }
        catch (IOException ex)
        {
            // should never happen (or JDK is buggy)
            return false;
        }
       
        if (listener != null)
        {
            for (File file : files)
            {
                try
                {
                    listener.receiveFileHandle(new FileHandle(file));
                }
                catch (Exception e)
                {
                    ExceptionHandler.raise(e);
                }
            }
        }
       
        return true;
    }
}

Have fun ;-)

Docking Framework with JVx application (Swing)

In last weeks, we got some inguiries about Docking support in JVx. Our answer was always the same:

JVx itself doesn't offer a Docking API because there are many docking frameworks available and it's super easy to integrate one of them.

But this wasn't the expected answer (for most people) because it wasn't clear enough or it wasn't believed. We said that the integration of any existing library or framework is super easy and super fast because it's usually not more effort than the integration in any other source code. But still....

Let's add some numbers

Integration in our existing JVx application
10 minutes (only one screen) and 30 minutes (the whole desktop)

Docking Framework Evaluation
3 hours (Test code, examples, ...)

Implementing Docking Features
6 hours (because of missing documentation and/or incomplete examples)

So, the integration took not more than 10 minutes, but the missing knowledge of Docking Frameworks was expensive. But this had nothing to do with JVx because getting know-how with frameworks or tools are always expensive.

We tried two different docking frameworks, but found much more: Stackoverflow question

We didn't consider commercial frameworks and inactive projects. Also GPL solutions weren't an option for us.

The first candidate was FlexDock because "the screenshot was impressive".
Our first demo was working but we didn't find any documentation (only one inofficial getting started). The demo application was complete enough but we had some problems because the framework uses a static context for component registration and this was a no-go. The API was simple but unclear/inconsistent in many situations.

We tried the next framework and this was Docking Frames. The last update of this framework was Feb 2017 and documentation is available. The tutorials are good and more than enough. The framework itself is super powerful but the API.... (oh my good). There is a core API and a common API. You shouldn't use the core API and work with common API instead. After some hours we had all our features working, but the documentation is soo complex and all examples are really complex. Long story, short: Very powerful but not easy to understand.

We took a simple demo application and tried to replace a Split Panel, in one of our screens, with dockable panels. After this was done, we replaced the whole MDI desktop (internal fames) with a dockable desktop (dockable panels).

The result is shown in different videos:

Docking Framework integration (simple Screen)

Docking Framework integration (frame and tab mode)

And the whole use-case, with replaced MDI desktop:

Docking Framework integration (desktop mode)

And, finally I want to show you the source code of our changes:

/** the data table. */
private NavigationTable tableElegantdock = new NavigationTable();
/** the details group. */
private UIGroupPanel groupPanelElegantdock = new UIGroupPanel();
/** the docking control. */
private CControl ccontrol;

private void initializeUI() throws Throwable
{
    ...

    ccontrol = new CControl();
    ccontrol.putProperty(StackDockStation.TAB_PLACEMENT, TabPlacement.TOP_OF_DOCKABLE);
   
    DefaultSingleCDockable dock1 = new DefaultSingleCDockable("data");
    dock1.setTitleText("Data");
    dock1.setMinimizable(false);
    dock1.setExternalizable(false);
    dock1.add((Component)tableElegantdock.getResource());

    DefaultSingleCDockable dock2 = new DefaultSingleCDockable("detail");
    dock2.setTitleText("Details");
    dock2.setMinimizable(false);
    dock2.setExternalizable(false);
    dock2.add((Component)groupPanelElegantdock.getResource());

    CGrid cgrid = new CGrid(ccontrol);
    cgrid.add(0,  0,  1,  1, dock1);
    cgrid.add(1,  0,  1,  1, dock2);
   
    ccontrol.getContentArea().deploy(cgrid);
   
    dock1.setVisible(true);
    dock2.setVisible(true);

    add(new UICustomContainer(ccontrol.getContentArea()), UIBorderLayout.CENTER);

The relevant code for JVx integration (will only work for JVx' swing UI):

dock1.add((Component)tableElegantdock.getResource())

Use the JVx resource (JPanel) and add it as component.

dock2.add((Component)groupPanelElegantdock.getResource());

Use the JVx resource (JPanel with a TitledBorder) and add it as component.

add(new UICustomContainer(ccontrol.getContentArea()), UIBorderLayout.CENTER)

Adds the dock control to the screen as custom container. This class connects a standard Container with JVx UI.

I won't publish the code for the desktop replacement because it's the same again with different variable names.

Map component for JVx applications

We played around with some interesting stuff in the last weeks. Some customers and users asked us if we have a Map component.

We don't have a ready-to-use component but there are many free and commercial solutions available. The integration in a JVx application with custom components is not a problem and doesn't need much effort. But sure, an out-of-the-box solution would be useful.

Our Research team did create a PoC for a Map. The results is very nice and we want to show you some screenshots from our tests.

Swing integration (Tab mode)

Swing integration (Tab mode)

Swing integration (frame mode)

Swing integration (frame mode)

Vaadin integration

Vaadin integration

Vaadin integratin (corporation mode)

Vaadin integratin (corporation mode)

We didn't add the component to JVx because it's just a PoC and not ready-to-use.
But the Map integration looks great :)

Smooth Forms 10g, 11i, 12c to Java Migration

This is a follow up for Smooth Forms 6i to Java Migration.

The following video demonstrates the integration of a Java screen into a Forms application. Since WebForms, it's possible to embedd Java swing components directly. We did create a compatibility layer to support special mouse features and to fix repaint problems. Our integration layer allows you to integrate a complete Java application, based on JVx.

Smooth Forms 10g, 11i, 12c Java Migration

The application is the standard Summit demo application for Forms. The Java application is very similar to the original application because we want to show how easy a 1:1 migration could be. The application was created with our low code platform VisionX. It offers a modern UI and is based on JVx, the OpenSource Java application framework. The final scene shows the embedded Java screen in Forms. It's super easy and doesn't need additional code. It just works with our compatibility layer.

Smooth Forms 6i to Java Migration

Following video demonstrates our Java integration for Forms 6i. In Forms 6i you can't embedd a Java application without complex ActiveX controls. So we chose an alternative for a smooth integration. It's more like an IPC between Forms and Java but with some additional features like automatic window switching.

Our solution is super flexible and it's possible to send custom events from Forms to Java and from Java to Forms. Here's an impression:

Smooth Forms6i Java Migration

Both applications use the same database. The Forms application is like any other Forms application and the Java Application was created with VisionX based on the Open Source Java Application Framework JVx.

toPDF 1.2 is available

Our Open Source PDF converter (toPDF) server is available in version 1.3

It contains some smaller bugfixes and very useful new features.

What's new?

  • BCL easyPDF SDK 8.0 support

    Convert via native Java API or COM interface. We've introduced EasyPdfNativeOperator which is now the default operator for PDF conversion.

  • Bookmark option

    This option creates bookmarks in your PDF document for headlines/sections in Word. Simply set the X-BOOKMARKS header parameter or use the REST API.

  • Additional attributes

    Set additional attributes for the conversion to PDF via Request parameters or REST API.

Get the current version from the project site ;-)

JVx Oracle Forms integration got better

We have a solution for Oracle Forms developers which allows integration of JVx applications and screens directly in your Oracle Forms screen/window. It's an awesome feature and works like a charm but had some limitations with repaints.

Let's have a look

Redraw problem (menu)

Redraw problem (menu)

Redraw problem (window)

Redraw problem (window)

We fixed the problem with our current version

No redraw issues (menu)

No redraw issues (menu)

No redraw issues (window)

No redraw issues (window)

It's was very tricky to solve the problem and it's well known. Our solution will work with other Swing based components as well.

JVx Reference, Custom Components

Let's talk about custom components, and how to create them.

The GUI of JVx

We've previously covered how the GUI of JVx works, and now we will have a look on how we can add custom components to the GUI.

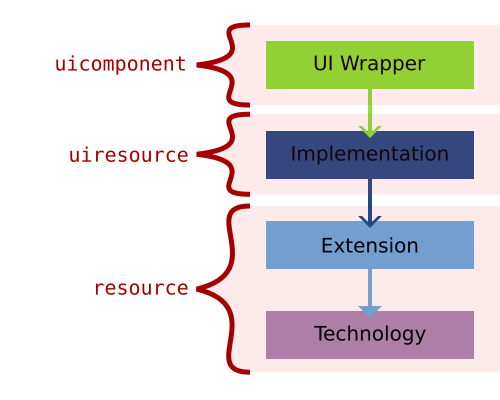
In the terminology of JVx there are two different kinds of custom components:

  1. UI based
  2. Technology based

We will look at both, of course.

Custom components at the UI layer

The simplest way to create custom components is to extend and use already existing UI classes, like UIPanel or UIComponent. These custom components will be Technology independent because they use Technology independent components, there is no need to know about the underlying Technology. You can think of those as a "remix" of already existing components.

The upside is that you never have to deal with the underlying Technology, the downside is that you can only use already existing components (custom drawing is not possible, for example).

Let's look at a very simple example, we will extend the UILabel to always display a certain postfix along with the set text:

public class PostfixedLabel extends UILabel
{
    private String postfix = null;

    // We must store the original text so that we can return
    // it if requested. Otherwise we could only return the text
    // with the appended postfix, which works unless the postfix
    // changes.
    private String text = null;

    public PostfixedLabel()
    {
        super();
    }

    public PostfixedLabel(String pText)
    {
        super(pText);
    }

    public PostfixedLabel(String pText, String pPostfix)
    {
        super(pText);

        setPostfix(pPostfix);
    }

    @Override
    public String getText()
    {
        return text;
    }

    @Override
    public void setText(String pText)
    {
        text = pText;

        if (!StringUtil.isEmpty(postfix) &amp;&amp; !StringUtil.isEmpty(pText))
        {
            // We translate the text and the postfix now separately,
            // the underlying label will obviously try to translate
            // the concatenated version.
            super.setText(translate(pText) + translate(postfix));
        }
        else
        {
            super.setText(pText);
        }
    }

    public String getPostfix()
    {
        return postfix;
    }

    public void setPostfix(String pPostfix)
    {
        postfix = pPostfix;

        // If the postfix changed, we must update the text.
        setText(text);
    }
}

It will be treated just like another label, but every time a text is set, the postfix is appended to it.

Another example, we want a special type of component, one that always does the same but will be used in many different areas of the application, it should contain a label and two buttons. The best approach for a custom component which should not inherit any specific behavior is to extend UIComponent:

public class BeepComponent extends UIComponent
{
   public BeepComponent()
   {
       super(new UIPanel());
       
       UIButton highBeepButton = new UIButton("High Beep");
       highBeepButton.eventAction().addListener(Beeper::playHighBeep);
       
       UIButton lowBeepButton = new UIButton("Low Beep");
       highBeepButton.eventAction().addListener(Beeper::playLowBeep);
       
       UIFormLayout layout = new UIFormLayout();        

       uiResource.setLayout(layout);
       uiResource.add(new UILabel("Press for beeping..."), layout.getConstraints(0, 0, -1, 0));
       uiResource.add(highBeepButton, layout.getConstraints(0, 1));
       uiResource.add(lowBeepButton, layout.getConstraints(1, 1));
   }
}

So we extend UIComponent and set a new UIPanel as UIResource on it, which we can use later and which is the base for our new component. After that we added a label and two buttons which will play beep sounds if pressed. This component does not expose any specific behavior as it extends UIComponent, it only inherits the most basic properties, like background color and font settings, yet it can easily be placed anywhere in the application and will perform its duty.

Custom controls at the Technology layer

The more complex option is to create a custom component at the Technology layer. That means that we have to go through a multiple steps process to create and use the component:

  1. Create an interface for the functionality you'd like to expose
  2. Extend the Technology component (if needed)
  3. Implement the necessary interfaces for JVx
  4. Extend the factory to return the new component
  5. Create a UIComponent for the new component
  6. Use the new factory

I will walk you through this process, step by step.

The upside is that we can use any component which is available to us in the Technology, the downside is that it is quite some work to build the correct chain, ideally for every technology.

Creating an interface

The first step is to think about what functionality the component should expose, we will use a progress bar as example. We don't want anything fancy for now, a simple progress bar on which we set a percent value should be more than enough:

/**
 * The platform and technology independent definition for a progress bar.
 */

public interface IProgressBar extends IComponent
{
    /**
     * Gets the current value, in percent.
     *
     * @return the current value. Should be between {@code 0} and {@code 100}.
     */

    public int getValue();
   
    /**
     * Sets the current value, in percent.
     *
     * @param pValue the value. Should be between {@code 0} and {@code 100}.
     */

    public void setValue(int pValue);
}

Might not be the most sophisticated example (especially in regards to documentation) but it will do for now. This interface will be the foundation for our custom component.

Extending the component, if needed

We will be using Swing and the JProgressBar for this example, so the next step is to check if we must add additional functionality to the Technology component. In our case we don't, as we do not demand any behavior that is not provided by JProgressBar, but for the sake of the tutorial we will still create an extension on top of JProgressBar anyway.

public class ExtendedProgressBar extends JProgressBar
{
    public ExtendedProgressBar(int pMin, int pMax)
    {
        super(pMin, pMax);
    }
}

Within this class we could now implement additional behavior independent of JVx. For example, we provide many extended components for Swing, JavaFX and Vaadin with additional features but without depending on JVx. The extension layer is the perfect place to extend already existing components with functionality which will be used by, but is not depending on, JVx.

Creating the Implementation

The next step is to create an Implementation class which allows us to bind our newly extended JProgressBar to the JVx interfaces. Luckily there is the complete Swing Implementation infrastructure which we can use:

public class SwingProgressBar<ExtendedProgressBar> extends SwingComponent
                              implements IProgressBar
{
    public SwingProgressBar()
    {
        // We can hardcode the min and max values here, because
        // we do not support anything else.
        super(new ExtendedProgressBar(0, 100));
    }
   
    @Override
    public int getValue()
    {
        return resource.getValue();
    }
   
    @Override
    public void setValue(int pValue)
    {
        resource.setValue(pValue);
    }
}

That's it already. Again, in this case it is quite simple because we do not expect a lot of behavior. The implementation layer is the place to "glue" the component to the JVx interface, implementing missing functionality which is depending on JVx and "translating" and forwarding values and properties.

Extending the factory

Now we must extend the Factory to be aware of our new custom component, that is equally simple as our previous steps. First we extend the interface:

public interface IProgressBarFactory extends IFactory
{
    public IProgressBar createProgressBar();
}

And afterwards we extend the SwingFactory:

public class ProgressBarSwingFactory extends SwingFactory
                                     implements IProgressBarFactory
{
    @Override
    public IProgressBar createProgressBar()
    {
        SwingProgressBar progressBar = new SwingProgressBar();
        progressBar.setFactory(this);
        return progressBar;
    }
}

Again, it is that easy.

Creating the UIComponent

So that we can use our new and shiny progress bar easily, and without having to call the factory directly, we wrap it one last time in a new UIComponent:

public class UIProgressBar<IProgressBar> extends UIComponent
                           implements IProgressBar
{
    public UIProgressBar()
    {
        // We'll assume that, whoever uses this component,
        // is also using the correct factory.
        super(((IProgressBarFactory)UIFactoryManager.getFactory()).createProgressBar());
    }
   
    @Override
    public int getValue()
    {
        return uiResource.getValue();
    }
   
    @Override
    public void setValue(int pValue)
    {
        uiResource.setValue(pValue);
    }
}

Nearly done, we can nearly use our new and shiny component in our project.

Using thecustom factory

Of course we have to tell JVx that we want to use our factory, and not the default one. Depending on the technology which is used, this has to be done at different places:

Swing and JavaFX

Add the factory setting to the application.xml of the application:

<Launcher.uifactory>your.package.with.custom.components.SwingProgressBarFactory</Launcher.uifactory>
Vaadin

Add the following setting to the web.xml under the WebUI Servlet configuration:

<init-param>
    <param-name>Launcher.uifactory</param-name>
    <param-value>your.package.with.custom.components.VaadinProgressBarFactory</param-value>
</init-param>

Using our new component

And now we are done, from here we can use our custom component like any other.

UIProgressBar progressBar = new UIProgressBar();
progressBar.setValue(65);

// Skip

add(progressBar, constraints);

Wrapping custom components with UICustomComponent

There is a third way to have Technology dependent custom components in JVx, you can wrap them within a UICustomComponent:

JProgressBar progressBar = new JProgressBar(0, 100);
progressBar.setValue(100);

UICustomComponent customProgressBar = new UICustomComponent(progressBar);

// Skip

add(customProgressBar, constraints);

This has the upside of being fast and easy, but the downside is that your code has to know about the currently used Technology and is not easily portable anymore.

Conclusion

As you can see, there are multiple ways of extending the default set of components which are provided by JVx, depending on the use case and what custom components are required. It is very easy to extend JVx with all the components one does require.