This website uses cookies for visitor traffic analysis. By using the website, you agree with storing the cookies on your computer.More information

Posts tagged: JVx

AngularJS 4 with VisionX and JVx REST services

Some time ago I wrote articles about my "web-technology" tests. The first article covered AngularJS with JVx in action. It was a simple list view for contacts, had an Edit form and was based on AngularJS 1.4. The second article was about Oracle JET with JVx. The result was another list view with contacts, without Edit form.

Both solutions were more or less a demonstration for the automatic REST interface of JVx but not a real technology PoC.

The second article about Oracle JET was written in Feb 2016 and the first, about AngularJS, was written in July 2015 - long time ago. Currently, Angular 4 is available and Angular 5 is coming. Big version jumps with big API changes and many new features.

Last week, I thought it might a good idea to start a new evaluation of AngularJS. One week later, I think different... but one step after another.

My plan was the creation of a very simple application with some enhanced features, like routing, CRUD, styling, custom components, REST with authentication, Deployment. This was the base idea because I read really cool marketing articles about Angular and thought it might be easy to create a simple application with expected features.

So, what did I do to start?

The Angular tutorial was great for a jump start. You'll build a smart heroes application with a small dashboard. Sure, it's not a real world application but has everything on board and hey, the Tutorial will show how to integrate REST services. I thought it might be an easy task and won't last more than 1 day!

The tutorial has 7 chapters and the last one integrates REST. The chapter 1 was easy, because it was the instruction :) The second chapter contains the setup process which should be trivial, because I manually tried to create an AngularJS 4 application from scratch and it was super simple. But the setup for the tutorial wasn't easy because the creation of a new project from scratch contained too many files and the expected project layout (shown in the tutorial) was reduced to a bare minimum. It wasn't possible to delete all additional files because the project preview in the browser didn't work afterwards. So I decided to download the example archive.

This was the right decission because everything was pre-configured :) First lesson learned: Project configuration is not easy and woha, many different config files.

It was super easy to follow the tutorial and chapters 3, 4 were relative short and fast to do. Starting with chapter 5, the whole thing was starting to get complex because Service integration, Routing and HTTP(REST) were complex things. The chapters 5, 6 and 7 are very long and boring because you have to do so many things (hey, it's a tutorial and it's good as it is!).
No worries because I'm an "expert" and so I jumped to Chapter 6 and downloaded the finished example archive. The example was working without problems in my test environment :) but it was without support for HTTP/REST calls because I thought it might be a good idea to integrate the features based on the tutorial on my own.

So the next step was the integration of my own REST service instead of the dummy service in the tutorial. But first... I needed a REST service.

The creation of a web service was super easy because of our Low Code Development Platform - VisionX. It creates JVx based applications with all gimmicks. I did create a simple Heroes application with VisionX. The application has one screen:
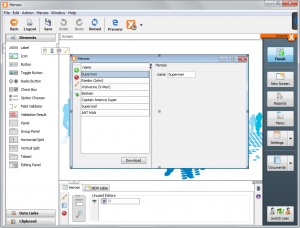
Heroes app created with VisionX

Heroes app created with VisionX

The application was ready to use in 1 minute and had one database table:
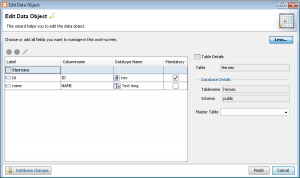
Heroes table

Heroes table

The heroes table contains the columns: ID and NAME. Thanks to JVx, the REST service was ready-to-use. The request: http://localhost/services/rest/Heroes/HeroesWorkScreen/data/heroes

returned the JSON string with my test data:

[
  {
    "ID": 1,
    "NAME": "Superman"
  },
  {
    "ID": 4,
    "NAME": "Rambo (John)"
  },
  {
    "ID": 6,
    "NAME": "Wolverine (X-Men)"
  },
  {
    "ID": 2,
    "NAME": "Batman"
  },
  {
    "ID": 5,
    "NAME": "Captain America"
  },
  {
    "ID": 3,
    "NAME": "ANT MAN"
  }
]

So, my backend was ready.

The Next step was the integration into my Angular frontend. It was easy to find the right source file for the integration, because the hero-service was encapsulated. The first problem was that my REST service required authentication and the service implementation didn't use authentication. I had the same problem with missing authentication support in Angular 1.4 but found some useful things on stackoverflow. With Angular 4 everything has changed because you code Typescript and the API is different to 1.4, so my old solution didn't work. I tried to find something in the Internet but had a lot of problems because most help was for Angular 2. And I found so many github issues for http authentication and most issues had tons of comments... frustrating and not effective.

I tried to search in the official Angular documentation and found some hints about HttpClient in the online guide. But I didn't know HttpClient because my example was created with HttpModule. Not helpful that the example from the tutorial is different to the official documentation.... or.... I didn't read the details.... or.... I'm a bad developer.... or (and this is a fact) my Javascript/Typescript know-how is not enough. But anyway, it was not a standard task to add authentication to my hero-service.

I'm not 100% sure how I solved the problem, but I guess I read the API doc about http and an information about the new Angular2 HttpModule (means that HttpModule is old and HttpClient is new?). I googled around for sime time and tried a lot of hints, but it was painful. So much documentation about such a simple problem and no concreate solution for the http authentication problem.

Here's my solution:

export class HeroService {
 
  private heroesUrl : string;
       
  private options : RequestOptions;
  private headers : Headers;
       
  constructor(private http: Http)
  {
    this.headers = new Headers();
    this.headers.append('Accept', 'application/json')
    this.headers.append('Content-Type', 'application/json');
    this.headers.append('Authorization', 'Basic ' + btoa("admin:admin"));
         
    this.options = new RequestOptions({ headers: this.headers, withCredentials: true });

    this.heroesUrl = 'http://localhost/services/rest/Heroes/HeroesWorkScreen/data/heroes';
  }

  getHeroes(): Promise<Hero[]> {
    return this.http.get(this.heroesUrl, this.options)
                    .toPromise()
                    .then(response => response.json() as Hero[])
                    .catch(this.handleError);
  }

}

I know that username and admin are hard-coded but it's a simple test application without login. It's not really a problem to add a login form if needed and to replace the hard-coded values with variables.

After I solved the authentication problem, and everything was working in my test environment, I tried to continue with tutorial chapter 7 and tried to add new features like Adding new heroes, Deleting heroes. This was really straight forward and worked without problems, even with authentication.

Yuhu. After two days I had a working Angular 4 application which reads data from a REST service and offers CRUD. A simple routing was available and I had custom components, styling and was happy. I thought the next step should be a test deployment. Sounds easy and I thought it couldn't be a problem... but... deployment hell.

Why is Angular deployment so complex?

The documentation has a lot of information about deployment. The simple deployment is really straight-forward because it's enough to copy/paste your development environment. But this is not recommended for production environments because of performance and many other things. So, i tried to deploy a production ready application and not my development environment... And the nightmare started.

I found a super simple deployment guide for Angular 4. First problem: didn't work for my example project because:

Unable to find @angular/cli in devDependencies

Please take the following steps to avoid issues:
"npm install --save-dev @angular/cli@latest"

After installing the missing module, the next problem:

Cannot read property 'config' of null
TypeError: Cannot read property 'config' of null

Also no problem because google found that my project needs an additional config file:

.angular-cli.json

I found this file in my demo Angular application, created from scratch. I tried to edit and adapt the file for my heroes application and the next problem came up:

ENOENT: no such file or directory, stat '...\angular-tour-of-heroes\src\tsconfig.app.json'

No problem, same solution as before (copy/paste/change).

Hurray, the command:

ng build -prod

was successful!

The dist folder contained my production ready application with 6 files! Great.

The deployment to my Tomcat application server was also super easy, because VisionX is able to create war files with a single mouse click. I changed the created war file and put the built Angular files in the root directory and deployed the war file.

No surprise, the application didn't work because some javascript files weren't found. The developer console of Chrome browser was a big help!

So, what should I do?

No... not Google. I read the development guide and found the solution in section Load npm package files from the web (SystemJS).

So, I changed my deployment and replaced node_modules in my index.html with https://unpkg.com/. This solved one problem but the developer console showed more 404 errors. I had to remove following:

<script>System.import('main.js').catch(function(err){ console.error(err); });</script>

and

<link rel="stylesheet" href="styles.css">

I also had to replace the node_modules path in systemjs.config.js with https://unpkg.com/. Oh, and the file was missing in dist folder. I decided to follow the deployment guide and created a file with the name systemjs.config.server.js. If you do this, the index.html needs a changed mapping.

I didn't replace the values by hand. Here's my ant build file:

<project name="AngularJS" default="start.complete">

  <!--
 *****************************************************************
 * information
 *****************************************************************
 -->

  <description>Angular JS deployment</description>

  <!--
 *****************************************************************
 * tasks
 *****************************************************************
 -->

  <target name="start.complete" description="Prepares production files">

    <property name="heroes" location="D:/dev/other/angularjs/angular-tour-of-heroes" />
    <property name="dist"   location="${heroes}/dist" />

    <replace file="${dist}/index.html" encoding="UTF-8">
      <replacetoken><![CDATA[<link rel="stylesheet" href="styles.css">]]></replacetoken>
      <replacevalue><![CDATA[]]></replacevalue>
    </replace>

    <replace file="${dist}/index.html" encoding="UTF-8">
      <replacetoken><![CDATA[<script>System.import('main.js').catch(function(err){ console.error(err); });</script>]]></replacetoken>
      <replacevalue><![CDATA[]]></replacevalue>
    </replace>

    <replace file="${dist}/index.html" encoding="UTF-8">
      <replacetoken><![CDATA[node_modules/]]></replacetoken>
      <replacevalue><![CDATA[https://unpkg.com/]]></replacevalue>
    </replace>
   
    <replace file="${dist}/index.html" encoding="UTF-8">
      <replacetoken><![CDATA[<script src="systemjs.config.js"></script>]]></replacetoken>
      <replacevalue><![CDATA[<script src="systemjs.config.server.js"></script>]]></replacevalue>
    </replace>
   
    <copy file="${heroes}/src/systemjs.config.server.js" tofile="${dist}/systemjs.config.server.js" />
       
  </target>

</project>

With above changes, it was possible to use my application with my tomcat application server. But I had two more problems!

First, my REST service URL was wrong because it was set for my dev environment.
Second, the browser reload of URLs didn't work because the application server returned 404 for e.g. https://cloud.sibvisions.com/heroes/heroes/3

Two more problems, omg.

But clear, the REST service URL can't be the same in the prod environment. I saw that Angular comes with support for environments and thought this would solve my first problem.... No way!
The problem was that the environment integration worked for build time, but not for development. It wasn't possible to import the environment constant in my Typescript files. It wasn't possible beause the file wasn't routed correctly and I didn't find a solution for this problem. The dev server returned 404 for the access to ../environments/environment.js. I tried to find a solution for more than one day, but gave up. I found out that the config files of an Angular application are evil. You have so many options and have absolutely no idea what's right. This is a common problem if you search the internet and it's a good idea to use a pre-created configuration. But the configuration of the heroes application was different to a newly created configuration. So I reverted all my environment changes and decided to follow the official documentation. This code is the clue:

if (!/localhost/.test(document.location.host)) {
  enableProdMode();
}

It doesn't read the value from the environment constant, as recommended here. Not sure if this was recommended in Angular 2 and not for Angular 4, but the support is still built-in. I found so many horrible solutions for the environment problem, but no simple and easy one.

I solved the problem with my heroes-service and static properties. Yep, static field properties. It's that easy!

Here's a snippet from my service:

export class HeroService {
 
  private static heroesUrl : string;
       
  public static initMode(prodMode: boolean): void {
    if (prodMode) {
      enableProdMode();

      HeroService.heroesUrl = 'https://cloud.sibvisions.com/heroes/services/rest/Heroes/HeroesWorkScreen/data/heroes';
    }
    else {
      HeroService.heroesUrl = 'http://localhost/services/rest/Heroes/HeroesWorkScreen/data/heroes';
    }
  }
...

I used the recommended environment detection in my main.ts:

HeroService.initMode(!/localhost/.test(document.location.host));

This solved my environment problem completely. I'm not sure what's the best solution and I would recommend the built-in environment solution, but there should be a working tutorial or example for development and deployment.

Second lesson learned: Deployment is not easy with Angular if you want to make it right. The documentation is not clear and it's complex!!!

Back to my second problem: browser reload!
This is documented here. Clear, isn't it?

So, no solution for my Apache Tomcat installation. Rewrite rules are supported but why so tricky? I won't configure routing in my application and in the application server. This should simply work.
I tried to find a simple solution and created a simple Filter, because too much configuration was not what I want!

My filter:

public void doFilter(ServletRequest pRequest, ServletResponse pResponse, FilterChain pChain) throws IOException, ServletException
    {
        String sURI = ((HttpServletRequest)pRequest).getRequestURI();
       
        if (StringUtil.isEmpty(FileUtil.getExtension(sURI)))
        {
            RequestDispatcher reqdis = pRequest.getRequestDispatcher(sIndex);
           
            reqdis.forward(pRequest, pResponse);
        }
        else
        {
            pChain.doFilter(pRequest, pResponse);
        }
    }

Configration (web.xml):

<filter>
   <filter-name>IndexHtmlFilter</filter-name>
   <filter-class>demo.angular.IndexHtmlFilter</filter-class>
   
   <init-param>
    <param-name>index</param-name>
    <param-value>/app/index.html</param-value>
   </init-param>
 </filter>
 
 <filter-mapping>
   <filter-name>IndexHtmlFilter</filter-name>
   <url-pattern>/app/*</url-pattern>
 </filter-mapping>

Not my best code, but works.... if you put the application in a seperate folder... e.g. The REST servic call:

//souldn't route to index.html
https://cloud.sibvisions.com/heroes/services/rest/Heroes/HeroesWorkScreen/data/heroes

//should route to index.html
https://cloud.sibvisions.com/heroes/heroes/2

So it was easier to move the application into a sub directory: /app
https://cloud.sibvisions.com/heroes/app/heroes/2

and everything starting with /app/* will be routed to /app/index.html if necessary.

This configuration and the filter solved my second problem and hurray, my application was working without any problems!

Oh, in order to serve my application from the /app directory, I had to set the base href in index.html:

ng build -prod --base-href /heroes/app/

Here's the application: https://cloud.sibvisions.com/heroes/app/
(Please don't delete my default heroes because there's no "restore defaults" implemented)

What's next?

I wasn't happy with default features of tutorial app because I missed an export feature. So I decided to add a Report which contains all my heroes. The REST service was ready in one minute because VisionX has Reporting support. But how to download/save the report?

I had no example and google returned too many answers for Angular 2 and one for Angular 4. I followed the instructions and had many problems because the saveAs method wasn't found... So I had the next big problem!

Every new feature was a big problem for me :)

This feature was horrible because I had absolutely no plan about angular modules. I found several save-file modules and tried to install one by one. No module was working as documented. Not sure if the problem was because of my configuration or because of Angular 4. Finally I found one solution but I had to change my system.config.js manually and add:

'file-saver': 'npm:file-saver'

to the system loader and

'file-saver': {
        format: 'global',
        main: 'FileSaver.js',
        defaultExtension: 'js'
      }

to the packages.

I don't know why the default module installation didn't work but it did not!

After everything worked in my dev environment, I tried the same application in my prod environment and... error.
The FileSaver.js was not found???

Absolutely unclear, but I solved the problem dirty (or not) in my index.html. Simply added

<script src="node_modules/file-saver/FileSaver.min.js"></script>

and it was find in dev and prod environment.

... I thought.

One more problem: Download worked but the content was damaged!

The problem was related to the content-type or maybe the encoding?

Recommended (Solution 1, Solution 2) solution:

this.http.post(HeroService.heroesUrlAction + 'createListReportHeroes', JSON.stringify([null, null]))
                                 .toPromise()
                                 .then(response => {
                                   var blob = new Blob([response._body], {type: 'application/vnd.openxmlformats-officedocument.spreadsheetml.sheet'});
                                   saveAs(blob, 'report.xlsx');
                                 })
                                 .catch(this.handleError);

This wasn't working because something was missing:

var optCopy = new RequestOptions({ headers: this.headers, withCredentials: true, responseType: ResponseContentType.Blob });+

      this.http.post(HeroService.heroesUrlAction + 'createListReportHeroes', JSON.stringify([null, null]), optCopy)
                                 .toPromise()
                                 .then(response => {
                                   var blob = new Blob([response.blob()], {type: 'application/vnd.openxmlformats-officedocument.spreadsheetml.sheet'});
                                   saveAs(blob, 'report.xlsx');
                                 })
                                 .catch(this.handleError);

Clear, the ResponseContentType.Blob has to be set!!!
And if you set this type, the response._body throws a warning? Use response.blob() instead!

It took me one hour to remove this warning!

Next?

I'm done!

The whole application development made me 1 year older because of frustration. I know that I'm not an Angular expert and I didn't read everything in the official documentation or guide/tutorial, but the whole development was a torture - sure, the result is great!

Too many different solutions for simple problems: deployment, downloading a file, configuration.

The documentation is awesome but too complex and contains no simple use cases. A simple deployment would be awesome and the problem with environments was horrible. Angular is powerful, no doubt! The configuration and deployment aren't straight forward. Also the mechanism behind the module system was not always working, at least not for me.

I love using custom components and the styling integration is great. The routing configuration is error-prone without an IDE or specific tools. My application didn't use all available features like testing, linting, ...

Finally

The application is available as JVx application with Vaadin UI here.
Login with admin as username and password.

The Angular 4 application.

MacOS JInternalFrame border problem

With new MacOS versions, the good old Aqua LaF has some problems.

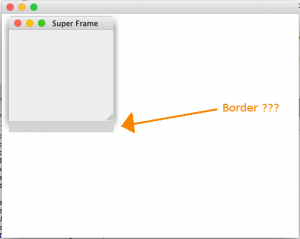
If you create a simple MDI application with JDesktopPane and JInternalFrame, following problem will occur:

Default JInternalFrame

Default JInternalFrame

The code for our problem:

import java.awt.BorderLayout;
import java.awt.Color;
import java.awt.Component;
import java.awt.Dimension;
import java.awt.Graphics;
import java.awt.Insets;
import java.awt.Rectangle;
import java.awt.event.WindowAdapter;
import java.awt.event.WindowEvent;

import javax.swing.JDesktopPane;
import javax.swing.JFrame;
import javax.swing.JInternalFrame;
import javax.swing.JLabel;
import javax.swing.JTabbedPane;
import javax.swing.border.Border;
import javax.swing.border.CompoundBorder;
import javax.swing.plaf.UIResource;

public class TestJVxTabbedPane
{
    public static void main(String[] args) throws Exception
    {
        new TestJVxTabbedPane();
    }
   
    public TestJVxTabbedPane()
    {
        JFrame frame = new JFrame();
        frame.setDefaultCloseOperation(JFrame.EXIT_ON_CLOSE);
        frame.getContentPane().setLayout(new BorderLayout());
       
        JDesktopPane dpan = new JDesktopPane();
        dpan.setBackground(Color.white);
               
        JInternalFrame fr = new JInternalFrame();
        fr.setTitle("Super Frame");
        fr.setPreferredSize(new Dimension(200, 200));
        fr.pack();
        fr.setResizable(true);
        fr.setMaximizable(true);
        fr.setIconifiable(true);
        fr.setClosable(true);
        fr.setVisible(true);
               
        dpan.add(fr);
       
        frame.getContentPane().add(dpan, BorderLayout.CENTER);
        frame.setSize(500, 400);
        frame.setLocationRelativeTo(null);

        frame.setVisible(true);      
    }
}

(nothing special, a simple JInternalFrame, JDesktopPane combination)

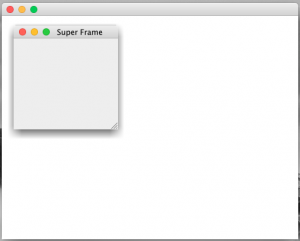
We don't like bad looking UIs, so we fixed the problem in JVx:

JInternalFrame without border problem

JInternalFrame without border problem

The fix will work without JVx as well. We made tests with different MacOS versions and our solution worked in all our tests.

JVx Reference, Launchers and Applications

Let's talk about Launchers, and how they are used to start JVx applications.

Starting an application

We've previously outlined a simple way to start a JVx application, and now we're going to look at how to do it with a launcher to benefit from everything JVx has to offer. From a technical point of view, there are two prerequisites which must be fulfilled before a JVx application can run:

  1. the JVM must have started.
  2. the technology specific system must have started.

Then, and only then, the JVx application can run. Depending on the implementation that is used, that can be as easily as instancing the factory (Swing, JavaFX), but can also mean that a servlet server has to start (Vaadin). Because we do not wish to encumber our applications with technology specific code, we have to entrust all this to an encapsulated entity, meaning the implementations of ILauncher and IApplication.

Following the chain

The steps for getting an application to start are as follows:

  1. The first thing that must run is obviously the JVM, without it we won't have much luck starting anything.
  2. The launcher must be created and it must start the Technology.
  3. The launcher than creates the application which the user is seeing.

Launcher chain

So we need two classes, the ILauncher implementation which knows how to start the Technology and the IApplication implementation. That we already knew, so let's try to put this into code. For simplicity reasons (and because I don't want to write a complete factory from scratch for this example) we will reuse the Swing implementation and write a new launcher and application for it.

Entry point

The Main class that we will use as example is very straightforward:

  1. public class Main
  2. {
  3.     public static void main(String[] pArgs)
  4.     {
  5.         // All we have to do here is kickoff the creation of the launcher.
  6.         // The launcher will do everything that is required to start for us.
  7.         //
  8.         // In a real world scenario and/or application there might be more
  9.         // setup or groundwork required, for example processing the arguments,
  10.         // but we don't need any of that here.
  11.         new SwingLauncher();
  12.     }
  13. }

All we have to do there is start the launcher itself. As the comment suggests, there might be work required for a "real" application startup. For this example, it is all we need to do. Of course we could also directly embed this little function into the launcher implementation itself, to save us one class.

The launcher

The ILauncher implementation on the other hand contains quite some logic, but nothing not manageable:

  1. public class SwingLauncher extends SwingFrame
  2.                            implements ILauncher
  3. {
  4.     // We have to extend from SwingFrame because there is no factory
  5.     // instantiated at that point, so we can't use UI components.
  6.    
  7.     private IApplication application;
  8.    
  9.     public SwingLauncher()
  10.     {
  11.         super();
  12.        
  13.         try
  14.         {
  15.             SwingUtilities.invokeAndWait(this::startup);
  16.         }
  17.         catch (InvocationTargetException | InterruptedException e)
  18.         {
  19.             e.printStackTrace();
  20.         }
  21.     }
  22.  
  23.     @Override
  24.     public void dispose()
  25.     {
  26.         try
  27.         {
  28.             // We must notify the application that we are being disposed.
  29.             application.notifyDestroy();
  30.         }
  31.         catch (SecurityException e)
  32.         {
  33.             e.printStackTrace();
  34.         }
  35.        
  36.         super.dispose();
  37.        
  38.         // We have to make sure that the application is exiting when
  39.         // the frame is disposed of.
  40.         System.exit(0);
  41.     }
  42.  
  43.     private void startup()
  44.     {
  45.         // We create a new SwingFactory and it is directly registered as global
  46.         // instance, that means it will be used by all components which are
  47.         // created from now on.
  48.         UIFactoryManager.getFactoryInstance(SwingFactory.class);
  49.        
  50.         // Also we set it as our factory instance.
  51.         setFactory(UIFactoryManager.getFactory());
  52.        
  53.         // Because the IApplication implementation we use is based upon
  54.         // UI components (which is advisable) we have to wrap this launcher
  55.         // in an UILauncher.
  56.         UILauncher uiLauncher = new UILauncher(this);
  57.        
  58.         // Now we create the main application.
  59.         // Note that the ExampleApplication is already based upon
  60.         // UI components.
  61.         application = new ExampleApplication(uiLauncher);
  62.        
  63.         // Then we add the application as content to the launcher.
  64.         uiLauncher.add(application);
  65.        
  66.         // Perform some setup work and start everything.
  67.         uiLauncher.pack();
  68.         uiLauncher.setVisible(true);
  69.        
  70.         // We also have to notify the application itself.
  71.         application.notifyVisible();
  72.     }
  73.    
  74.     // SNIP
  75. }

In short, the launcher is kicking off the Swing thread by invoking the startup method on the main Swing thread. This startup method will instantiate the factory and then create the application. From there we only need to set it visible and then our application has started.

The launcher extends from SwingFrame, that is required because there hasn't been a factory created yet which could be used by UI components to create themselves. If we'd try to use an UI component before creating/setting a factory, we would obviously see the constructor of the component fail with a NullPointerException.

The method startup() is invoked on the main Swing thread, which also happens to be the main UI thread for JVx in this application. Once we are on the main UI thread we can create the application, add it and then set everything to visible.

The application

The IApplication implementation is quite short, because we extend com.sibvisions.rad.application.Application, an IApplication implementation created with UI components.

  1. public class ExampleApplication extends Application
  2. {
  3.     public ExampleApplication(UILauncher pParamUILauncher)
  4.     {
  5.         super(pParamUILauncher);
  6.     }
  7.    
  8.     @Override
  9.     protected IConnection createConnection() throws Exception
  10.     {
  11.         // Not required for this example.
  12.         return null;
  13.     }
  14.    
  15.     @Override
  16.     protected String getApplicationName()
  17.     {
  18.         return "Example Application";
  19.     }
  20. }

Because the launcher has previously started the technology and created the factory we can from here on now use UI components, which means we are already independent of the underlying technology. So the IApplication implementation can already be used with different technologies and is completely independent.

Notes on the launcher

As you might have noticed, in our example the launcher is a (window) frame, that makes sense for nearly every desktop GUI toolkit as they all depend upon a window as main method to display their applications. But the launcher could also be simpler, for example just a call to start the GUI thread. Or it could be something completely different, for example an incoming HTTP request.

Also don't forget that the launcher is providing additional functionality to the application, like saving file handles, reading and writing the configuration and similar platform and toolkit dependent operations, see the launcher for Swing for further details.

Conclusion

This example demonstrates how a simple launcher is implemented and why it is necessary to have a launcher in the first place. Compared with the "just set the factory" method this seems like a lot of work, but the launchers used by JVx are of course a lot more complex than these examples, that is because they implement all the required functionality and also take care of a lot of boiler plate operations. It is taking care of all technology specific code and allows to keep your application free from knowing about the platform it runs on.

JVx and Lua, a proof of concept

We've found the time to look at something that was floating around the office for quite some time. A few of us had previous experiences with Lua, a simple scripting language, but nothing too concrete and while doing a prototype a question popped up: Would it be easy to create a JVx GUI in Lua? As it turns out, the answer is "yes".

Lua, a short tour

Lua is a lightweight, multi-paradigm programming language designed primarily for embedded systems and clients.

Lua was originally designed in 1993 as a language for extending software applications to meet the increasing demand for customization at the time. It provided the basic facilities of most procedural programming languages, but more complicated or domain-specific features were not included; rather, it included mechanisms for extending the language, allowing programmers to implement such features. As Lua was intended to be a general embeddable extension language, the designers of Lua focused on improving its speed, portability, extensibility, and ease-of-use in development.

That is what Wikipedia has to say about Lua, but personally I like to think about it as "Basic done right", no insults intended. Lua is easy to write, easy to read and allows to quickly write and edit scripts. There are quite a few implementations for different languages and systems available which makes it very versatile and usable from in nearly every environment.

The most simple Lua script is one that prints "Hello World":

  1. print("Hello World")

Because it is a prototype based language, functions are first-class citizens, which can be easily created, passed around and invoked:

  1. local call = function()
  2.     print("Hello World")
  3. end
  4.  
  5. call()

Additionally, we can use tables to store state. They work like a simple key/value store:

  1. local operation = {
  2.     method = function(string)
  3.         print(string)
  4.     end,
  5.     value = "Hello World"
  6. }
  7.  
  8. operation.method(operation.value)
  1. local operation = {}
  2. operation.method = function(string)
  3.     print(string)
  4. end
  5. operation.value = "Hello World"
  6.  
  7. operation.method(operation.value)

Additionally, with some syntactic sugar, we can even emulate "real" objects. This is done by using a colon for invoking functions, which means that the table on which the function is invoked from will be provided as first parameter:

  1. local operation = {
  2.     method = function(valueContainer, string)
  3.         print(valueContainer.value .. " " .. string)
  4.     end,
  5.     value = "Hello World"
  6. }
  7.  
  8. operation:method("and others")

Last but not least, the rules about "new lines" and "end of statements" are very relaxed in Lua, we can either write everything on one line or use semicolons as statement end:

  1. local call = function(value) return value + 5 end print(call(10))
  2.  
  3. local call = function(value)
  4.     return value + 5;
  5. end
  6.  
  7. print(call(10));

But enough of the simple things, let's jump right to the case.

World, meet JVx.Lua

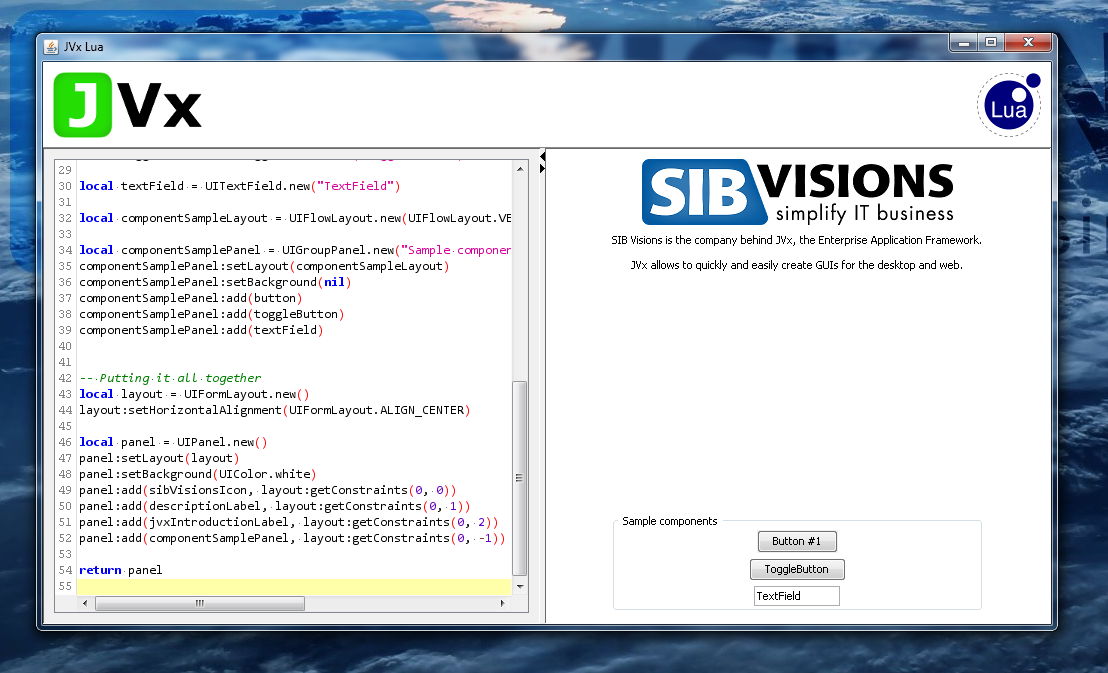
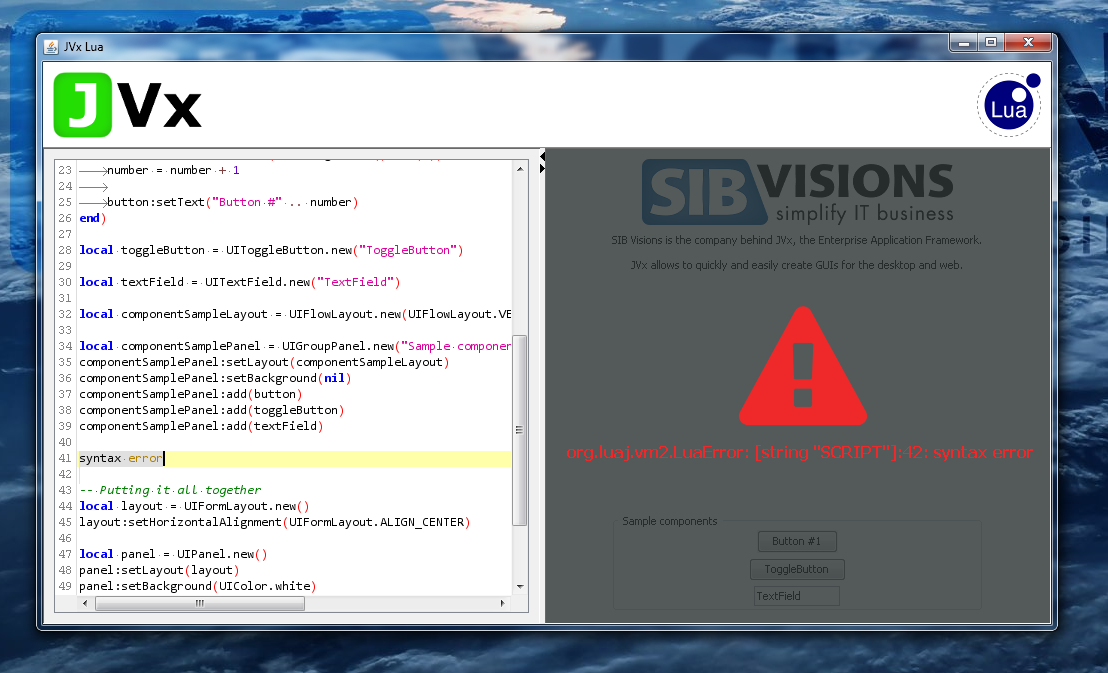
JVx.Lua is a proof of concept Java/Lua bridge, which allows to use the JVx classes in Lua scripts. Additionally, we've created a short demo application, JVx.Lua Live, which allows to directly write Lua code and see the output live in the application.

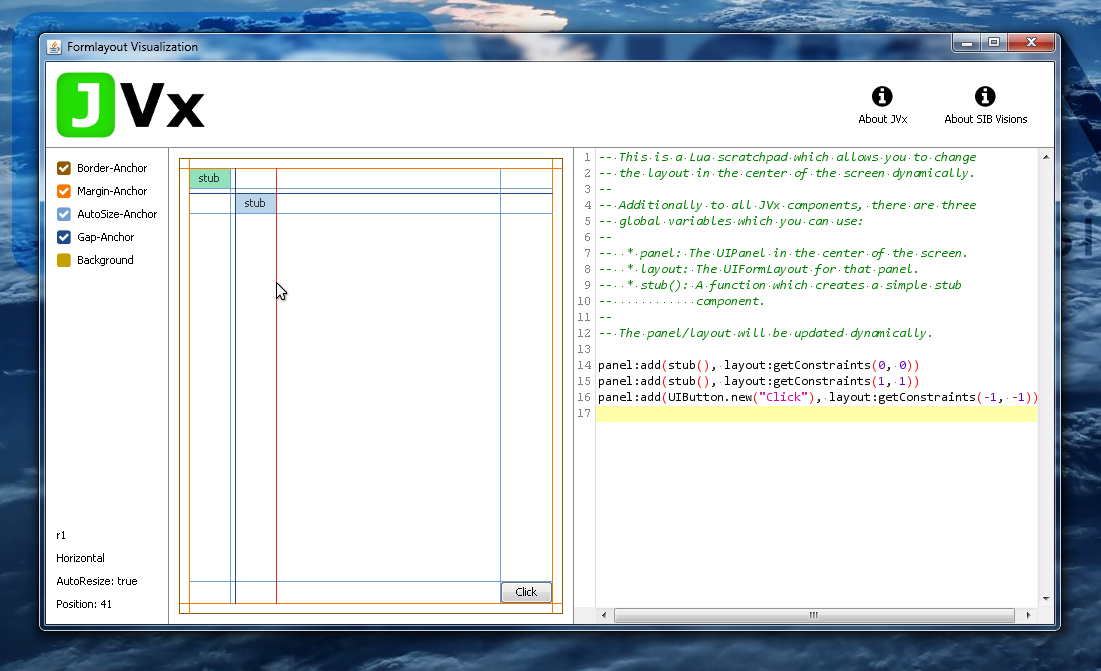
JVx/Lua live demo

The example code should be self-explanatory and the API is as close to the Java one as is possible. If an exception is thrown by the Lua environment it will be displayed in the live preview.

JVx/Lua live demo

This allows to quickly test out the Lua bindings and create a simple GUI in no time. But note that this simple demo application does not store what you've created, when you close it, it will be gone.

How does it work?

Glad you asked! The demo application is, of course, a simple GUI build with JVx, there are two core components which make it possible:

  1. RSyntaxTextArea, a Swing component for displaying and editing code.
  2. LuaJ, a Lua interpreter and compiler which allows to compile Lua directly to Java bytecode.

RSyntaxTextArea does not need to be further explained, it just works, and working very well it does. So does LuaJ, but that one has to be explained.

To create a new "Lua environment" one has to instance a new set of Globals and install the Lua-to-Lua-Bytecode and Lua-Bytecode-to-Java-Bytecode compilers into it.

  1. Globals globals = new Globals();
  2. LuaC.install(globals);
  3. LuaJC.install(globals);
  4.  
  5. globals.load("print(\"Hello World\")");

And that's it! With this we can already execute Lua code directly in Java, and most importantly, at runtime.

By default, LuaJ does provide nothing for the Lua environment, which means that it is sandboxed by default. If we want to add functionality and libraries, we'll have to load it into the Globals as so called "libs". For example if we want to provide all functions which can be found inside the string table, we'll have to load the StringLib:

  1. Globals globals = new Globals();
  2. LuaC.install(globals);
  3. LuaJC.install(globals);
  4.  
  5. globals.load(new StringLib());
  6.  
  7. globals.load("print(string.sub(\"Hello World\", 7))");

There are multiple libs provided with LuaJ which contain the standard library functions of Lua or provide access directly into the Java environment. For example we can coerce Java objects directly into Lua ones:

  1. BigDecimal value = new BigDecimal("-5.1234");
  2.  
  3. globals.set("value", CoerceJavaToLua.coerce(value));
  1. local absoluteValue = value:abs()
  2. local squaredValue = absoluteValue:pow(2)
  3.  
  4. print(squaredValue:toString())

Which gives us all the power of Java at our fingertips in Lua.

JVx bindings for Lua

Armed with that knowledge, we can have a look at the bindings which make it possible to use the JVx classes. JVxLib and LuaUtil are the main classes which coerce a single class to be used by Lua, the procedure looks as follows:

  1. Create a LuaTable to hold the class and register it globally.
  2. Add all public static fields (constants) to it.
  3. Add all static methods to it.
  4. Add a single constructor with a vararg argument to it.

The most interesting point is the constructor call, we simply register a method called "new" on the table and give it a vararg argument, which means that it can be called with any number of arguments. When this function is invoked the arguments are processed and a fitting constructor for the object is chosen. The found constructor is invoked and the created object is coerced to a Lua object, that created Lua object is returned.

This allows us to use a clean syntax when it comes to accessing the static or instance state of the objects. Static methods and constants, including constructors, are always accessed using the "dot" notation, while everything related to the instance is accessed using the "colon" notation.

Downside, binding events

For events and event handlers we had to dig a little deeper into LuaJ. The main problem with our EventHandler is that it has two methods: addListener(L) and addListener(IRunnable), at runtime the first one is reduced to addListener(Object). Let's assume the following code:

  1. button:eventAction():addListener(listener)

With such a construct LuaJ had a hard time finding the correct overload to use even when listener was a coerced IRunnable. This turned out to be undefined behavior, because the order of methods returned by a class object during runtime is undefined, sometimes LuaJ would choose the correct method and all other times it would use the addListener(Object) method. Which had "interesting" side effects, obviously, because an IRunnable object ended up in a list which should only hold objects of type L.

We've added a workaround so that functions with no parameters can be easily used, but for "full blown listener" support we'd have to invest quite some time. Which we might do at some point, but currently this is alright for a proof of concept.

Conclusion

Using Lua from Java is easy thanks to LuaJ, another possible option is Rembulan, which can not go unmentioned when one talks about Java and Lua. It does not only allow to quickly and easily write logic, but with the right bindings one can even create complete GUIs and applications in it and thanks to the ability to compile it directly to Java bytecode it is nearly as fast as the Java code. But, with the big upside that it can be easily changed at runtime, even by users.

JVx Kitchensink, a simple JVx showcase application

As we've just noticed, we've neglected so far to properly introduce the JVx Kitchensink, a (very) simple showcase application for JVx and its controls. We'd like to rectify that now.

A simple showcase, not a demo application

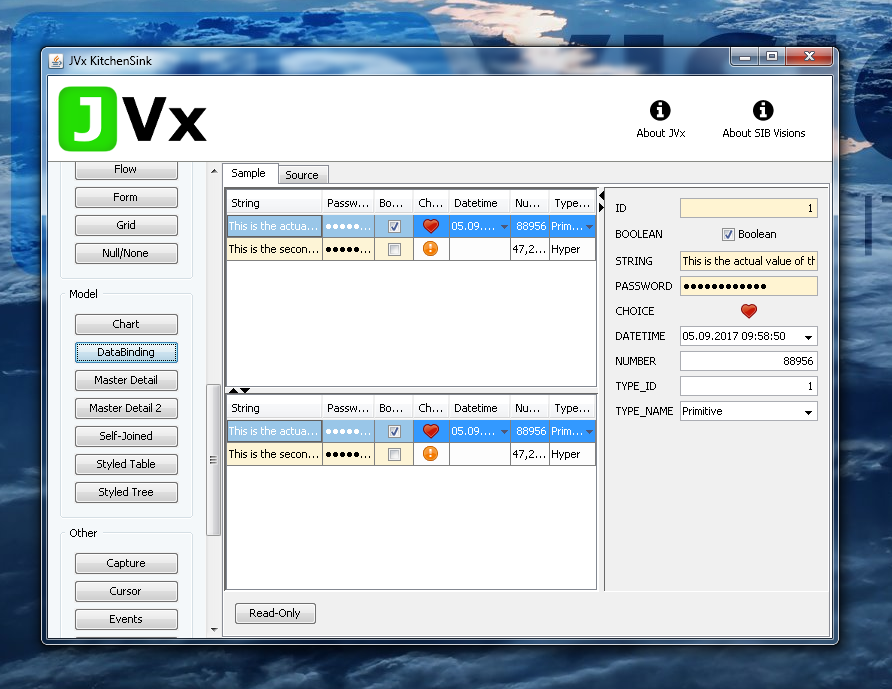
The JVx Kitchensink can be found on GitHub and is available under an Apache 2.0 License. It demonstrates nearly all controls and components of the JVx framework and simple and easy to digest examples.

JVx Kitchensink

As some of you might know, there is also the JVx Hello World Application. The Kitchensink does not intend to supersede the Hello World Application, quite the opposite, the intention is to complement it. The Hello World Application is demonstrating how to quickly and easily set up a complete JVx application and have it up and running in mere minutes, with focus on the lifecycle of the application. The Kitchensink on the other hand demonstrates each individual component and control of JVx, and completely neglects the "normal" lifecycle of a JVx application.

Samples

The button bar on the left allows you to quickly access each example, for example the one about databinding.

JVx Kitchensink - Databinding

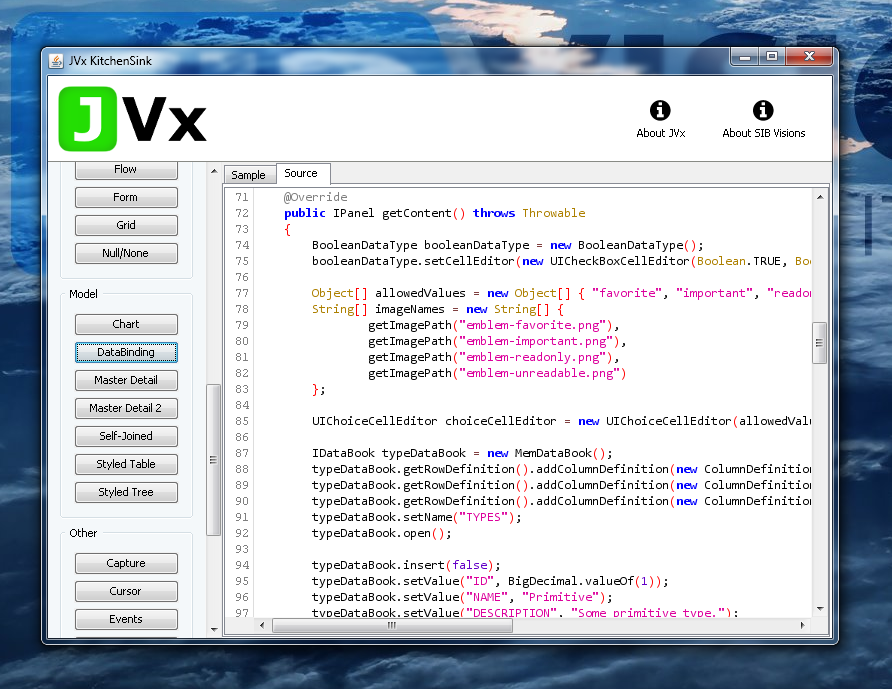
Newly added has been the feature that you can now see the source code of the selected sample right inside the Kitchensink, simply select the "Source" tab.

JVx Kitchensink - Databinding (Source)

Here I have to mention the awesome RSyntaxTextArea, which is a Swing component and provides highlighting and editing functionalities for source code, and is obviously used by us.

Regarding the lifecycle

As said before, the Kitchensink as not a good example of the lifecycle of a JVx application, as outlined in JVx Reference, Application Basics.

Packaged and ready

The Kitchensink does already come as a ready to use Eclipse project with launchers, so all you have to do is import it into Eclipse and be ready to go. There is also an Ant build script and instructions on how to launch the readily compiled jars.

Last but not least, it does provide a nice test bed for most of the functionality of JVx and demonstrates most concepts in a neatly packaged manner. We've been using it excessively during the development of the JVx JavaFX frontend bindings and it can be as simply used to test new concepts and custom components.

Once again, the link to the KitchenSink GitHub repository

Full-Screen Mode for JVx applications

If you have a JVx application and want to use it without the frame border, it's not supported out-of-the-box. Sometimes it's very useful to have a full-screen application or to grab a screenshot without frame.

We now support this feature for Swing based applications but not in the official UI API. Here's a code snippet:

//F12 for toggling mode
KeyboardFocusManager.getCurrentKeyboardFocusManager().addKeyEventDispatcher(new KeyEventDispatcher()
{
      @Override
      public boolean dispatchKeyEvent(KeyEvent e)
      {
          if (e.getKeyCode() == KeyEvent.VK_F12)
          {
              if (ObjectCache.get("FULLSCREEN") == null)
              {
                  ObjectCache.put("FULLSCREEN", Boolean.TRUE, 500);
                 
                  SwingApplication app = (SwingApplication)getLauncher();
                  app.setFullScreen(!app.isFullScreen());
                 
                  return true;
              }
             
              return false;
          }
         
          return false;
      }
});

The trick with FULLSCREEN is necessary because the event fires sometimes more than once.

Simply press F12 key to toggle between Fullscreen/Frame mode.

JVx Reference, Resource and UIResource

Let's talk about Resources and UIResources, and why they sound similar but are not the same.

The Basics

We've previously covered how the JVx GUI layer works, now we are going to have a better look at the Resources and UIResources. With "Resource" we do not mean images or similar, we mean the implementation at the technology layer which is encapsulated by a wrapper class (Bridge Pattern). An "UIResource" on the other hand is an encapsulated concrete implementation of one of the interfaces on the UI layer.

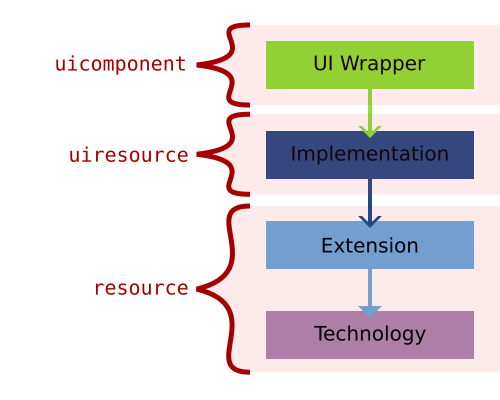
Let's do a short brush-up on how the JVx architecture looks like in regards to the GUI stack:

JVx Resource

The UI Wrappers are the main UI classes which are used to create the GUI (f.e. UIButton). These are wrapping the Implementations (f.e. a SwingButton) which themselves are wrapping the Extension/Technology (f.e. a JVxButton/JButton). Only the UI and Implementation classes are implementing the interface required for the component (f.e. IButton). That also means that the Implementation is dependent on the Extension/Technology component, but the UI can use any object which implements the interface.

Now, with that knowledge we can start defining what is what:

JVx Resource 2

The resource itself, accessed by calling <uiwrapper>.getResource(), is the Extension/Technology component. The uiresource can be accessed by calling <uiwrapper>.getUIResource(). The uicomponent can be accessed by calling <uiwrapper>.getUIComponent() and is usually the UI Wrapper itself. If we use our previous Swing example, the resource would be a JVxButton/JButton, the uiresource would be the SwingPanel and the uicomponent would be the UIButton.

As one can see, access to all objects which are comprising the GUI is at all times possible. We, of course, have the UI component, we can access the Implementation component and we can access the Extension/Technology component. Theoretically we could also swap them at runtime, but in JVx this is limited to the construction of the object to greatly reduce the error potential.

Creating custom components

Equipped with that knowledge, we can revisit the previous guide on how to create custom components, the part about the BeepComponent to be exact:

  1. public class BeepComponent extends UIComponent<IPanel>
  2. {
  3.    public BeepComponent()
  4.    {
  5.       super(new UIPanel());
  6.        
  7.       UIButton highBeepButton = new UIButton("High Beep");
  8.       highBeepButton.eventAction().addListener(Beeper::playHighBeep);
  9.      
  10.       UIButton lowBeepButton = new UIButton("Low Beep");
  11.       highBeepButton.eventAction().addListener(Beeper::playLowBeep);
  12.      
  13.       UIFormLayout layout = new UIFormLayout();        
  14.      
  15.       uiResource.setLayout(layout);
  16.       uiResource.add(new UILabel("Beep"), layout.getConstraints(0, 0, -1, 0));
  17.       uiResource.add(highBeepButton, layout.getConstraints(0, 1));
  18.       uiResource.add(lowBeepButton, layout.getConstraints(1, 1));
  19.    }
  20. }

We are setting a new UIResource (an UIPanel) in the constructor (at line #5) which is to be used by the UIComponent. In this case it is not an Implementation, but another UI component, but that doesn't matter because the UIResource only must implement the expected interface. At line #15 we start using that custom UIResource.

Because UIComponent is an abstract component designed for exactly this usage, the example might not be the most exciting one, but it clearly illustrates the mechanic.

Bolting on functionality

Also from the previous guide on how to create custom components we can reuse the PostfixedLabel as example.

  1. private UILabel testLabel = new UILabel()
  2. {
  3.     public UILabel()
  4.     {
  5.         super(new PostfixedLabel("", "-trial"));
  6.     }
  7. };

Now testLabel will be using the PostfixedLabel internally, but with no indication to the user of the object that this is the case. This allows to extend the functionality of a component completely transparently, especially in combination with functions which do return an UIComponent and similar.

An important note about the component hierarchy

If we create a simple component extensions, like the BeepComponent above, it is important to note that there is one other layer of indirection in regards to the hierarchy on the technology layer. If we create a simple frame with the BeepComponent in it, one might expect the following hierarchy:

         UI                   Technology
---------------------    ----------------------
 UIFrame                  Frame
   \-UIPanel                \-Panel
       \-BeepComponent          \-BeepComponent
                                    \-Panel
                                        |-Label
                                        |-Button
                                        \-Button

With the BeepComponent added and its sub-components as its children. However, the actual hierarchy looks like this:

         UI                   Technology
---------------------    ----------------------
 UIFrame                  Frame
   \-UIPanel                \-Panel
       \-BeepComponent          \-Panel
                                    |-Label
                                    |-Button
                                    \-Button

That is because such extended components are not "passed" to the Technology, they do only exist on the UI layer because they do not have a Technology component which could be used. That is done by adding the UIComponent to the UI parent, but for adding the actual Technology component the set UIResource is used.

The special case of containers

Another special case are containers. For example we could create a panel which does display an overlay in certain situations and we will need to use that throughout the whole application.

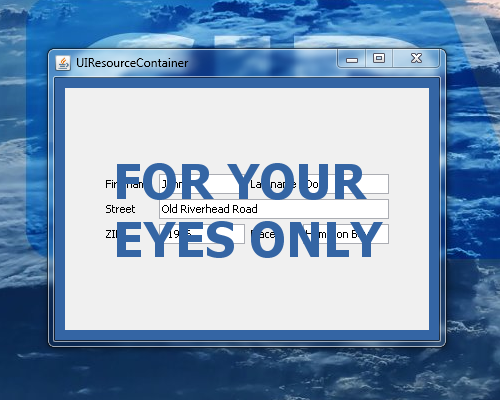
UIResourceContainer Example

That means we do not want to build it every time anew, so one option would be to use a factory method to "wrap" the content, something like this:

  1. UIFormLayout panelLayout = new UIFormLayout();
  2. panelLayout.setHorizontalAlignment(UIFormLayout.ALIGN_CENTER);
  3. panelLayout.setVerticalAlignment(UIFormLayout.ALIGN_CENTER);
  4.    
  5. UIPanel panel = new UIPanel();
  6. panel.setLayout(panelLayout);
  7. panel.add(new UILabel("Firstname"), panelLayout.getConstraints(0, 0));
  8. panel.add(new UITextField("John"), panelLayout.getConstraints(1, 0));
  9. panel.add(new UILabel("Lastname"), panelLayout.getConstraints(2, 0));
  10. panel.add(new UITextField("Doe"), panelLayout.getConstraints(3, 0));
  11. panel.add(new UILabel("Street"), panelLayout.getConstraints(0, 1));
  12. panel.add(new UITextField("Old R. Road"), panelLayout.getConstraints(1, 1, 3, 1));
  13. panel.add(new UILabel("ZIP"), panelLayout.getConstraints(0, 2));
  14. panel.add(new UITextField("11946"), panelLayout.getConstraints(1, 2));
  15. panel.add(new UILabel("Place"), panelLayout.getConstraints(2, 2));
  16. panel.add(new UITextField("Hampton Bays"), panelLayout.getConstraints(3, 2));
  17.    
  18. parentContainer.add(OverlayPanelFactory.wrap(panel), UIBorderLayout.CENTER);

And the wrap method itself:

  1. public static final UIPanel wrap(IComponent pContent)
  2. {
  3.     UILabel overlayLabel = new UILabel("FOR YOUR<br>EYES ONLY");
  4.     overlayLabel.setBackground(null);
  5.     overlayLabel.setFont(UIFont.getDefaultFont().deriveFont(UIFont.BOLD, 48));
  6.     overlayLabel.setForeground(UIColor.createColor("#3465a4"));
  7.     overlayLabel.setHorizontalAlignment(UILabel.ALIGN_CENTER);
  8.    
  9.     UIFormLayout layout = new UIFormLayout();
  10.    
  11.     UIPanel panel = new UIPanel();
  12.    
  13.     panel.setLayout(layout);
  14.     panel.setBackground(UIColor.createColor("#3465a4"));
  15.     panel.add(overlayLabel, layout.getConstraints(0, 0, -1, -1));
  16.     panel.add(pContent, layout.getConstraints(0, 0, -1, -1));
  17.    
  18.     return panel;
  19. }

Which is easy enough, but let's say we'd like to add logic to that wrapper, at that point it becomes more complicated. We can't use the same technique as for custom component from above, because in that case the "overlaying panel" would simply not be displayed. However, there is a similar mechanism for containers, setting the UIResourceContainer.

The UIResourceContainer is another special mechanism which works similar to setting the UIResource, but it works exactly the other way round. While setting the UIResource does "hide" components from the Technology which are there in UI layer, setting the UIResourceContainer does hide components from the UI layer while there are added in the Technology. A little bit complicated, here is our example again using this technique:

  1. public static class OverlayedPanel extends UIPanel
  2. {
  3.     public OverlayedPanel()
  4.     {
  5.         super();
  6.        
  7.         UILabel overlayLabel = new UILabel("FOR YOUR<br>EYES ONLY");
  8.         overlayLabel.setBackground(null);
  9.         overlayLabel.setFont(UIFont.getDefaultFont().deriveFont(UIFont.BOLD, 48));
  10.         overlayLabel.setForeground(UIColor.createColor("#3465a4"));
  11.         overlayLabel.setHorizontalAlignment(UILabel.ALIGN_CENTER);
  12.        
  13.         UIPanel innerPanel = new UIPanel();
  14.        
  15.         UIFormLayout layout = new UIFormLayout();
  16.        
  17.         setLayout(layout);
  18.         setBackground(UIColor.createColor("#3465a4"));
  19.         add(overlayLabel, layout.getConstraints(0, 0, -1, -1));
  20.         add(innerPanel, layout.getConstraints(0, 0, -1, -1));
  21.        
  22.         setUIResourceContainer(innerPanel);
  23.     }
  24. }

What we've done is extend an UIPanel (line #1), setting it up and adding children and then we've declared one of its children as the UIResourceContainer (line #22). So all methods which are specific to IContainer (adding children, setting a layout, etc.) are now forwarding to the innerPanel and manipulating the contents of the OverlayedPanel directly is not directly available.

And here is how it is used:

  1. UIFormLayout panelLayout = new UIFormLayout();
  2. panelLayout.setHorizontalAlignment(UIFormLayout.ALIGN_CENTER);
  3. panelLayout.setVerticalAlignment(UIFormLayout.ALIGN_CENTER);
  4.    
  5. UIPanel panel = new OverlayedPanel();
  6. panel.setLayout(panelLayout);
  7. panel.add(new UILabel("Firstname"), panelLayout.getConstraints(0, 0));
  8. panel.add(new UITextField("John"), panelLayout.getConstraints(1, 0));
  9. panel.add(new UILabel("Lastname"), panelLayout.getConstraints(2, 0));
  10. panel.add(new UITextField("Doe"), panelLayout.getConstraints(3, 0));
  11. panel.add(new UILabel("Street"), panelLayout.getConstraints(0, 1));
  12. panel.add(new UITextField("Old R. Road"), panelLayout.getConstraints(1, 1, 3, 1));
  13. panel.add(new UILabel("ZIP"), panelLayout.getConstraints(0, 2));
  14. panel.add(new UITextField("11946"), panelLayout.getConstraints(1, 2));
  15. panel.add(new UILabel("Place"), panelLayout.getConstraints(2, 2));
  16. panel.add(new UITextField("Hampton Bays"), panelLayout.getConstraints(3, 2));
  17.    
  18. parentContainer.add(panel, UIBorderLayout.CENTER);

Notice that we can use it is any other panel (line #5) and simply add it to the parent (line #18). For a user of the API it is transparent as to whether there are more components or not, this is also visible in the created component hierarchy:

         UI                   Technology
---------------------    ----------------------
 UIPanel                  Panel
   \-OverlayedPanel         \-Panel
       |-UILabel                |-Label
       |-UITextField                \-Panel
       |-UILabel                    |-Label
       |-UITextField                |-TextField
       |-UILabel                    |-Label
       |-UITextField                |-TextField
       |-UILabel                    |-Label
       |-UITextField                |-TextField
       |-UILabel                    |-Label
       \-UITextField                |-TextField
                                    |-Label
                                    \-TextField

This makes it very easy to have containers which add additional components without the actual GUI noticing or caring.

Conclusion

Because of the way the JVx framework is designed, it is easy to access all layers of the GUI framework and also facilitate the usage of these layers to create custom components and allow easy access to the wrapped components, no matter on what layer or of what kind they are.

JVx Reference, DataBooks

Let's talk about DataBooks, which allow access to data without any effort.

What is it?

DataBooks are an active model, which allow you to directly query and manipulate the data. Contrary to many other systems JVx does not map the data into objects, but instead allows you to directly access it in a table like fashion, exposing columns, rows and values.

One could say that it is like a three dimensional array, with these dimensions:

  1. DataPages
  2. DataRows
  3. Columns/Values

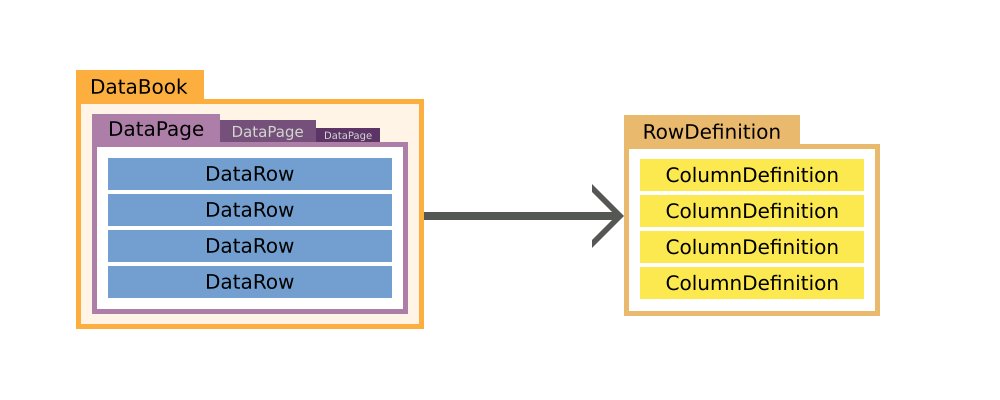
With DataPages containing DataRows, which itself contain the values and everything is referencing the RowDefinition, which outlines how a row looks like.

DataBook Architecture

RowDefinition

The RowDefinition defines what columns are available in the row and stores some additional information about them, like the names of the primary key columns. You can think of the RowDefinition as the headers of a table.

Its creation and usage is rather simple, and if you're working with RemoteDataBooks there is no need to create one at all, as it is automatically created when the DataBook is opened. A RowDefinition holds and manages ColumnDefinitions, which define the columns.

RowDefinition rowDefinition = new RowDefinition();
rowDefinition.addColumnDefinition(columnDefinitionA);
rowDefinition.addColumnDefinition(columnDefinitionB);
rowDefinition.addColumnDefinition(columnDefinitionC);

dataBook.setRowDefinition(rowDefinition);

ColumnDefinition

The ColumnDefinition defines and provides all necessary information about the column, like its DataType, its size and if it is nullable or not. You can think of it as one column in a table.

ColumnDefinition columnDefinition = new ColumnDefinition("NAME", new StringDataType());
columnDefinition.setNullable(false);

MetaData

Most of the ColumnDefinition is additional information about the column, like if it is nullable, the label of the column, default values, allowed values and similar information.

DataType

Of course we must define what type the value in the column has, this is done by setting a DataType on the ColumnDefinition. The DataType defines what kind of values the column holds, like if it is a String, or a Number or something else. We do provide the widest used DataTypes out of the box:

  • BigDecimal
  • BinaryData
  • Boolean
  • Long
  • Object
  • String
  • Timestamp

It is possible to add new DataTypes by simply implementing IDataType.

DataRow

The DataRow repesents a single row of data, it holds/references its own RowDefinition and of course provides access to the values of the row. Accessing the DataRow can be done either by column index or column name, and the methods do either return or accept Objects. Let's look at a simple usage example:

DataRow dataRow = new MemDataRow(rowDefinition);

String value = (String)dataRow.getValue("COLUMN_A");

dataRow.setValue("COLUMN_A", "New Value");

DataPage

The DataPage is basically a list of DataRows, it also holds its own RowDefinition which is shared with all the contained DataRows.

The main usage of DataPages is to allow paging in a master/detail relationship. If the master selects a different row, the detail databook does select the related DataPage.

DataBook

The DataBook is the main model of JVx, it provides direct access to its current DataPage and DataRow by extending from IDataRow and IDataPage.

By default, the DataBook holds one DataPage and only has multiple DataPages if it is the detail in a master/detail relationship.

Usage example

Here is a simple usage example of a MemDataBook, an IDataBook implementation which does only operate in memory:

IDataBook dataBook = new MemDataBook();
dataBook.setName("test");
dataBook.getRowDefinition().addColumnDefinition(new ColumnDefinition("ID", new LongDataType()));
dataBook.getRowDefinition().addColumnDefinition(new ColumnDefinition("COLUMN_STRING", new StringDataType()));
dataBook.open();

dataBook.insert(false);
dataBook.setValue("ID", Long.valueof(0));
dataBook.setValue("COLUMN_STRING", "VALUE");

dataBook.insert(false);
dataBook.setValue("ID", Long.valueof(1));
dataBook.setValue("COLUMN_STRING", "VALUE_A");

dataBook.saveSelectedRow();

dataBook.setSelectedRow(0);

dataBook.setValue("COLUMN_STRING", "VALUE_NEW");

dataBook.saveSelectedRow();

dataBook.setSelectedRow(1);

dataBook.delete();

Accessing the data with Strings

One of the major advantages of the DataBook concept is that there is no need to create new classes to represent each table, view or query result. One can always use the DataBook, directly and easily and model changes don't necessitate changes on the client side. The downside to this approach is that we lose compile time checks because we access the data dynamically. However, This can be mitigated by using EPlug, an Eclipse plugin which provides compile time checks and many more features.

No primitives, Objects only

We do not provide overloads to fetch primitives, that is because there are mainly three types of data inside a database:

  1. Numbers
  2. Text
  3. Binary Data

Text and Binary Data are both objects (arrays of primitives are Objects after all) and Numbers are either primitives or Objects. Most of the time if we deal with numbers inside a database we want them to be of arbitrary precision, which means we must represent them as BigDecimal. Supporting double or float in these cases would be dangerously, because one might write a float into the database which might or might not end up with the correct value in the database. To completely eliminate such problems, we do only support Objects, which means that one is "limited" to the usage of Number extensions like BigLong and BigDecimal, which do not suffer from such problems.

Where are the DataPages?

What is not clear from this example is how and when DataPages are used. As a matter of fact, most of the time there is no need to think about DataPages because they are managed directly by the DataBook, and if used this like there is only one DataPage. Multiple DataPages will be used if there is a Master/Detail relationship defined in which case the DataBook does select the correct DataPage automatically.

Master/Detail

Master/Detail is something that occurs in nearly every data model. It means simply that there is one master dataset which is referenced by one or multiple detail datasets. Or to express it in SQL:

SELECT
  *
FROM
  MASTER m
  LEFT JOIN DETAIL d ON m.ID=d.MASTER_ID;

We can of course express a Master/Detail relationship when using DataBooks. For that we just create a ReferenceDefinition and assign it to the Detail DataBook:

IDataBook masterDataBook = new MemDataBook();
masterDataBook.setName("master");
masterDataBook.getRowDefinition().addColumnDefinition(new ColumnDefinition("ID", new LongDataType()));
masterDataBook.open();

IDataBook detailDataBook = new MemDataBook();
detailDataBook.setName("detail");
detailDataBook.getRowDefinition().addColumnDefinition(new ColumnDefinition("ID", new LongDataType()));
detailDataBook.getRowDefinition().addColumnDefinition(new ColumnDefinition("MASTER_ID", new LongDataType()));
detailDataBook.setReferenceDefinition(new ReferenceDefinition(new Streing[] {"MASTER_ID"}, masterDataBook, new String[] {"ID"});
detailDataBook.open();

Let's assume the following data for illustration purposes:

MASTER              DETAIL
======        =================
  ID            ID  | MASTER_ID
------        ------|----------
     1             1|         1
     2             2|         1
     3             3|         2
                   4|         2
                   5|         2
                   6|         3
                   7|         3
                   8|         3

Now if we select the second row in the masterDataBook, the detailDataBook will just contain the rows with the corresponding MASTER_ID, so 3, 4 and 5.

MASTER              DETAIL
======        =================
  ID            ID  | MASTER_ID
------        ------|----------
     1             3|         2
S    2             4|         2
     3             5|         2

The detailDataBook is automatically adjusted according to the selection in the masterDatabook. Of course this can have an arbitrary depth, too.

Conclusion

The DataBook is the backbone of JVx, it provides a clean and easy way to access and manipulate data. At the same time, it is flexible and can be customized to specific needs with ease.

JVx Reference, Application Basics

Let's talk about the basics, how a JVx application starts, works and how the connection strings together the client and server side.

Multitier Architecture

JVx is designed to be Multitier by default. It allows a clean and easy separation of processes and makes it easy to build, maintain and extend applications by separating the client, server and data storage.

Launchers

The following method is a simplified way to launch a JVx application. Normally, you'd use the technology specific launcher to launch the application. These launchers do know exactly what is required to set it up and start the technology and the application. However, covering the launchers is out of scope for this post, so we will review them and their mechanics in a follow-up.

The simplest JVx application: Just the GUI

But first, we will start without anything. The most simple application you can create with JVx is an application which does open a single window and only works with in memory data (if at all). This can be easily achieved by "just starting" the application.

The JVx GUI is a simple layer on top of the Technology which implements the actual functionality. So if we want to have a GUI we'll need to initialize the factory before doing anything else:

UIFactoryManager.getFactoryInstance(SwingFactory.class);

With this little code we have initialized everything we need to create a simple Swing application. Now we can start to create and populate a window with something:

UIFrame frame = new UIFrame();
frame.setLayout(new UIBorderLayout());
frame.addComponent(new UILabel("Hello World!"));

frame.pack();
frame.setVisible(true);

frame.eventWindowClosed().addListener(() -> System.exit(0));

We can start to create and manipulate the GUI, in this case we are building a simple window with a label inside. Last but not least, we make sure that the JVM will exit when the window is closed.

A very good example and showcase for that is the JVx Kitchensink.

That's it. That is the most simple way to start a JVx application. We can use all controls and we can use MemDataBooks without any problem or limitation. And best of all, we can simply switch to another Technology by using another factory.

Anatomy of a remote JVx application

Of course JVx wouldn't be that useful if it would just provide static GUI components. Now, to explain what else is required for a remote JVx application I have to go far afield, so let's head down the rabbit hole.

JVx Layers

What you are seeing here is a rough sketch of how the architecture of JVx looks like. Let's walk through the image step by step. We will look at each successive layer and work our way from the database on the server to the databook on the client.

DBAccess, accessing a database

Accessing a database is easy when using DBAccess. All we must do is to set the JDBC URL of the server and connect to it:

DBAccess dbAccess = DBAccess.getDBAccess(
           "jdbc:postgresql://server:5432/schema",
           "username",
           "password");
dbAccess.open();

As a note, the instance returned by getDBAccess is the database specific DBAccess extension, which does know how to handle its database.

We can of course use DBAccess to directly access the database:

dbAccess.executeStatement("insert into SOME_TABLE values (?, ?);",
        BigDecimal.valueOf(1),
        "Some Value");

List<Bean> data = dbAccess.executeQuery("select * from SOME_TABLE");

...or manipulate the database, or query information about the database or execute procedures or do anything else.

DBStorage, preparing the database access for databooks

The downside of using DBAccess is that everything must be database specific. To become database agnostic we must use DBStorage. DBStorage does not care which database it is connected to and can operate on any of them:

DBStorage storage = new DBStorage();
storage.setDBAccess(dbAccess);
storage.setWritebackTable("SOME_TABLE");
storage.open();

We can use this to insert, update, delete and fetch data. Additionally the DBStorage does retrieve and manage the metadata of the table we've set, which means that we can query all column names, what type they are, we can even access the indexes and the default values. Short, the DBStorage leaves little to be desired when it comes to operating on a database.

If we query data from the DBStorage we receive a List of rows. The rows are are either represented as Object array, IBean or a POJO and we can easily manipulate the data, like this:

for (IBean row : storage.fetchBean(null, null, 0, -1))
{
    row.put("SOME_COLUMN", "newvalue");
    storage.update(row);
}

As one can see, it looks quite familiar to the DataBook, which isn't a coincidence. The DBStorage "powers" the DataBooks on the server side, a DataBook will get its data from and will send its modified data to the DBStorage.

I've been using the DBStorage here as an example, but actually the Storage is not dependent on a database. IStorage can be implemented to provide any sort of data provider, like reading from an XML or JSON file, scraping data from a website, fetching data from a different process or reading it directly from a hardware sensor.

Life Cycle Objects, the business objects with all the logic

Life Cycle Objects, or LCOs, are the server side business objects which contain and provide the business logic. They are created and destroyed as is requested by the client-side and are used to provide specific functionality to the client, like providing functionality specific to one screen or workflow. This is done by RPC, Remote Procedure Calls, which means that the client is directly calling the methods defined in the LCOs, which includes getting the Storages for the DataBooks.

There is also a security aspect to these, as you can permit one client access to a certain LCO but lock out everyone else, which means that only that client can use the functionality provided by the LCO.

But let's not get ahead of our selves, there are three important "layers" of LCOs which we will look at.

Application

The LCO for the application represents the application itself and provides functionality on the application layer. It is created once for the lifetime of the application and this instance is shared by all sessions.

public class Application extends GenericBean
{
}
Session

The LCO for the session represents one session, which most of the time also equals one client connection. It provides functionality which should be session-local, like providing the database connection which can be used.

public class Session extends Application
{
    protected DBAccess getDBAccess() throws Exception
    {
        // Code for initialization and caching of DBAccess goes here.
    }
}
Sub-Session aka Screen

The sub-session, also known as screen, LCO is the last in the chain. It provides functionality specific to a certain part of the application, like a single screen, and provides the storages required to power the databooks and other functionality.

public class MySubSession extends Session
{
    public DBStorage getTablename() throws Exception
    {
        // Code for initialization and caching of DBStorage goes here.
    }
}

Server, serving it up

There really isn't much to say about the server, it accepts connections and hands out sessions. Of course it is not that easy, but for this guide we will not go into any further detail.

Connection, connecting to a server

The connection which strings together the client and the server is used for the communication between them, obviously. It can be anything, from a simple direct connection which strings two objects together to a HTTP connection which talks with a server on the other side of the planet.

By default we provide different IConnection implementations, the DirectServerConnection, DirectObjectConnection, the HttpConnection and the VMConnection. The DirectServerConnection is a simple IConnection implementation which does simply forward method calls to known Objects - without serialization - and is used when the client and server reside inside the same JVM. The HttpConnection communicates with the server over a HTTP connection and is used whenever the client and server are not inside the same JVM. The DirectObjectConnection and VMConnection are used for unit tests.

As example we will use the DirectServerConnection, which serves as Server and Connection. It is used if the server and client reside in the same JVM.

IConnection connection = new DirectServerConnection();
// The connection will be automatically opened by the MasterConnection.

Master- and SubConnections, client-side lifecycle management

The MasterConnection is the main connection which is used to access the server and its functionality. When a MasterConnection is established, a Session LCO on the server is created.

MasterConnection masterConnection = new MasterConnection(connection);
masterConnection.open();

A SubConnection is a sub connection of the MasterConnection and allows to access specific functionality encapsulated in an LCO. When a SubConnection is established, the requested/specified LCO on the server is created and can be accessed through the SubConnection.

SubConnection subConnection = masterConnection.createSubConnection("MySubSession");
subConnection.open();

The SubConnection can now access the functionality provided by the Application, the Session and the LCO which was specified.

subConnection.callAction("doSomethingOnTheServer");

DataSource, preparing the connection for the databook

To provide data to the databooks we can use the connection which we've described earlier. However, the DataBook does not directly know about the connection, it expects an IDataSource, which is used as an intermediate:

IDataSource dataSource = new RemoteDataSource(subConnection);
dataSource.open();

Of course the RemoteDataSource is just one possible implementation of IDataSource which can be used to provide data to the DataBook.

DataBook, accessing data

And now we are at the other end of the chain, at the databook on the client side. We just need to tell our databook what datasource to use, and we are done.

RemoteDataBook dataBook = new RemoteDataBook();
dataBook.setDataSource(dataSource);
dataBook.setName("storagename");
dataBook.open();

The name of the DataBook is used to access the DBStorage object in the LCO provided by the datasource. The mechanism for that is a simple search for a getter with the set name.

Interactive Demo

Here is an interactive demo which allows you to explore the connections between the client and server side. The complement classes are always highlighted and you can click on the names of the objects to receive additional information about them.

The JVx application: Manual example

Now that we have seen all layers that make up the architecture of JVx, let us put all of that into code:

public class JVxLocalMain
{
    public static void main(String[] pArgs) throws Throwable
    {
        // ############################## Server ##############################
       
        // ----------------------------- DBAccess -----------------------------
       
        // The DBAccess gives us access to the database.
        DBAccess dbAccess = DBAccess.getDBAccess(
                "jdbc:h2:mem:database",
                "",
                "");
        dbAccess.open();
       
        // We'll insert some data for this example.
        dbAccess.executeStatement("create table if not exists TEST("
                + "ID int primary key auto_increment,"
                + "NAME varchar(128) default '' not null);");
        dbAccess.executeStatement("insert into TEST values (1, 'Name A');");
        dbAccess.executeStatement("insert into TEST values (2, 'Name B');");
        dbAccess.executeStatement("insert into TEST values (3, 'Name C');");
       
        // ---------------------------- DBStorage -----------------------------
       
        // Our sole storage.
        DBStorage testStorage= new DBStorage();
        testStorage.setDBAccess(dbAccess);
        testStorage.setWritebackTable("TEST");
        testStorage.open();
       
        // -------------------- LCO / Session / Application -------------------
       
        // We are skipping the LCO, Session and Application in this example.
       
        // ####################### Network / Connection #######################
       
        // For this example we are initializing a DirectObjectConnection, which
        // does not require a server.
        // It is designed to be used mainly for unit testing.
        DirectObjectConnection connection = new DirectObjectConnection();
        connection.put("test", testStorage);
       
        // ############################## Client ##############################
       
        // ------------------------- MasterConnection -------------------------
       
        MasterConnection masterConnection = new MasterConnection(connection);
        masterConnection.open();
       
        // -------------------------- SubConnection ---------------------------
       
        // We are skipping the SubConnection in this example.
       
        // ---------------------------- DataSource ----------------------------
       
        IDataSource dataSource = new RemoteDataSource(masterConnection);
        dataSource.open();
       
        // ----------------------------- DataBook -----------------------------
       
        RemoteDataBook dataBook = new RemoteDataBook();
        dataBook.setDataSource(dataSource);
        dataBook.setName("test");
        dataBook.open();
       
        // You can use the DataBook here.
       
        // Perform cleanup of all opened objects here.
    }
}

With this little example we have a completely working JVx application. We provide ways to create most of this out of the box and read most of it from configuration files, so there really is just little code to be written, see the JVx FirstApp as a perfect example for that. So there is rarely any need to write code like this, all you have to do is create a new application and start it.

Additionally, we could combine this long example with the simple one from before to initialize and create a GUI which could use our RemoteDataBook, like this:

// Insert after the RemoteDataBook has been created.

// Set the UI factory which should be used, in this case it is
// the SwingFactory.
UIFactoryManager.getFactoryInstance(SwingFactory.class);

UIFrame frame = new UIFrame();
frame.setLayout(new UIBorderLayout());
frame.add(new UITable(dataBook));

frame.pack();
frame.setVisible(true);

frame.eventWindowClosed().addListener(() -> System.exit(0));

Abstractions on every step

As you can see, you always have full control over the framework and can always tailor it to your needs. There is always the possibility to provide a custom implementation to fulfill your needs:

  1. Accessing a not supported database can be achieved by extending DBAccess
  2. Having a different service/way of providing data can be implemented on top of IStorage
  3. Supporting a different connection can be implemented on top of IConnection
  4. And a completely different way of providing data can be implemented on top of IDataSource

You can swap out every layer and provide custom and customized implementations which exactly work as you require it.

Just like that

Just like that we've walked through the whole stack of a JVx application, from the database which holds the data all the way to the client GUI. Of course there is much more going on in a full-blown JVx application, for example I've spared you here the details of the configuration, server, network and providing actual LCOs and similar. But all in all, this should get you going.

Simple Drop File Support for JVx applications

Our next update release of VisionX will support Dropping files. It's a very useful feature and was easy to implement. Sure, it's a Swing specific feature, but our VisionX is more or less JVx Swing UI based.

Get a first impression

VisionX Drop file support

We drop an exported application archive into VisionX and the import wizard is starting. It's also possible to Drop a file directly into the import wizard.

VisionX is a JVx application and it's super easy to implement such feature for your own JVx application. Here's a code snippet how it'll work:

public SimpleFileDropHandler addTarget(IComponent pTarget, IFileHandleReceiver pListener,
                                       String... pExtension)
{
    Object oResource = pTarget.getResource();
   
    if (!(oResource instanceof JComponent) && !(oResource instanceof JFrame))
    {
        throw new IllegalArgumentException("Given object can't be a drop target!");
    }
   
    SimpleFileDropHandler handler = new SimpleFileDropHandler(pListener, pExtension);
   
    if (oResource instanceof JFrame)
    {
        ((JFrame)oResource).setTransferHandler(handler);
    }
    else
    {
        JComponent jcomp = getComponent((JComponent)oResource);
       
        if (jcomp != null)
        {
            jcomp.setTransferHandler(handler);
        }
    }
}

private JComponent getComponent(JComponent pComponent)
{
    if (pComponent instanceof JVxEditor)
    {
        JComponent comp = ((JVxEditor)pComponent).
                          getCellEditorHandler().getCellEditorComponent();
       
        if (comp instanceof JScrollPane)
        {
            Component cView = ((JScrollPane)comp).getViewport().getView();
           
            if (cView instanceof JComponent)
            {
                return ((JComponent)cView);                    
            }
            else
            {
                return null;
            }
        }
        else
        {
            return comp;
        }
    }
    else
    {
        return pComponent;
    }        
}

In principle, we set the TransferHandler for a JComponent. Above code detects the right JComponent because there's a difference if you use an IEditor.

The TransferHandler could be implemented like our SimpleFileDropHandler

public class SimpleFileDropHandler extends TransferHandler
{
    private IFileHandleReceiver listener;
   
    private String[] extensions;
       
    public SimpleFileDropHandler(IFileHandleReceiver pListener, String... pExtension)
    {
        listener = pListener;
        extensions = pExtension;
    }
   
    @Override
    public boolean canImport(TransferHandler.TransferSupport pSupport)
    {
        if (!pSupport.isDrop())
        {
            return false;
        }

        if (!pSupport.isDataFlavorSupported(DataFlavor.javaFileListFlavor))
        {
            return false;
        }

        boolean copySupported = (COPY & pSupport.getSourceDropActions()) == COPY;
       
        if (copySupported)
        {
            pSupport.setDropAction(TransferHandler.COPY);
            return true;
        }            
       
        return false;
    }
   
    @Override
    public boolean importData(TransferHandler.TransferSupport support)
    {
        if (!support.isDrop())
        {
            return false;
        }

        List<File> files;
        try
        {
            files = (List<File>)support.getTransferable().
                    getTransferData(DataFlavor.javaFileListFlavor);
        }
        catch (UnsupportedFlavorException ex)
        {
            // should never happen (or JDK is buggy)
            return false;
        }
        catch (IOException ex)
        {
            // should never happen (or JDK is buggy)
            return false;
        }
       
        if (listener != null)
        {
            for (File file : files)
            {
                try
                {
                    listener.receiveFileHandle(new FileHandle(file));
                }
                catch (Exception e)
                {
                    ExceptionHandler.raise(e);
                }
            }
        }
       
        return true;
    }
}

Have fun ;-)